
I got an email a few days ago from someone who said they couldn’t make a recipe that I posted because they didn’t have a stand mixer. I know that the vast majority of recipes these days are written for stand mixer use but your hands will always be the best tool you have for cooking or baking and it makes me sad that people are overlooking recipes just because they tell you that you need a stand mixer.
For the record, I don’t own a stand mixer. I have a $6 hand mixer that crapped out a few weeks back which means the last time I made cupcakes? I whipped that frosting by hand. By. Hand.
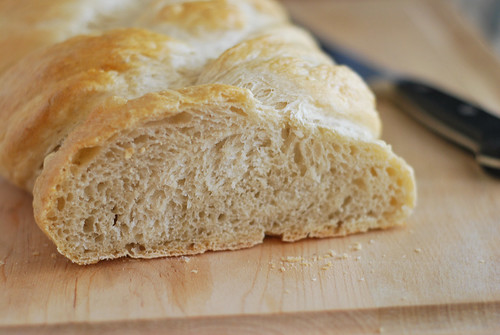
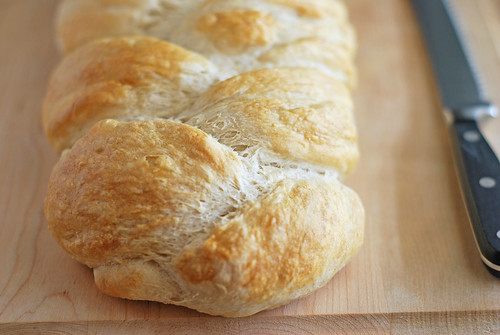
So anyway, that email inspired me to make some bread just in case there’s anyone out there reading who is scared to try bread by hand. Bread is easy and the great thing about it is that it’s very forgiving. See all those bumps on top of my bread? I didn’t deflate the dough enough before I braided it but it still turned out delicious.

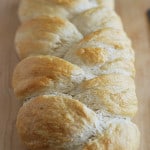
This recipe is a 2-day bread but don’t let that stop you from making it! On day 1, you mix up a sponge (the first picture up there) of just flour, water, and yeast. It sits overnight and then one day 2 you stir in the rest of the ingredients. Knead for 5 minutes, let rise, braid, rise again, and bake. Easy peasy, I tell you!
This is a fabulous recipe that produces a crusty bread that’s just as good as anything you’d find at a fancy Italian restaurant. (BTW, anyone else think that a certain chain Italian restaurant’s bread is crap? Who goes to an Italian restaurant and wants soft, airy breadsticks? Give me crusty bread, dangit!) The flavor is simple and perfect. You don’t even need butter for this guy.
P.S. Email me if you need bread help! I promise to help as much as possible without actually getting in my car and driving to your house.
📖 Recipe
Crusty Italian Bread
Ingredients
For the sponge:
- 1 cup 8 ounces cool water, about 65F
- 2 cups 8 ½ ounces all-purpose flour
- ¼ teaspoon instant yeast
For the dough:
- ½ cup 4 ounces cool water, about 65F
- 2 to 2 ½ cups 8 ½ to 10 ⅝ ounces all-purpose flour
- 2 teaspoons instant yeast
- 1 ½ teaspoons salt
- 1 egg white mixed with 1 tablespoon water
Instructions
To make the sponge:
-
Combine all of the sponge ingredients, mixing just till a cohesive dough forms. Allow it to rest, covered, for 12 to 16 hours at room temperature. When the sponge is ready, it will be filled with large holes and bubbles.
To make the dough:
-
Add the water to the sponge, and mix till smooth. Add the flour, yeast and salt, and knead the dough till it’s fairly smooth but not necessarily elastic, about 3 minutes by machine, or 5 minutes by hand. (The gluten will continue to develop as the dough rises, so you don’t want to develop it fully during the kneading process.)
-
Place the dough in a lightly greased bowl, cover, and allow the dough to rise at room temperature for 1 ½ hours. To help develop the gluten and distribute the yeast’s food, turn the dough twice during the rising time: gently fold all four sides into the middle, and turn the dough over.
-
Divide dough in thirds, and roll each third into a 20-inch-long rope. Braid ropes. Set the braid on a lightly greased or parchment-lined baking sheet, cover with greased plastic wrap and let rise 1 to 1 ½ hours, until just puffy.
-
Preheat oven to 425F. Gently brush the braid with the beaten egg white mixture and sprinkle generously with sesame seeds. Bake for 25 to 35 minutes. Remove from the oven and cool on a rack.
KathyS says
Hi! I am a novice and have questions about the initial sponge “leave out at room temperature” step so I’m going to take you up on the “I’ll help” bit. :)
1. what do you cover it with? A plastic lid on the bowl? Saran wrap? Tin foil? A towel? (actually, I have the same questions re covering the bread in step #3 the next day.)
2. what range of room temperature are we talking about? Is a 100 degree summer day too hot? Is a 60 degree winter day too cold? If I get any of this wrong, will it hurt the bread and/or cause me/people to whom I serve the bread to get sick?
Thanks!
Kathy
amanda says
I use a dish towel to cover it. And even when it’s shaped and on the pan, I’ll use a towel.
For temperature, just whatever is comfortable to you. The temperature won’t affect the bread as far as making people sick but if your house is especially cold, it may take longer to rise. And if it’s really warm, it may rise a little quicker.
Thanks for reading and commenting! Let me know if you have any other questions! :)
Kim reilly says
Your bread looks delicious!!! I’m currently making a no knead artisan bread that recommends a cup of hot water on the lower rack of the oven when baking. Do you do this with your bread to get a crispy crust?
amanda says
I’ve done this a few times (I’m usually too lazy) and it turns out fantastic! The steam really help the crust.
E says
This bread was amazing! We wolf it down when I make it. Just FYI for those of you who have active yeast not instant this does work with active yeast. I soaked the sponge yeast in a tablespoon of the water (warmed water but not hot) but just added the rest of it. Next time I’m going to try mixing some rosemary and maybe a little garlic into the loaf. Thanks for the recipe!
Sonya says
It’s SO PRETTY!! :)
.-= Sonya´s last blog ..Lauren – isms =-.
A Talug says
Did you by any chance mean to suggest baking at 425F? 325 F seems way too low for this loaf, particularly for only 30 minutes. I regularly make No Knead Bread. I am trying your recipe tonight, I will bake on a stone in a 425 F oven though. Regards,
Ahmet
amanda says
Yes! Oh my gosh, I can’t believe I didn’t notice that! So yes, bake at 425 and good luck! And thanks for pointing that mistake out to me. ;)
Kelly says
Quick question;
I’m making my second batch of bread – it’s currently rising.
But, how do you roll it out so perfectly and make it so nice looking?
When i tried to roll out my first batch, it ended up fat and not pretty at all.
amanda says
Let the dough relax a few minutes before you try to do any shaping. When I’m making ropes, I always pull them a little to help stretch the dough instead of just rolling.
Cheri Witmer says
My braid is rising now! Can’t wait to slice into some of that goodness!
.-= Cheri Witmer´s last blog ..Smokin Deviled Eggs =-.
Jamie says
I love your blog!
This post spoke to me and my stomach. I love carbs in a serious way. I tried this recipe and had the same problem I have had with every loaf I make. The crusty bit, well its more like a rock. I like crusty bread but the crust on this and every other loaf from my oven is nearly impossible to cut through.
Any thoughts? I really want a loaf like in the picture!
.-= Jamie´s last blog ..White Monkey- yummy =-.
amanda says
Hmm. How was the inside of the bread?
Jamie says
It was dense but the taste was great.
.-= Jamie´s last blog ..White Monkey- yummy =-.
amanda says
Hmm. I’m not sure what happened then. Maybe it needs a longer rise time?
Kelly says
Hello again-
Had to come back and write. The bread was AMAZING!! Even better with butter but it’s definitely not needed like you said. Mine was no where near as pretty as yours but I tried! I just couldn’t get it to roll out long enough so I gave up and just twisted it so they ended up being really large pieces but it still tasted amazing. Will definitely be making it at least once a week to go with spaghetti! Yum, thanks!
Julie says
I just have to say that I TOTALLY agree with you about the certain Italian restaurant that serves that flavorless bread! I think that is the dumbest thing ever and is one of the main reasons that my family rarely goes there.
jo says
This rustic bread looks very good. I started off making bread by hand as well but since I bought my KA mixer, I’ve been using this instead. However for cakes, cupcakes I sometimes use my handmixer, especially if it’s small portion. The KA bowl is too big if whipping up only 1 or 2 egg white portions.
Sue says
yeah, I kinda thought I couldn’t live without my stand mixer. It’s been 6 months….still baking, kneading etc. Amazing how many gadgets we think we need.
Megan says
Your bread looks fabulous! A perfect recipe to show people that you dont need all the fancy tools to make good food! Great job!
.-= Megan´s last blog ..100-2355-edited-1 =-.
Jacqueline says
I think the stand mixer is a real rift between a typical food blogger and their audience. What bothers me is when recipes are “written” for a stand mixer and say to, for example, cream butter and sugar together for 5 minutes, which seems like overkill for most baked goods. I think the only way to make bread approachable for the lay-baker is to knead and prepare by hand. A stand mixer makes everything seem easier, and while it is a wonderful tool, it’s not something everyone has in their kitchen.
Summary: thank you for being relatable and showing us how truly easy bread is to make through leading by example.
inna says
I totally agree with that. I don’t own a stand mixer either, and every time I see beautiful bread I wish I could make and then realize that the recipe is for a stand mixer, it’s a real blow :( Turns me off right away and I don’t bother drooling over it, and continue my search for a different recipe.
Pretty. Good. Food. says
Wow, super simple! I have to try this :) Yum!!!
.-= Pretty. Good. Food.´s last blog ..Basil Chicken Burgers with Goat Cheese =-.
Kelly says
I follow your recipes all the time. I’ve made your ranch mac and cheese [delicious!] and the cookies and cream cupcakes as well as the no yeast banana bread. Now I HAVE to try this bread. It looks delicious!! Where exactly is the yeast at like kroger though? I’m pretty sure I’ve never seen it..?
amanda says
Thanks! :)
The yeast is going to be near the flour, usually right next to it, in the grocery store They have little jars of it and strips of 3 small packets.
Good luck! Let me know how the bread goes!
Kelly says
thank you for replying so quickly! i was about to head to kroger and figured i’d check lol.
which yeast is better?
amanda says
I prefer the jarred kind (it’s usually labeled “bread machine yeast”) because I’m convinced it rises quicker but the packet kind works just as well.
briarrose says
Now that is dedication to whip a frosting by hand. ;) The bread looks lovely…nothing is more heavenly than fresh baked bread.
.-= briarrose´s last blog ..Salted Pistachio Sesame Squares =-.
Lee Ann says
That is some seriously beautiful bread! I’ll be saving this recipe Thanks!
Rachel says
Definitely going to try this sometime. I’ve made a different Italian bread in the past that’s pretty quick but never one that you make a starter sponge a day before. Can’t beat a nice crust and a soft warm inside – great with butter! mmm
.-= Rachel´s last blog ..Pumpkin Oatmeal Cookies =-.
nicole says
I’m very impressed that you hand whipped the frosting for your last cupcake post.
This bread looks really good. I love my hot bread with butter so I’d still want it with butter. Scratch that! With olive oil, yeah, olive oil with some grated cheese, hot pepper flakes and some pepper. Damn, now I’m hungrier than before…
.-= nicole´s last blog ..November- A month of Thanks =-.