• Skip to primary navigation
  • Skip to main content
  • Skip to primary sidebar
  • Home
  • About
  • Recipes

Fake Ginger

menu icon
go to homepage
  • Recipe Index
  • About
  • Subscribe
    • Facebook
    • Instagram
    • Pinterest
  • subscribe
    search icon
    Homepage link
    • Recipe Index
    • About
    • Subscribe
    • Facebook
    • Instagram
    • Pinterest
  • ×
    Home » Page 50

    Chicken Ranch Pizza

    Chicken Ranch Pizza

    Jan 25, 2012

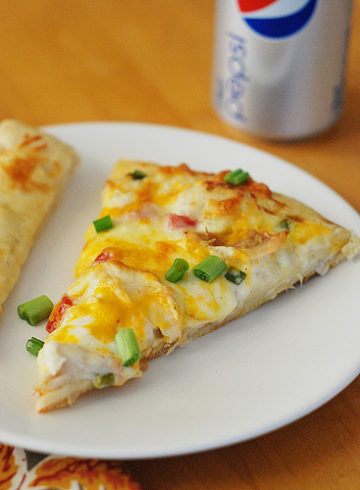
    Chicken Ranch Pizza – delicious homemade pizza with ranch dressing, chicken, 3 types of cheeses, fresh tomatoes, and green onions! This one is always a hit!

    Chicken Ranch Pizza - delicious homemade pizza with ranch dressing, chicken, 3 types of cheeses, fresh tomatoes, and green onions! This one is always a hit!

    Pizza night is always a favorite around here. The boys love it because, well, who doesn’t love pizza?! And I love it because it’s fast and easy and no one whines about what’s on their plate.

    Our go-to pizza recipes for pizza night lately have been my Pesto Sausage Pizza and this Chicken Ranch Pizza. 

    Instead of a red sauce, this pizza uses ranch dressing with a good bit of garlic mixed in.

    Not gonna lie – I’m not a ranch on pizza person so using ranch dressing as the sauce didn’t sound super appealing to me but it worked.

    It’s actually really good with the chicken and the fresh tomatoes that are added on top. And the combination of mozzarella, cheddar, and Parmesan is just perfect!

    I’ve heard from many people who have tried the recipe that it’s a copycat for a popular Papa Murphy’s pizza but I’ve never tried that one so I can’t be 100% sure. I do know that it’s really delicious!

    It’s definitely going to become a regular in our pizza rotation!

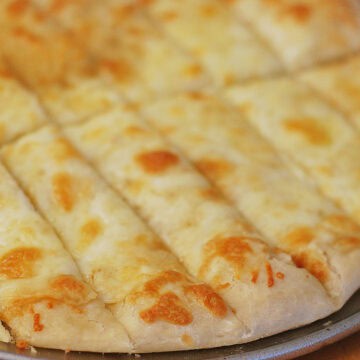
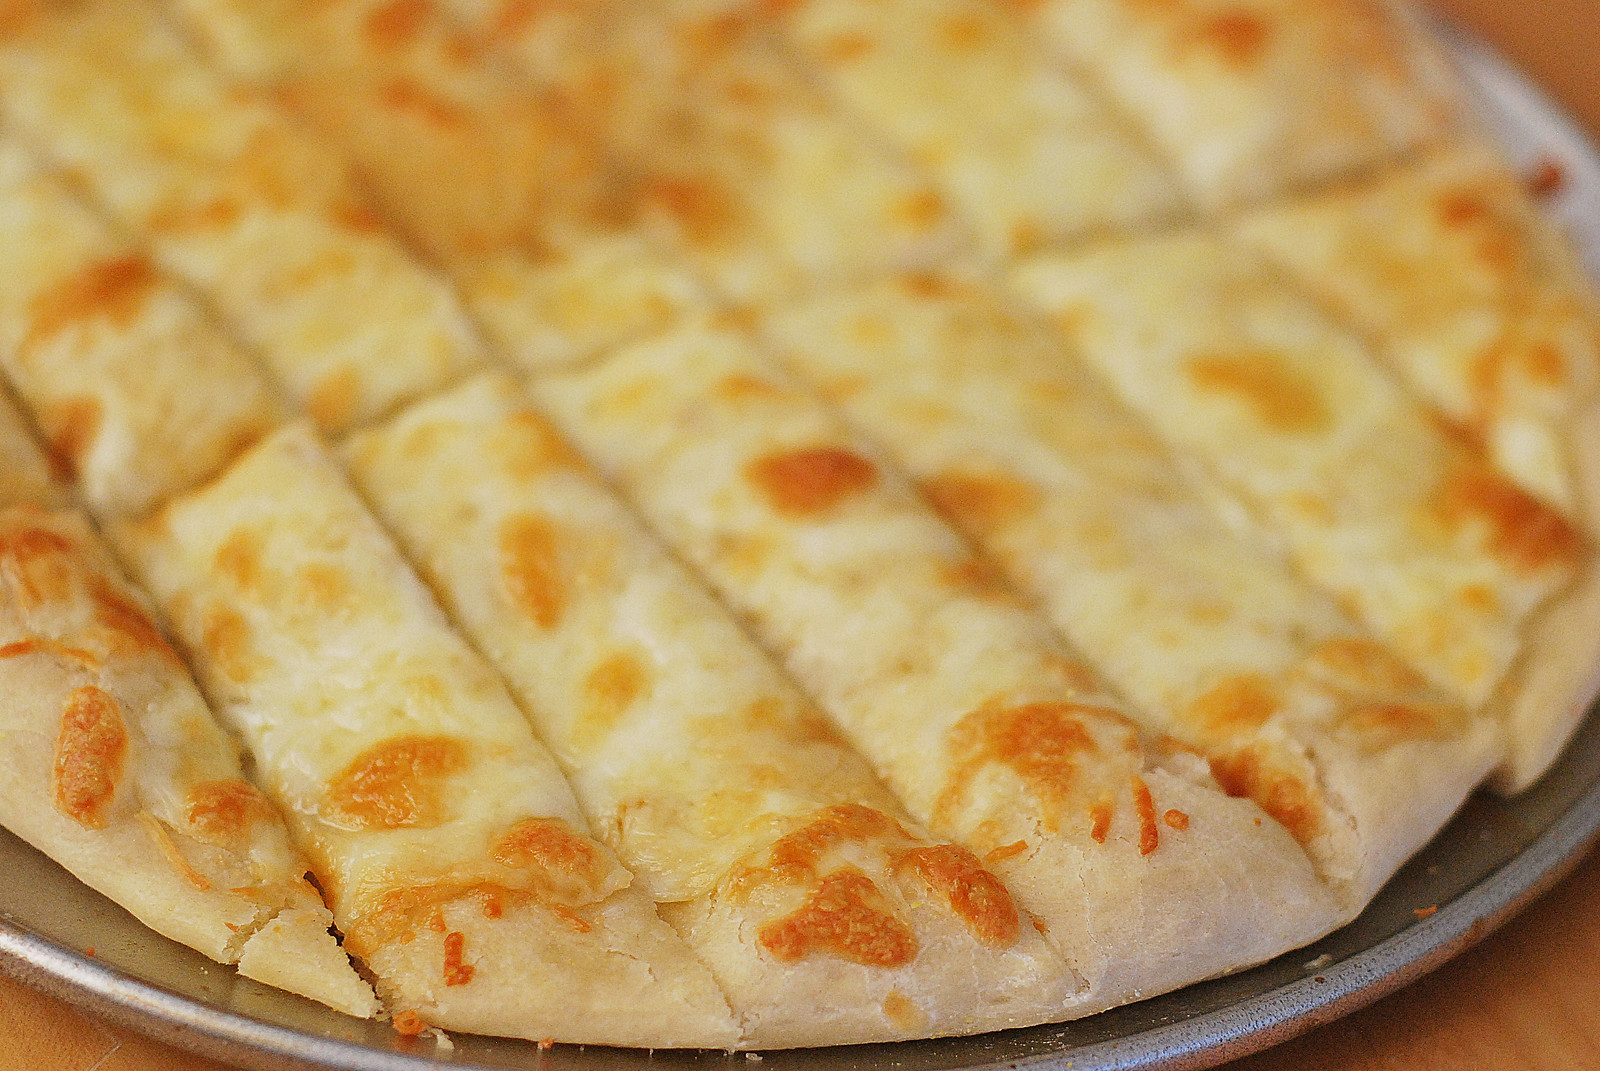
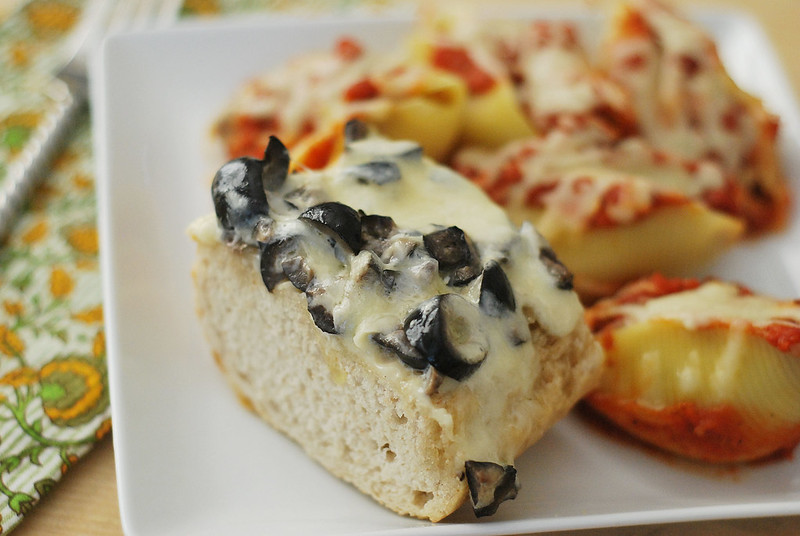
    (I served the Cheesy Breadsticks with it! They were great together!)

    …

    Read More

    Sausage-Stuffed Shells

    Jan 19, 2012

    Deliciously comforting Sausage-Stuffed Shells are filled with a ricotta and Parmesan mixture and topped with Italian sausage pasta sauce and mozzarella cheese. The whole family is going to love this dinner!

    If you love sausage pasta, try my favorite Pasta with Sausage, Artichokes, and Sun-Dried Tomatoes!

    Sausage stuffed shells on a plate with cheese bread next to it

    Last month my dear husband started talking about stuffed shells. He wanted them to be nothing but pasta shells stuffed with ricotta (just ricotta) and with sauce poured over the top. Informal Twitter poll told me not to do it but I figured I could at least make him a version I could be proud of

    My Sausage-Stuffed Shells have ricotta and sausage and Parmesan and lots of basil! And more cheese on top because duh, pasta needs cheese on top! They were delicious and even the husband had to admit that my shells were better than the ones he had wanted so badly.

    I tend to use spicy Italian sausage in my pasta dishes so the sweet sausage was a fun change. If you prefer the spicy stuff, go ahead and use it! Or add some crushed red pepper flakes for a little heat. I made my olive cheese bread with it but the cheesy breadsticks I just posted would be awesome too!

    Stuffed shells in a baking dish with red sauce and melted mozzarella on top

    Ingredients

    • Jumbo pasta shells – make sure are they big ones!
    • Olive oil – you can also use avocado oil or vegetable oil if you prefer
    • Onion
    • Mild Italian sausage – if you prefer spicy pasta, you can use hot Italian sausage instead. Make sure to remove the casings.
    • Garlic
    • Egg – this is for the filling of the stuffed shells
    • Ricotta cheese – for the filling. It makes a super creamy
    • Parmesan – Parmesan adds the most delicious salty flavor to the filling.
    • Basil – you can use fresh or dried basil.
    • Unseasoned breadcrumbs – these are going in the filling. They add just a tiny bit of crunch.
    • Salt and pepper
    • Pasta sauce – use your favorite jarred sauce or homemade recipe.
    • Mozzarella – this is getting sprinkled on top of the shells so it melts during the baking.

    How To Make Sausage Stuffed Shells

    • Cook pasta. Cook the pasta shells according to the instructions on the package. Drain, rinse in cold water, and set aside.
    • Cook sausage and veggies. Cook onions in olive oil until softened. Add sausage and cook thoroughly. Add the garlic and cook 30 seconds. Remove pan from heat.
    • Make filling. Beat the egg lightly in a large bowl. Mix in the ricotta, Parmesan cheese, basil, bread crumbs, salt, pepper, and sausage mixture.
    • Fill. Fill each cooked pasta shell with some of the ricotta mixture.
    • Transfer to pan. Spread ½ cup of pasta sauce over the bottom of 2 9×13-inch baking dishes. Arrange the stuffed pasta shells in the dishes. Spread the remaining sauce over the top of the pasta shells and top with mozzarella.
    • Bake. Cover the pans with foil and bake for 30 minutes, until hot and bubbling. Remove foil and bake until the cheese is starting to brown, about 10 minutes.

    How Long Is It Good For?

    These stuffed shells will be good for up to 3 days. Make sure to store them in an airtight container and store in the refrigerator.

    I recommend reheating in the microwave.

    Can You Freeze Them?

    You can freeze stuffed shells for up to 3 months. I like to do individual servings (I freeze them in silicone molds and then transfer to freezer ziploc bags once they are frozen solid) to make reheating easier.

    Let them defrost overnight in the refrigerator when you are ready to serve.

    More Pasta Recipes

    • Parmesan Pasta with Bacon and Peas
    • One-Pan Pizza Pasta
    • Pasta with Zucchini Sauce
    • Chicken Parmesan Baked Pasta

    Make sure you subscribe to my email list to get all my new recipes delivered right to your inbox!

    You can also follow me on Instagram, Facebook, or Pinterest for even more! 

    📖 Recipe

    Yield: about 8 servings

    Sausage Stuffed Shells

    Sausage Stuffed Shells

    Deliciously comforting Sausage-Stuffed Shells are filled with a ricotta and Parmesan mixture and topped with Italian sausage pasta sauce and mozzarella cheese. The whole family is going to love this dinner!

    Prep Time 20 minutes
    Cook Time 40 minutes
    Total Time 1 hour

    Ingredients

    • 1 (12- ounce) package jumbo pasta shells
    • 1 tablespoon olive oil
    • 1 cup onion (finely diced)
    • 1 pound mild Italian sausage, casings removed
    • 1 tablespoon minced garlic
    • 1 large egg
    • 16 ounces ricotta cheese
    • ½ cup Parmesan cheese, grated
    • 1 tablespoon chopped fresh basil or 1 teaspoon dried basil
    • ¼ cup unseasoned bread crumbs
    • ½ teaspoon salt
    • ½ teaspoon ground black pepper
    • 1 (28- ounce) jar pasta sauce
    • 1 cup mozzarella, shredded

    Instructions

      1. Preheat oven to 375F.
      2. Bring a large pot of salted water to a boil. Cook the pasta shells according to the instructions on the package. Drain, rinse in cold water, and set aside.
      3. Heat olive oil in a large skillet on medium high heat. Add the onions and cook until softened, about 5 minutes. Add the sausage to the pan, breaking up the sausage with a wooden spoon. Cook sausage until cooked through, and no pink remains, about 5 minutes. Add the garlic and cook until fragrant, about 30 seconds to a minute more. Remove pan from heat.
      4. Beat the egg lightly in a large bowl. Mix in the ricotta, Parmesan cheese, basil, bread crumbs, salt, pepper, and sausage mixture. Fill each cooked pasta shell with some of the ricotta mixture.
      5. Spread ½ cup of pasta sauce over the bottom of 2 9x13-inch baking dishes. Arrange the stuffed pasta shells in the dishes. Spread the remaining sauce over the top of the pasta shells and top with mozzarella.
      6. Cover the pans with foil and bake for 30 minutes, until hot and bubbling. Remove foil and bake until the cheese is starting to brown, about 10 minutes.

    Recommended Products

    As an Amazon Associate and member of other affiliate programs, I earn from qualifying purchases.

    • 9x13-inch pan
      9x13-inch pan
    • Clip On Pasta Strainer
      Clip On Pasta Strainer

    Nutrition Information:

    Yield:

    8

    Serving Size:

    1

    Amount Per Serving: Calories: 286Total Fat: 16gSaturated Fat: 7gTrans Fat: 0gUnsaturated Fat: 7gCholesterol: 71mgSodium: 804mgCarbohydrates: 14gFiber: 1gSugar: 3gProtein: 22g

    Did you make this recipe?

    Tag me in your Instagram photo - @fakeginger

    © Amanda Livesay
    Cuisine: italian / Category: pasta

    Cheesy Breadsticks

    Jan 18, 2012

    Homemade Cheesy Breadsticks that are just as good as your favorite pizza place! Use homemade or store-bought pizza dough and top it with butter, garlic, and 2 cheeses. It’s so delicious!

    Homemade Cheesy Breadsticks that are just as good as your favorite pizza place! Use homemade or store-bought pizza dough and top it with butter, garlic, and 2 cheeses. It's so delicious!

    I was never really a pizza person until we moved to Colorado. We spent a month in a hotel and then another week in our house without our belongings so we ate a lot of pizza and I came to love breadsticks (and stuffed crust pizza but we’re talking breadsticks right now). I suggest ordering pizza these days just so I can get breadsticks.

    I saw this recipe and needed to make it ASAP. Ridiculously good. They taste just like the kind of breadsticks you would get at a pizza place and they’re so simple! And cheaper than ordering out because I’m almost positive you have all the ingredients already in your kitchen.

    Ingredients

    • Pizza dough – use your favorite store-bought pizza dough (I love the Trader Joe’s one) or homemade recipe.
    • Butter – this gets brushed all over the dough to make it extra delicious.
    • Garlic – if you don’t have fresh garlic, you can use garlic powder.
    • Mozzarella cheese – this gives you that stretchy cheese pull when you pull the breadsticks apart.
    • Parmesan – you can’t make cheesy breadsticks without parmesan. It adds a saltiness that makes them so delicious.

    How To Make Cheesy Breadsticks

    • Prepare dough. Stretch pizza dough to fit 12-inch pizza pan or a regular sheet pan.
    • Make garlic butter. Melt butter over low heat in a small saucepan. Add garlic and cook just for a few seconds, until fragrant.
    • Brush garlic butter. Use a pastry brush to brush the butter over the dough.
    • Add cheese. Sprinkle the cheeses over top.
    • Bake. Bake at 425F for 10 – 12 minutes or until cheese is bubbly and starting to brown.
    • Cut and serve. Let cool slightly before cutting.
    A white plate with a cheesy breadstick and a slice of white pizza

    How Long Are They Good For?

    These cheesy breadsticks will be good for 3 – 4 days in the refrigerator. Make sure to store them in an airtight container.

    I like to reheat these in the oven or a toaster oven so they get a little crispiness back.

    More Cheesy Bread Recipes

    • Easy Cheese-Stuffed Breadsticks
    • Cheesy Garlic Crescent Rolls
    • Olive Cheese Bread
    • Pull Apart Cheesy Garlic Bread

    Make sure you subscribe to my email list to get all my new recipes delivered right to your inbox!

    You can also follow me on Instagram, Facebook, or Pinterest for even more! 

    📖 Recipe

    Yield: about 8 servings

    Cheesy Breadsticks

    Cheesy Breadsticks

    Homemade Cheesy Breadsticks that are just as good as your favorite pizza place! Use homemade or store-bought pizza dough and top it with butter, garlic, and 2 cheeses. It's so delicious!

    Prep Time 10 minutes
    Cook Time 12 minutes
    Total Time 22 minutes

    Ingredients

    • 1 unbaked pizza dough (homemade or store-bought)
    • 2 tablespoons salted butter
    • 2 cloves garlic (finely minced)
    • ¼ cup Parmesan cheese
    • 1 cup mozzarella cheese (shredded)

    Instructions

    1. Preheat oven to 425F. Stretch pizza dough to fit 12-inch pizza pan or a regular sheet pan. (Use cornmeal to work with dough if it's sticky.)
    2. Melt butter over low heat in a small saucepan. Add garlic and cook just for a few seconds, until fragrant.
    3. Use a pastry brush to brush the butter over the dough. Sprinkle the cheeses over top.
    4. Bake for 10 - 12 minutes or until cheese is bubbly and starting to brown. Let cool slightly before cutting.

    Recommended Products

    As an Amazon Associate and member of other affiliate programs, I earn from qualifying purchases.

    • 12-inch Pizza Pan
      12-inch Pizza Pan
    • Pizza Cutter
      Pizza Cutter

    Nutrition Information:

    Yield:

    8

    Serving Size:

    1

    Amount Per Serving: Calories: 91Total Fat: 7gSaturated Fat: 4gTrans Fat: 0gUnsaturated Fat: 2gCholesterol: 21mgSodium: 180mgCarbohydrates: 3gFiber: 0gSugar: 0gProtein: 4g

    Did you make this recipe?

    Tag me in your Instagram photo - @fakeginger

    © Amanda Livesay
    Cuisine: italian / Category: breads

    Slow Cooker Red Beans and Rice

    Jan 10, 2012

    One of my favorite meals growing up was red beans and rice. It’s the ultimate comfort food in my book but I’ve never made it before because my husband swears that he doesn’t like beans. And well, beans are kind of a big part of red beans and rice.

    But I took a chance recently and crossed my fingers that it would go over well. And go over well it did! It was just as comforting as I remembered it being and was perfect on a snowy day!

    Awesome, easy recipe that requires zero bean soaking! And I bet you have almost everything you need in your pantry right now. The recipe calls for the slow cooker to start on high and then be turned down to low after a few hours of cooking but I imagine that if you soaked the beans overnight, you could just cook them on low the entire time.

    📖 Recipe

    0 from 0 votes
    Print

    Slow Cooker Red Beans and Rice

    from LouLou Sucre

    Ingredients

    • 1 pound dried red beans
    • 1 large white onion chopped
    • 1 bunch green onions chopped
    • 2 tablespoons dried parsley
    • 1 large green bell pepper chopped
    • 3 large garlic cloves minced
    • 1 tablespoon salt
    • 1 teaspoon black pepper
    • ¼ teaspoon thyme
    • ½ teaspoon cayenne pepper
    • 1 pound link sausage sliced
    • 2 quarts water
    • 1 4-ounce can tomato sauce
    • 1 tablespoon Worcestershire sauce
    • 3 dashes hot sauce
    • Hot cooked rice for serving

    Instructions

    1. Combine everything but the rice in a slow cooker. Cook on high for 4-5 hours; turn down to low and cook another 3-4 hours or until the beans are tender. Serve over rice.

    Olive Cheese Bread

    Jan 09, 2012

    Olive Cheese Bread is French bread topped with a creamy, cheesy olive mixture and baked until the cheese melts and starts to brown. The perfect side dish for pasta night!

    Olive Cheese Bread - French bread topped with a creamy, cheesy olive mixture and baked until the cheese melts and starts to brown. The perfect side dish for pasta night!

    I’m not sure if you guys have noticed but I haven’t really been in a sugary mood lately. (Which is a complete lie because I killed a box of Confetti Cake Pop Tarts in less than 24 hours this weekend. But I just don’t feel like making anything sugary.) So I’m going to apologize in advance if this week is a little more savory than you’re used to. Let’s blame all the Christmas cookies.

    This is one of my all-time favorite breads but I very rarely make it because I’m the only one is the house that likes it.  I found myself with an extra can of black olives recently and knew what they were destined for.

    I can’t even begin to describe how amazing this bread is. It’s cheesy and crunchy and salty. It’s pure heaven. Monterey Jack is one of my least favorite cheeses but it works here with the olives. I’ve also used mozzarella in this and it’s just as good.

    My kids won’t eat olives so I normally halve this recipe and then use the other half of the bread for cheesy garlic bread. Perfect for spaghetti nights!

    Olive Cheese Bread - French bread topped with a creamy, cheesy olive mixture and baked until the cheese melts and starts to brown. The perfect side dish for pasta night!

    Ingredients for Olive Cheese Bread

    • French bread – use a store-bought French bread or your favorite homemade recipe.
    • Butter
    • Mayonnaise – this makes the olive mixture extra creamy and delicious.
    • Monterey Jack cheese
    • Black olives
    • Green onions – these add a nice brightness to the cheesy mixture.

    Instructions

    • Make olive mixture. Mix together butter, mayonnaise, Monterey Jack cheese, black olives and green onions until well combined.
    • Spread. Spread onto French bread that has been halved lengthwise.
    • Bake. Bake at 325F for 25 – 30 minutes, or until cheese is melted and started to brown.

    How Long Is It Good For?

    Olive cheese bread will be good for up to 4 days after making it. Make sure to store it in an airtight container in the refrigerator.

    You can serve it straight from the fridge or warm it up in the microwave or oven.

    Olive Cheese Bread - French bread topped with a creamy, cheesy olive mixture and baked until the cheese melts and starts to brown. The perfect side dish for pasta night!

    More Easy Bread Recipes

    • Cheesy Garlic Crescent Rolls
    • 7Up Biscuits
    • Pumpkin Cornbread
    • Cheesy Breadsticks
    • Pull Apart Cheesy Garlic Bread

    Make sure you subscribe to my email list to get all my new recipes delivered right to your inbox!

    You can also follow me on Instagram, Facebook, or Pinterest for even more! 

    📖 Recipe

    Yield: 12 servings

    Olive Cheese Bread

    Olive Cheese Bread

    Olive Cheese Bread is French bread topped with a creamy, cheesy olive mixture and baked until the cheese melts and starts to brown. The perfect side dish for pasta night!

    Prep Time 10 minutes
    Cook Time 30 minutes
    Total Time 40 minutes

    Ingredients

    • 1 loaf french bread
    • ½ cup (1 stick) butter, softened
    • ½ cup mayonnaise
    • 2 cups (8 ounces) Monterey Jack cheese, shredded
    • 2 6-ounce cans ripe black olives, roughly chopped
    • 2 stalks green onions, sliced

    Instructions

    1. Combine butter, mayonnaise, cheese, olives and green onions in a mixing bowl. Stir together until thoroughly combined. Spread mixture onto French bread that has been sliced lengthwise. Bake at 325F for 25 to 30 minutes or until cheese is melted and browning.

    Recommended Products

    As an Amazon Associate and member of other affiliate programs, I earn from qualifying purchases.

    • Rimmed Baking Sheet
      Rimmed Baking Sheet
    • Parchment Paper
      Parchment Paper

    Nutrition Information:

    Yield:

    12

    Serving Size:

    1

    Amount Per Serving: Calories: 221Total Fat: 12gSaturated Fat: 3gTrans Fat: 0gUnsaturated Fat: 9gCholesterol: 9mgSodium: 534mgCarbohydrates: 22gFiber: 2gSugar: 2gProtein: 6g

    Did you make this recipe?

    Tag me in your Instagram photo - @fakeginger

    © Amanda Livesay
    Cuisine: American / Category: Sides

    Soft-Frosted Sugar Cookies

    Jan 05, 2012

    These cookies sure have made the blog rounds lately. I keep seeing them referred to as Lofthouse cookies and each time the blogger would profess their love of these so-called Lofthouse cookies. And I had zero clue what a Lofthouse cookie was. I thought maybe I was missing out on a bakery or a restaurant or something. Then one day I was wondering around our grocery store’s bakery – because that’s the kind of thing I do – and stopped in front of the soft cookies, thinking about how I hadn’t had them since my college days, and DUH, Lofthouse is the brand that makes the dang things!

    I always loved those cookies – they have a dough taste to them that I’ve never found before in another cookie and well, who doesn’t love cookie dough?! This recipe produces cookies that are dead ringers for those grocery store cookies. I mean exact. I could’ve easily eaten my weight in these guys.

    📖 Recipe

    5 from 1 vote
    Print

    Soft-Frosted Sugar Cookies

    Ingredients

    For the cookies:

    • 4 ½ cups all-purpose flour
    • 4 ½ teaspoon baking powder
    • ¾ teaspoon salt
    • 1 ½ cups 3 sticks butter, at room temperature
    • 1 ½ cups sugar
    • 3 large eggs
    • 5 teaspoon vanilla extract

    For the frosting:

    • 5 cups powdered sugar sifted
    • ⅓ cup 5 ⅓ tablespoons unsalted butter, melted
    • 1 tablespoon vanilla extract
    • 7-8 tablespoons milk plus more, as needed
    • Food coloring optional
    • Sprinkles optional

    Instructions

    1. To make the cookies, preheat the oven to 350F. Line baking sheets with parchment paper or silicone baking mats. In a medium bowl combine the flour, baking powder and salt, and whisk together to blend. In the bowl of an electric mixer, combine the butter and sugar and beat together on medium-high speed until soft and fluffy, about 2-3 minutes. Beat in the eggs one at a time, mixing well after each addition and scraping down the bowl as needed. Blend in the vanilla. With the mixer on low speed, add in the dry ingredients mixing just until incorporated and evenly mixed. Cover and chill the dough for 1 hour.
    2. When you are ready to bake the cookies, scoop a scant quarter cup of dough and roll into a ball. Flatten the ball slightly and place on the prepared baking sheet. Repeat with the remaining dough, spacing the cookies at least 2-3 inches apart. Bake about 10-12 minutes or just until set. (Do not overbake! The edges should be no more than very lightly browned if at all.) Let cool on the baking sheet for several minutes. Transfer to a wire rack to cool completely.
    3. To frost the cookies, place the powdered sugar in a medium bowl. Add the melted butter, vanilla, and milk to the bowl and whisk until smooth. Whisk in additional milk as necessary, 1 teaspoon at a time, until you reach your desired consistency. Tint with food coloring if desired. Use an offset spatula or spoon to frost the cooled cookies. (If the frosting begins to thicken as you decorate, just continue to whisk in small amounts of milk to keep it workable.) Top with sprinkles if desired. Store in an airtight container.
     

    Chicken and Dumplings

    Dec 26, 2011

    You know how when you don’t grow up eating something, you just don’t like it? It’s not the taste that you don’t like, it’s just the fact that your mom didn’t make it? That’s me with chicken and dumplings. My mom may have made it a few times (I can’t remember… sorry mom) but it definitely wasn’t something that frequented our table. And therefore, I don’t like it.

    My husband, however, grew up eating it so of course, it’s one of his favorites.

    You guys might remember that I made a cheater version last month when my husband was out of town and the snow was falling on us – and I liked it fine but I really wanted to try a real version now that the husband is home.

    It turned out really good! The dumplings were soft and doughy, and the sauce was thick and amazing! I think I could’ve eaten a bowl of just the sauce and called it dinner. (Is it even sauce? Is it soup? I don’t know…) It’s still not my favorite but I won’t roll my eyes in disgust the next time my husband requests it. Progress, my friends, progress.

    📖 Recipe

    Chicken and Dumplings

    Chicken and Dumplings

    Ingredients

    • 1 large fryer chicken, 4-5 lbs., neck and gizzards removed
    • 1 large onion, peeled and cut in half
    • 3 carrots, cut into large pieces
    • 3 stalks of celery, cut into large pieces
    • Kosher salt, to taste
    • Pepper, to taste
    • For the dumplings
    • 3 cups flour
    • ¾ teaspoon baking soda
    • ¾ teaspoon salt
    • 5 tablespoons butter
    • 1 cup milk

    Instructions

    1. Place the chicken, onions, carrots, and celery in a large stock pot and cover with water. Bring to a boil, then reduce heat so water maintains a gentle simmer. Cook chicken for 1 hour or until cooked through (about 165 degrees).
    2. Once chicken is done, remove from the broth and let cool. Remove chicken from the bone and shred into medium-sized pieces, discarding bones and skin.
    3. Pour the chicken broth through a fine mesh sieve lined with cheese cloth, discarding vegetables. Reserve 6 cups of the broth for the dumplings. (You can refrigerate or freeze the rest to use in for another recipe.)
    4. Mix flour, baking soda, and salt together in bowl. Cut butter into flour mixture with your fingertips until it resembles small peas.
    5. Add milk ¼ cup at a time, you may not need a full cup and stir until a ball of dough just begins to form, being careful not to over-mix.
    6. Roll out the dough onto floured surface. Roll about ¼ inch thick. Using a pizza cutter or sharp knife, cut dough into rectangles about 1 inch wide by 3 inches long. Place strips on wax paper and allow to harden up a bit, about 30 minutes.
    7. In a large pot or dutch oven over medium-low heat, bring broth to a gentle simmer and drop in dumplings. Cover and allow to cook for 6-7 minutes.
    8. Reduce heat to low and add chicken. Allow to cook until thickened, approximately 15-20 minutes, or longer. Season generously with salt and pepper.

    Did you make this recipe?

    Tag me in your Instagram photo - @fakeginger

    © Amanda Livesay

    Mexican Hot Chocolate Cookies

    Dec 23, 2011

    I am so ready for Christmas. SO ready. I’m worse than my kids, y’all. I have run out of things to distract myself with and actually resorted to playing Angry Birds for the first time the other night while waiting for my nails to dry. It wasn’t until the next morning that I realized I never got around to painting my right hand. That game is ridiculous.

    But anyway, one last cookie recipe for you. I’ve seen Mexican hot chocolate cookies around for awhile but the spice aspect of it never appealed to me. I decided to give them a try finally and I’m so happy that I did! The spice is subtle and it doesn’t hit you until you’re just about done with the cookie. You can adjust the chili powder to your tastes, so make sure it a taste before you start baking them off. (Excuse to eat the dough. *high five*)

    I’m looking for last minute additions to my holiday baking list so if you have any suggestions, please leave them!

    Two years ago: Cranberry Orange Cookies

    📖 Recipe

    5 from 1 vote
    Print

    Mexican Hot Chocolate Cookies

    from Martha Stewart

    Ingredients

    • 2¼ cups all-purpose flour
    • ½ cup unsweetened cocoa powder
    • 2 teaspoons cream of tartar
    • 1 teaspoon baking soda
    • ½ teaspoon coarse salt
    • 1 cup 2 sticks unsalted butter, room temperature
    • 1¾ cups sugar
    • 2 large eggs
    • 1 teaspoon vanilla
    • 2 teaspoons cinnamon
    • ½ teaspoon Chipotle chili powder

    Instructions

    1. Preheat oven to 400 degrees, with racks in upper and lower thirds.
    2. In a medium bowl, sift together flour, cocoa powder, cream of tartar, baking soda, and salt.
    3. In a large bowl, using an electric mixer, beat butter and 1½ cups sugar on medium speed until light and fluffy, about 2 minutes. Scrape down side of bowl. Add eggs vanilla; beat to combine. With mixer on low, gradually add flour mixture and beat until combined.
    4. In a small bowl, combine remaining ¼ cup sugar, cinnamon, and Chipotle chili powder. Using heaping tablespoons, form balls of dough and roll in cinnamon-sugar mixture.
    5. Place, about 3 inches apart, on two parchment-lined baking sheets. Bake until cookies are set in center and begin to crack, about 10 minutes, rotating sheets halfway through. Let cookies cool on sheets on wire racks 5 minutes, then transfer cookies to racks to cool completely. (Store in an airtight container, up to 1 week.)


    This post linked to Ultimate Recipe Swap.

    Red Velvet Cream Cheese Brownies

    Dec 17, 2011

    I know red velvet isn’t very holiday-ish but it’s red! And red & green mean holidays!

    I’m not a huge red velvet fan but I couldn’t resist this recipe. It’s pretty much a red velvet brownie with a cheesecake layer on top. Yeah, it’s good. My husband came home while they were baking, peeked in the oven, and said – and I quote – “Eww, what is that?” But guess what!

    We got down to the last brownie and he asked if I wanted to split it. When I said no, he said “Good, I wanted it all to myself!”

    They’re rich and delicious and you can definitely tell that they are red velvet and not just a regular brownie. The cheesecake layer is what makes them, though. It’s sweet but not overly sweet like a frosting. The two go perfectly together!

    📖 Recipe

    0 from 0 votes
    Print

    Red Velvet Cream Cheese Brownies

    from What's Cookin' Chicago

    Ingredients

    • ½ cup 1 stick butter
    • 1 cup sugar
    • 1 teaspoon vanilla
    • ¼ cup cocoa powder
    • pinch of salt
    • 1 tablespoon red food coloring gel or powder
    • 1 teaspoon white distilled vinegar
    • 2 eggs
    • ¾ cup flour
    • For the cream cheese:
    • 8 ounces cream cheese softened
    • ¼ cup sugar
    • 1 egg
    • ½ teaspoon vanilla

    Instructions

    1. Heat oven to 350F. Line an 8—8 baking pan with parchment paper (or butter it generously).
    2. Melt the butter; add sugar, vanilla, cocoa powder, salt, red food coloring, and vinegar - stir to combine everything. In a separate bowl, whisk the eggs; add eggs to the butter mixture slowly, whisking constantly.
    3. Fold the flour into the mixture, being careful not to overmix. Reserve ¼ cup of batter for the top and set aside. Pour the remaining batter into the prepared baking pan.
    4. For the cream cheese:
    5. Using a stand mixer or hand mixer, beat cream cheese until soft. Add sugar, egg, and vanilla; beat until combined. Spread the cream cheese mixture over the brownie batter in baking pan.
    6. Dollop remaining brownie batter over the cream cheese layer. Drag a toothpick or knife through the batter to create swirls.
    7. Bake brownies for 25 - 30 minutes, or until the cream cheese is set. Remove to a cooling rack and allow to cool completely before cutting.

    Parker House Rolls

    Dec 13, 2011


    I have been itching to get back into bread baking but it’s been tough since my flour stash got thrown out when we moved last summer. My stash now consists of white flour and that’s pretty much it – and there’s only so much that can be done with white flour. I’ve been scouring the internet for simple rolls and breads to satisfy my need to knead. (har har)

    Parker House Rolls are something I’ve always heard about but I wasn’t really sure what they were until I made them recently. They’re basically a slightly sweet roll that’s folded over (so you can split it open and smear butter all over, of course) before baking. They’re so much simpler than they look and are guaranteed to impress!

    This recipe is very simple and the dough is a breeze to work with. It rolled out like a dream and held it’s shape beautifully during baking. My family gobbled these up and asked for more long after they were gone!

    📖 Recipe

    5 from 1 vote
    Print

    Parker House Rolls

    Ingredients

    • 2 packages ¼ ounce each active dry yeast
    • 1 teaspoon plus 6 tablespoons sugar divided
    • 1 cup warm water 110° to 115°, divided
    • 1 cup warm milk 110° to 115°
    • 2 teaspoons salt
    • 1 egg
    • 2 tablespoons plus 2 teaspoons canola oil
    • 5-½ to 6 cups all-purpose flour
    • 3 tablespoons butter melted, optional

    Instructions

    1. In a large bowl, dissolve yeast and 1 teaspoon sugar in ½ cup warm water; let stand for 5 minutes. Add the milk, salt, egg, oil, remaining sugar, water and 2 cups flour. Beat until smooth. Stir in enough remaining flour to make a soft dough.
    2. Turn onto a floured surface; knead until smooth and elastic, about 6-8 minutes. Place in a greased bowl, turning once to grease top. Cover and let rise in a warm place until doubled, about 45 minutes.
    3. Punch dough down. Turn onto a lightly floured surface; divide in half. Roll out each piece to ⅓-in. or ½-in. thickness. Cut with a floured 2-½-in. biscuit cutter. Brush with butter if desired.
    4. Make an off-center crease in each roll. Fold along crease so the large half is on top; press along folded edge. Place 2 inch apart on greased baking sheets. Cover and let rise until doubled, about 30 minutes.
    5. Bake at 375F for 10-15 minutes or until golden brown. Remove from pans to wire racks to cool.

    Cinnamon Apple Pie with Raisins and Crumb Topping

    Dec 12, 2011

    Time again for a Secret Recipe Club post!

    I hit the jackpot with my secret blog this month: Kristine’s Kitchen. Kristine has healthy food, naughty food, and everything in between. After sorting through her blog, I tweeted:

    I got a bunch of replies telling me to let the husband choose and decided to pick the one I knew he would want: apple pie. Because if pie is an option, he’s going for it.

    I was intrigued by this recipe because for one, it includes raisins. I have a very recent love for raisins so I knew I would love this. The recipe also calls for you to put the raw apples right into the pie crust instead of cooking them first, which is something I’ve never done when making a pie.

    The pie turned out fantastic! And so easy since you literally just toss the ingredients together and throw them in the crust! My husband declared it the best apple pie ever to which I said, “Umm… you said that about the last apple pie I made”. He decided that they are equally good but this one is more of a seasonal apple pie because of the raisins. Men…

    This is definitely one I’ll make again and again!

    Two years ago: Mint Brownies

    📖 Recipe

    Yield: about 8 servings

    Cinnamon Apple Pie with Raisins and Crumb Topping

    Cinnamon Apple Pie with Raisins and Crumb Topping

    Ingredients

    • 1 refrigerated pie dough
    • 1 cup packed golden brown sugar
    • 3 tablespoons all purpose flour
    • 2 teaspoons finely grated lemon peel
    • 1 ¼ teaspoons ground cinnamon
    • 2 ¾ pounds Granny Smith apples about 6 medium, peeled, cored, cut into chunks
    • 1 cup raisins
    • 2 teaspoons vanilla extract

    For the Crumb Topping:

    • 1 cup all purpose flour
    • ½ cup packed golden brown sugar
    • 1 teaspoon ground cinnamon
    • ⅛ teaspoon salt
    • ½ cup 1 stick chilled unsalted butter, cut into ½-inch cubes

    Instructions

      1. For the crust, roll out pie dough to a 14-inch circle. Transfer to a pie dish by gently wrapping the dough around a rolling pin and then carefully unrolling it. Gently press dough down into pie dish and trim excess dough around edges, leaving about a 1-inch overhang. Fold the edges under and crimp to make a decorative edge. Chill unbaked crust in freezer for 20 minutes.
      2. To make the filling:
      3. Position rack in center of oven and preheat to 375F. Mix brown sugar, flour, lemon peel, and cinnamon in large bowl. Add apple chunks, raisins, and vanilla; toss until well coated. Transfer filling to unbaked crust, mounding filling slightly in center. Bake pie until apples begin to soften, about 40 minutes.
      4. Meanwhile, prepare crumb topping:
      5. Whisk flour, sugar, cinnamon, and salt in small bowl. Add butter and rub in with fingertips until mixture begins to clump together.
      6. Sprinkle topping evenly over hot pie. Continue to bake pie until apples are tender and topping is browned and crisp, tenting pie with sheet of foil if browning too quickly, about 50 minutes. Cool pie on rack at least 2 hours.

    Recommended Products

    As an Amazon Associate and member of other affiliate programs, I earn from qualifying purchases.

    • Rolling Pin
      Rolling Pin
    • Pie Plate
      Pie Plate
    • Pie Storage Container
      Pie Storage Container

    Nutrition Information:

    Yield:

    8

    Serving Size:

    1

    Amount Per Serving: Calories: 580Total Fat: 19gSaturated Fat: 10gTrans Fat: 0gUnsaturated Fat: 8gCholesterol: 30mgSodium: 164mgCarbohydrates: 100gFiber: 7gSugar: 60gProtein: 4g

    Did you make this recipe?

    Tag me in your Instagram photo - @fakeginger

    © Amanda Livesay
    Cuisine: American / Category: pie

    Pumpkin Scones

    Dec 07, 2011

    Homemade scones that taste better than the coffee shop scones! Tender Pumpkin Scones brushed with a sweet glaze and drizzled with a cinnamon glaze.

    I sent my husband to Starbucks last weekend after listening to him whine all morning about how cold he was and how bored he was and omg, 3-day weekends are really long sometimes. But anyway, off to Starbucks he went, with a gift card in hand (that was supposed to be for his Christmas stocking but I was desperate), and as he was walking out the door I shouted “Get me the best looking pastry they have!” And he came home with a pumpkin scone.

    At first I was confused. Out of everything in the pastry case, he chose a scone? A dry little scone? I mean, when was the last time he saw me choose a scone when there’s muffins and doughnuts and danishes to choose from?!

    But then I tried it. And it was amazing. It was soft, the glaze was not overly sweet, and it had just the right amount of pumpkin. I refused to share with my kids. Then I asked if he wanted to go back out (in the snow) to get me another one. (He said no. With a few curse words.)

    These scones taste exactly like the Starbucks ones – but you get to attack them as soon as they come out of the oven which makes them even better! Hot scones with a teeny bit of butter? These didn’t last 24 hours in our house!

    Ingredients

    • All-purpose flour
    • Sugar
    • Baking powder
    • Salt
    • Ground cinnamon
    • Ground nutmeg
    • Ground cloves
    • Ground ginger
    • Cold butter
    • Canned pumpkin
    • Half-and-half
    • Egg
    • Powdered sugar
    • Milk

    Instructions

    • Preheat oven to 425F; line a baking sheet with parchment
    • Whisk together flour, sugar, baking powder, salt, cinnamon, nutmeg, cloves, and ginger
    • Cut the butter into small pieces and use a pastry blender to cut it into the flour mixture; set aside
    • In a separate bowl, whisk together pumpkin, half-and-half, and egg
    • Fold the wet ingredients into the dry ingredients until just combined
    • Turn dough onto a lightly floured surface and press into a rectangle
    • Use a sharp knife to cut the dough into triangles
    • Transfer to the prepreaed pan and bake for 15 – 18 minutes or until golden brown
    • Remove from oven and cool completely before glazing
    • To make the glaze, whisk together powdered sugar and milk.
    • Use a pastry brush to glaze the tops of the scones; let the glaze firm up before you add cinnamon glaze
    • To make the cinnamon glaze, whisk together powdered sugar, milk, and cinnmon
    • Use the whisk to drizzle the glaze over the tops of the scones
    • Let the glaze firm up before serving

    How Long Are Homemade Scones Good For?

    These pumpkin scones will be fine at room temperature for 2 days or in the refrigerator for up to 5 days. Make sure to store them in an airtight container to keep them fresh for as long as possible.

    If you are serving these days after baking them, I recommend warming them up for a few minutes in the oven so they get their crispness back.

    More Scones Recipes

    • Cheesy Bacon Scones
    • Lemon Poppy Seed Scones
    • Cranberry Orange Scones
    • Pumpkin White Chocolate Scones
    • Irish Soda Bread Scones
    • Cinnamon Raisin Scones

    Make sure you subscribe to my email list to get all my new recipes delivered right to your inbox!

    You can also follow me on Instagram, Facebook, or Pinterest for even more! 

    📖 Recipe

    Yield: about 8 scones

    Pumpkin Scones

    Pumpkin Scones

    Ingredients

    • 2 cups all purpose flour
    • ⅓ cup sugar
    • 1 tablespoon baking powder
    • ½ teaspoon salt
    • ½ teaspoon ground cinnamon
    • ½ teaspoon ground nutmeg
    • ¼ teaspoon ground cloves
    • ¼ teaspoon ground ginger
    • 6 tablespoons cold butter
    • ½ cup canned pumpkin
    • 3 tablespoons half-and-half
    • 1 large egg
    • For the glaze:
    • 1 cup powdered sugar
    • 2 tablespoons milk
    • For the cinnamon glaze:
    • 1 cup powdered sugar
    • 2 tablespoons milk
    • ¼ teaspoon ground cinnamon

    Instructions

    1. Preheat your oven to 425F. Line a baking sheet with parchment paper.
    2. Whisk together flour, sugar, baking powder, salt, cinnamon, nutmeg, cloves, and ginger. Cut the butter into small pieces (or use a grater to grate the butter) and cut it into the flour mixture with a pastry cutter or 2 knives. Set aside.
    3. In a separate bowl, whisk together pumpkin, half and half, and egg.
    4. Fold the wet ingredients into the dry ingredients until just combined. Turn out onto a lightly floured surface. Divide the dough into 2 and press (or roll) one piece into about a 12 x 4 x 1 rectangle. Use a pizza cutter or sharp knife to cut the dough into triangles.
    5. Transfer to the prepared pan and bake in preheated oven for 15-18 minutes, or until light brown. Remove to a cooling rack and cool completely before glazing.

    To make the glaze:

    1. Whisk together the powdered sugar and milk. Use a pastry brush to to glaze the tops of the scones. Let the glaze firm up before you add the cinnamon glaze

    To make the cinnamon glaze:

    1. Whisk together the powdered sugar, milk, and cinnamon. Use the whisk the drizzle the glaze over the tops of the scones. Let this glaze firm up before serving.

    Recommended Products

    As an Amazon Associate and member of other affiliate programs, I earn from qualifying purchases.

    • Pastry Blender
      Pastry Blender
    • Pumpkin Puree
      Pumpkin Puree
    • Parchment Paper
      Parchment Paper
    • Rimmed Baking Sheet
      Rimmed Baking Sheet

    Nutrition Information:

    Yield:

    8

    Serving Size:

    1

    Amount Per Serving: Calories: 357Total Fat: 10gSaturated Fat: 6gTrans Fat: 0gUnsaturated Fat: 3gCholesterol: 49mgSodium: 402mgCarbohydrates: 63gFiber: 2gSugar: 36gProtein: 5g

    Did you make this recipe?

    Tag me in your Instagram photo - @fakeginger

    © Amanda Livesay
    Category: breakfast

    Braised French Onion Chicken Thighs

    Nov 29, 2011

    I have a deep, secret love for chicken thighs. I feel like it’s not girly to say things like “Oh yeah, I love the dark meat” so whenever I’m at someone else’s house, I always go for the white meat. Just because I don’t want to be judged. But there’s something magical about how chicken thighs pretty much just melt in your mouth. I can’t get enough.

    I made this recipe almost 2 months ago but didn’t post it because I didn’t like the pictures. I went scrolling through my Flickr stream recently and the picture made me hungry immediately. You know it’s good chicken when that happens! So I didn’t I could hold back no longer.

    It’s so good, y’all. The chicken seriously falls apart – even more than usual! – after being braised. And topped with caramelized onions and Swiss? Please. We made grilled sandwiches with the leftover meat and onions (and more Swiss, of course) and it was mindblowing.

    📖 Recipe

    4 from 1 vote
    Print

    Braised French Onion Chicken Thighs

    Ingredients

    • 3 tablespoons unsalted butter
    • 2 pounds onions sliced into thin half-moons
    • Kosher salt and freshly ground black pepper
    • 4 garlic cloves sliced
    • 2 small sprigs thyme leaves only
    • 4- inch sprig rosemary
    • 2 cups chicken broth divided
    • 1 tablespoon balsamic vinegar
    • 2 tablespoons Dijon mustard
    • 3 pounds boneless skinless chicken thighs
    • 2 ounces Swiss cheese finely grated (about 1 cup)

    Instructions

    1. Melt the butter in a deep 10-inch sauté pan over medium heat. When the butter has melted completely and foams up, add the onions. They will fill the pan to the top, at this point. Stir as you add the onions to coat them in the butter. Sprinkle lightly with salt and black pepper. Cook the onions for about 40 minutes over low or medium heat, stirring occasionally.
    2. When the onions have developed an evenly light beige color throughout, add the garlic, thyme leaves, and whole rosemary sprig, and cook for a few minutes more, stirring frequently. Turn the heat up to high and cook for a further 5 minutes, stirring frequently. You want dark, slightly burnt spots to appear on the onions, and for them to develop a rich mahogany color. When the onions get quite dark, add 1 cup of the beef or chicken broth. Add it slowly, stirring and scraping the pan vigorously to scrape up any burnt or stuck-on bits. When the liquid has been added, bring it back up to a simmer and simmer lightly for 5 minutes, or until it is somewhat reduced.
    3. Take the onions off the heat and pour them into a 3-quart oven-safe dish with a lid. (If you don't have a Dutch oven or another oven-safe dish with a lid, you can use a 9x13-inch baking dish. Just cover it tightly with a double layer of foil.)
    4. Heat the oven to 325°F.
    5. While the onions are cooking, brown the chicken. Heat another 10-inch or cast iron skillet over medium-high heat. Pat the chicken thighs dry and season lightly with kosher salt and black pepper. When the skillet is hot, add the thighs and brown for about 3 minutes on each side, 6 minutes total. When they've developed a golden-brown crust, remove from the pan and set on top of the caramelized onions in the baking dish.
    6. Add the remaining 1 cup broth to the pan. Stir vigorously, scraping up any browned bits on the bottom of the pan. Whisk in the balsamic vinegar and Dijon mustard. Simmer for about 5 minutes or until reduced by half. Pour this sauce over the chicken and onions, and put the lid on the baking dish. The chicken and onions will look quite saucy; there will be plenty of liquid in the baking dish.
    7. Bake at 325°F for 30 minutes. Remove the chicken from the oven and turn the heat up to broil. Take the lid off the baking dish, and sprinkle the cheese evenly over the top of the chicken. When the broiler has heated up, return the dish to the oven and broil for 3 to 4 minutes, or until the cheese is melted and golden on top.

    Chicken Gnocchi Soup

    Nov 28, 2011

    I’m digging the soups lately. Have you noticed?

    I really love potato soups but I don’t like how they kind of turn into mashed potatoes once they sit overnight in the fridge. This soup, which uses gnocchi, solves that problem! The soup stays soupy but you still get the potato-ness that you love. It’s so tasty and comforting! Perfect with a slice of crusty bread.

    I plan on making this a lot over the next few months but I’ll probably leave out the chicken from now on. The chicken was nice to make it feel like a “real” meal but I think the soup itself is heavy enough to not need it. To make it completely veggie, use vegetable broth in place of the chicken broth.

    Make sure you subscribe to my email list to get all my new recipes delivered right to your inbox!

    You can also follow me on Instagram, Facebook, or Pinterest for even more! 

    📖 Recipe

    Yield: about 6 servings

    Chicken Gnocchi Soup

    Chicken Gnocchi Soup
    Prep Time 10 minutes
    Cook Time 20 minutes
    Total Time 30 minutes

    Ingredients

    • 4 teaspoons olive oil divided
    • 1 onion diced
    • 2 carrots peeled and thinly sliced
    • 2 cloves garlic minced
    • 1 teaspoon Italian seasoning
    • 3 tablespoons flour
    • 1 cup half and half
    • 2 ½ cups milk
    • 1 ½ cups chicken broth
    • 2 boneless chicken breasts cooked & diced
    • 1 pound gnocchi
    • 1 very large handful spinach, coarsely chopped
    • ¼ teaspoon cayenne
    • salt and pepper to taste
    • Parmesan and green onions

    Instructions

      1. Heat 2 teaspoons of the olive oil over medium heat in a large stock pot. Add onion and saute until the onion just begins to become translucent, about 2 minutes. Add carrots, saute the mixture for another 2 - 3 minutes until both are tender. Add garlic and Italian seasoning. Cook until fragrant, about 30 seconds.
      2. Add the remaining 2 teaspoons of olive oil and the flour. Stir to make sure all veggies are coated and continue to stir while the flour cooks. Slowly stir in half and half, milk, and chicken broth. Raise the heat to high and allow to bubble. The mixture will thicken slowly.
      3. Once it's thickened, add chicken and gnocchi. The gnocchi only requires about 3 minutes of cooking and will float to the top when it's done. Once it floats, add the spinach - it will wilt almost immediately. Season with cayenne, salt, and pepper.
      4. Serve piping hot with Parmesan and green onions on top.

    Nutrition Information:

    Yield:

    6

    Serving Size:

    1

    Amount Per Serving: Calories: 388Total Fat: 12gSaturated Fat: 5gTrans Fat: 0gUnsaturated Fat: 6gCholesterol: 80mgSodium: 439mgCarbohydrates: 46gFiber: 3gSugar: 9gProtein: 24g

    Did you make this recipe?

    Tag me in your Instagram photo - @fakeginger

    © Amanda Livesay
    Cuisine: italian / Category: soup

    Butternut Squash and Crab Bisque

    Nov 25, 2011

     Butternut Squash and Crab Bisque is a delicious creamy butternut squash soup with crab meat.

    I have to tell you guys that I’m pretty excited to move on from Thanksgiving related recipes.

    I had planned on one more post highlighting an idea or 2 for leftover turkey but… uhhh, there is no leftover turkey.

    You guys have that problem too? My husband is a turkey fiend which works out nicely because when it comes to leftovers, he takes care of the turkey and leaves all the yummy sides for me!

    So because I have no turkey left, I made you some soup!

    I wandered into Whole Foods last week because my friend Pam told me that her Whole Foods has butternut squash breakfast sausage.

    I bee-lined it to the butcher and asked about the sausage and, of course, our store doesn’t sell it but the butcher pointed me in the direction of their butternut squash and crab bisque. Being the polite girl that I am, I snagged a sample even though I don’t like butternut squash or crab.

    And omg, it was the best soup ever.

    Butternut Squash and Crab Bisque!

    I was googling recipes on my phone at every stoplight on the way home, and within days I had all the ingredients in my fridge.

    It turned out just like the Whole Foods version – kind of sweet from the squash but just the right amount of “meatiness” from the crab. And the ingredients are so simple and wholesome. It is seriously delicious!

    📖 Recipe

    Yield: 4 servings

    Butternut Squash and Crab Bisque

    Butternut Squash and Crab Bisque

     Butternut Squash and Crab Bisque is a delicious creamy butternut squash soup with crab meat.

    Prep Time 10 minutes
    Cook Time 1 hour
    Total Time 1 hour 10 minutes

    Ingredients

    • 2 tablespoons unsalted butter
    • 1 tablespoon olive oil
    • 1 ½ pounds butternut squash, peeled and cubed
    • 1 large yellow onion, diced
    • 1 cup fresh carrots, diced
    • 1 quart low-sodium chicken broth
    • 4 large cloves garlic, minced
    • 1 tablespoon fresh sage leaves finely chopped
    • 1 cup heavy cream
    • 8 ounces crab claw meat
    • Salt and pepper to taste

    Instructions

      1. In a large (at least 5 quart) soup pot over medium heat, add the butter and olive oil. Once butter is melted, add squash, onions, carrots, and garlic. Sauté 5 minutes.
      2. Add 3 cups of broth, reserving the rest.
      3. Cover pot and simmer until squash is very tender (about one hour).
      4. Add the cream and puree the mixture with a stick blender until very smooth (or blend in batches in blender and return to pan).
      5. Thin with remaining broth if needed.
      6. Fold in the crab meat and sage. Season with salt and pepper and serve.

      Recommended Products

      As an Amazon Associate and member of other affiliate programs, I earn from qualifying purchases.

      • Immersion Blender
        Immersion Blender

      Nutrition Information:

      Yield:

      4

      Serving Size:

      1

      Amount Per Serving: Calories: 533Total Fat: 36gSaturated Fat: 20gTrans Fat: 1gUnsaturated Fat: 14gCholesterol: 163mgSodium: 437mgCarbohydrates: 30gFiber: 7gSugar: 8gProtein: 27g

      Did you make this recipe?

      Tag me in your Instagram photo - @fakeginger

      © Amanda Livesay
      Cuisine: American / Category: soup

      « Previous Page
      Next Page »

      Primary Sidebar

      Amanda Livesay
      Hi, I'm Amanda! DFW food blogger, mom of boys, and crazy dog lady.
      Read more
      Privacy Policy
      Privacy Policy

      Footer

      ↑ back to top

      About

      • Privacy Policy
      • About Fake Ginger

      Newsletter

      • Sign Up for weekly emails featuring new recipes!

      As an Amazon Associate I earn from qualifying purchases.

      Copyright © 2024 FakeGinger.com