• Skip to primary navigation
  • Skip to main content
  • Skip to primary sidebar
  • Home
  • About
  • Recipes

Fake Ginger

menu icon
go to homepage
  • Recipe Index
  • About
  • Subscribe
    • Facebook
    • Instagram
    • Pinterest
  • subscribe
    search icon
    Homepage link
    • Recipe Index
    • About
    • Subscribe
    • Facebook
    • Instagram
    • Pinterest
  • ×
    Home » Page 49

    Butter Pecan Ice Cream

    Butter Pecan Ice Cream

    Apr 20, 2012

    Happy last day of the work week!!

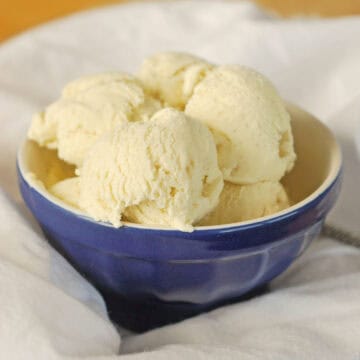
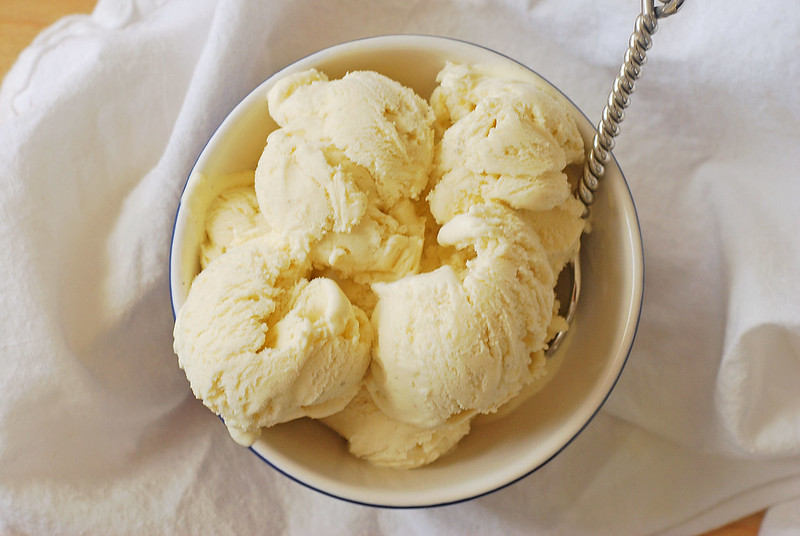
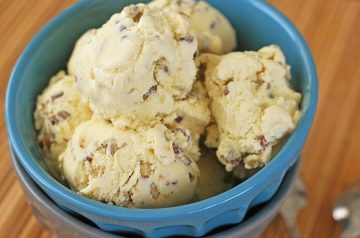
    As I promised last week, I’m back with more ice cream! This one is even better than that amazing vanilla bean!

    Butter pecan has never really been a favorite of mine but every once in a while I get a wild hair and buy a small container. I had always assumed that the butter flavor in butter pecan came from the little bottled butter flavoring. But this recipe? Has 6 tablespoons of butter in it! And you can taste every tablespoon. So rich, so decadent, so perfect! It tastes just like store-bought butter pecan but even more buttery, if that’s possible. It’s like frozen pecan pie minus all the gooeyness.

    …

    Read More

    Lemon-Raspberry Coffee Cake

    Apr 19, 2012

    Lemon Raspberry Coffee Cake is light and fluffy coffee cake with a cream cheese lemon raspberry layer in the middle!

    Why yes, this is the 2nd coffee cake I’ve posted in the past week. I told you guys I liked to eat cake for breakfast!

    This coffee cake is different from others that I’ve made. To me, coffee cake is a little denser than, say, a birthday cake but this one has more of the birthday cake texture. It also has a cheesecake filling in the center but mine kind of blended in with the rest of the cake. The recipe makes it sound like there are supposed to be distinctive layers but like I said, mine just melted into the cake as it baked. You can still taste it though, and that’s the important part! And last but not least, raspberries!

    I absolutely love the lemon and berry combination and it was especially lovely in this fluffy cake. It’s also very good with whipped cream.

    More Coffee Cake Recipes

    • Blueberry Orange Coffee Cake
    • Strawberry Cream Cheese Coffee Cake
    • New York Style Coffee Cake

    Make sure you subscribe to my email list to get all my new recipes delivered right to your inbox!

    You can also follow me on Instagram, Facebook, or Pinterest for even more! 

    📖 Recipe

    Yield: about 12 servings

    Lemon-Raspberry Coffee Cake

    Lemon-Raspberry Coffee Cake

    Prep Time 20 minutes
    Cook Time 55 minutes
    Total Time 1 hour 15 minutes

    Ingredients

    For the cake:

    • 1 ½ cups flour
    • 1 ½ teaspoon baking powder
    • ¼ teaspoon baking soda
    • ¼ teaspoon salt
    • 1 cup sugar
    • ½ cup butter, softened
    • 1 egg
    • 1 teaspoon vanilla
    • ¾ cup buttermilk

    For the cheesecake filling:

    • 3 ounces cream cheese, softened
    • ¼ cup sugar
    • zest from 1 lemon
    • 1 egg
    • 1 cup fresh or frozen raspberries

    Instructions

    1. Preheat oven to 375F. Butter and flour a 9-inch round cake pan.

    To make the cake:

    1. In a medium bowl, whisk together flour, baking powder, baking soda, and salt making sure to remove any lumps. Set aside.
    2. In a medium mixing bowl, beat the sugar and the butter with mixer on medium until fluffy. Add the egg and vanilla; beat on medium for another minute. Alternately add flour mixture and buttermilk to the sugar mixture, beating just until combined after each addition; set aside.

    To make the cheesecake filling:

    1. In a small mixing bowl, beat the cream cheese and sugar on medium until combined. Add lemon zest and egg; beat until combined

    To assemble:

    1. Spoon half the cake batter into prepared pan, spreading to edges. Pour the cheesecake filling on top and spread it to the edges. Spoon remaining batter on cheesecake filling and spread to the edges. Gently press raspberries into the cake.
    2. Bake 50 - 55 minutes or until a toothpick inserted into the center comes out clean. Use a sharp knife to loosen the edges of the cake; remove from pan and cool on a wire rack.

    Recommended Products

    As an Amazon Associate and member of other affiliate programs, I earn from qualifying purchases.

    • Zester
      Zester
    • Stand Mixer
      Stand Mixer
    • 9-inch Cake Pan
      9-inch Cake Pan

    Nutrition Information:

    Yield:

    12

    Serving Size:

    1

    Amount Per Serving: Calories: 260Total Fat: 11gSaturated Fat: 7gTrans Fat: 0gUnsaturated Fat: 4gCholesterol: 59mgSodium: 256mgCarbohydrates: 37gFiber: 2gSugar: 23gProtein: 4g

    Did you make this recipe?

    Tag me in your Instagram photo - @fakeginger

    © Amanda Livesay
    Category: cake

    Oatmeal Waffles

    Apr 18, 2012

    Oatmeal Waffles are fluffy but hearty waffles the whole family will love.

    These Oatmeal Waffles have become our new favorites! They’ve even replaced our beloved Yeasted Waffles as our weekly breakfast-for-dinner meal!

    The oats add just a bit of chewiness to the waffles but aren’t so obvious that your oatmeal-hating child might refuse to eat them. We also really loved the slight sweetness that the brown sugar gives them.

    The waffle batter can be made the night before to make your mornings go a little smoother. Just mix it up, cover it, and stash it in the fridge. It will be ready to go whenever you wake up!

    Make sure you subscribe to my email list to get all my new recipes delivered right to your inbox!

    You can also follow me on Instagram, Facebook, or Pinterest for even more! 

    📖 Recipe

    Yield: about 10 waffles

    Oatmeal Waffles

    Oatmeal Waffles

    Cook Time 30 minutes
    Total Time 30 minutes

    Ingredients

    • 1 ½ cups all-purpose flour
    • 1 cup quick-cooking oats
    • 1 tablespoon baking powder
    • ½ teaspoon cinnamon
    • ¼ teaspoon salt
    • 2 eggs
    • 1 ½ cups milk
    • ⅓ cup butter, melted
    • 2 tablespoons brown sugar

    Instructions

    1. Heat waffle iron according to manufacturer's instructions and preference.
    2. In a medium-size mixing bowl, whisk together flour, oats, baking powder, cinnamon, and salt.
    3. In a separate bowl, beat eggs, milk, butter, and brown sugar. Pour this mixture over the flour and stir just until combined - do not overmix!
    4. Cook about ⅓ of a cup of waffle batter (will vary based on waffle iron) onto iron and cook until golden brown. Serve with fruit, syrup, or whatever toppings you want!

    Recommended Products

    As an Amazon Associate and member of other affiliate programs, I earn from qualifying purchases.

    • Waffle Maker
      Waffle Maker

    Nutrition Information:

    Yield:

    10

    Serving Size:

    1

    Amount Per Serving: Calories: 195Total Fat: 8gSaturated Fat: 5gTrans Fat: 0gUnsaturated Fat: 3gCholesterol: 56mgSodium: 282mgCarbohydrates: 24gFiber: 1gSugar: 2gProtein: 6g

    Did you make this recipe?

    Tag me in your Instagram photo - @fakeginger

    © Amanda Livesay
    Cuisine: American / Category: breakfast

    Orange Beef and Broccoli

    Apr 17, 2012

    Skip takeout and make Orange Beef and Broccoli at home! Flank steak and broccoli cooked in a spicy orange sauce. It’s so delicious and so easy!

    I cooked with flank steak for the first time a couple months ago and since then I have become obsessed with it. It’s easy, delicious, and so versatile!

    This Orange Beef and Broccoli is just like from your favorite Chinese takeout place but so much cheaper and healthier! The sauce is exploding with flavor and just spicy enough.

    This had been on my “Make When the Husband Leaves” list but I am officially transferring it to the “Make When the Husband Comes Home” list! I absolutely adored it and had no problem eating it for lunch 3 days in a row.

    Ingredients

    • Fresh oranges – you’re going to use the juice and the zest from the orange.
    • Soy sauce – I recommend using a low-sodium soy sauce so that you can control how salty the final dish is.
    • Orange marmalade
    • Rice wine vinegar
    • Garlic
    • Crushed red pepper flakes – adjust the amount based on how much spice you like.
    • Cornstarch – this is used to thicken the sauce.
    • Oil
    • Flank steak
    • Broccoli

    How To Make Orange Beef and Broccoli

    • Make sauce. Whisk orange juice, orange zest, soy sauce, orange marmalade, rice wine vinegar, garlic, crushed red pepper flakes, and cornstarch until the cornstarch has dissolved.
    • Cook broccoli. Boil or steam the broccoli for just a few minutes, until tender crisp.
    • Stir fry. Heat the oil in a skillet over high heat. Add the flank steak and stir-fry it until the pieces are nice and browned.
    • Add sauce. Add sauce to the pan with the steak; stir until thickened.
    • Add broccoli. Remove from heat and stir in broccoli.

    How Long Is It Good For?

    Orange beef and broccoli will be good for up to 3 days in the fridge. Make sure to store it in an airtight container.

    Reheat it in the microwave. If the sauce has thickened too much, a splash of water will help to loosen it up.

    Can You Freeze It?

    You can freeze leftovers for up to 3 months. Let it cool completely and transfer to an airtight container, like a freezer ziploc bag.

    When you are ready to serve, let it defrost overnight in the fridge and reheat in the microwave.

    More Takeout Fakeout Recipes

    • Sweet and Sour Pork
    • Spicy Orange Shrimp
    • Sesame Chicken
    • Sweet and Sour Chicken
    • Slow Cooker Teriyaki Chicken

    Make sure you subscribe to my email list to get all my new recipes delivered right to your inbox!

    You can also follow me on Instagram, Facebook, or Pinterest for even more! 

    📖 Recipe

    Yield: 4 servings

    Orange Beef and Broccoli

    Orange Beef and Broccoli

    Skip takeout and make Orange Beef and Broccoli at home! Flank steak and broccoli cooked in a spicy orange sauce. It's so delicious and so easy!

    Cook Time 30 minutes
    Total Time 30 minutes

    Ingredients

    • juice of 1 orange
    • 1 tablespoon fresh orange zest
    • 2 tablespoons soy sauce
    • ⅓ cup orange marmalade
    • 1 teaspoon rice wine vinegar
    • 2 cloves garlic, minced
    • ¼ - ½ teaspoon crushed red pepper flakes
    • 2 tablespoons cornstarch
    • 1 teaspoon oil
    • 1 pound flank steak, very thinly sliced
    • 1 head broccoli, washed and cut into bite-sized pieces

    Instructions

    1. In a small bowl, whisk the orange juice, orange zest, soy sauce, orange marmalade, rice wine vinegar, garlic, crushed red pepper flakes, and cornstarch until the cornstarch has dissolved. Set aside.
    2. Boil or steam the broccoli for just a few minutes, until tender crisp.
    3. Heat the oil in a skillet over high heat. Add the flank steak and stir-fry it until the pieces of nice and browned.
    4. Give the sauce one more stir and add it to the pan with the steak; stir until thickened. Remove from heat and stir in broccoli. Serve over rice.

    Recommended Products

    As an Amazon Associate and member of other affiliate programs, I earn from qualifying purchases.

    • Carbon Steel Wok
      Carbon Steel Wok

    Nutrition Information:

    Yield:

    4

    Serving Size:

    1

    Amount Per Serving: Calories: 399Total Fat: 11gSaturated Fat: 4gTrans Fat: 0gUnsaturated Fat: 5gCholesterol: 90mgSodium: 592mgCarbohydrates: 41gFiber: 4gSugar: 27gProtein: 35g

    Did you make this recipe?

    Tag me in your Instagram photo - @fakeginger

    © Amanda Livesay
    Cuisine: Asian / Category: beef

    Lemon Poppy Seed Pound Cake

    Apr 16, 2012

    Strawberries are one of those things that I have a real love/hate relationship with. I love them because they are delicious but I hate them because  it seems like the day after I buy them, I find a moldy one down at the bottom of the container. I, of course, go nuts thinking WHAT IF THAT STRAWBERRY TOUCHED ALL THE OTHERS?! and end up throwing the whole thing out.

    That happened last week.

    This week I bought more strawberries. A lot of strawberries.

    Whenever I overbuy strawberries, I start thinking about pound cakes or angel food cakes or anything that I could turn into strawberry shortcake. Because why eat plain strawberries when you can put them on cake and top them with whipped cream?!

    This Lemon Poppy Seed Pound Cake was perfect for a shortcake-like dessert. Lemon and strawberry is an amazing combination and the poppy seeds added a fun texture with just a bit of nuttiness. I expected my kids to turn their noses up to it when they saw the “black spots” but they loved it!

    If you can’t get enough lemon poppy seed, try Lemon Poppy Seed Cookies!

    Make sure you subscribe to my email list to get all my new recipes delivered right to your inbox!

    You can also follow me on Instagram, Facebook, or Pinterest for even more! 

    📖 Recipe

    Yield: 12 servings

    Lemon Poppy Seed Pound Cake

    Lemon Poppy Seed Pound Cake

    adapted from Cooking Light

    Prep Time 30 minutes
    Cook Time 1 hour
    Total Time 1 hour 30 minutes

    Ingredients

    • Cooking spray
    • 1 teaspoon all-purpose flour
    • ⅓ cup butter softened
    • 1 cup sugar
    • 2 large egg whites
    • 1 large egg
    • 1 tablespoon grated lemon rind
    • 1 teaspoon vanilla
    • 1 ⅔ cups all-purpose flour
    • 2 tablespoons poppy seeds
    • 1 teaspoon baking powder
    • ¼ teaspoon baking soda
    • ⅛ teaspoon salt
    • ¾ cup low-fat buttermilk

    Instructions

    1. Preheat oven to 350F.
    2. Coat an 8 x 4-inch loaf pan with cooking spray; dust with 1 teaspoon flour. Set aside.
    3. Beat butter and sugar at medium speed with a mixer until well-blended (about 4 minutes). Add egg whites and egg, 1 at a time, beating well after each addition. Beat in lemon rind and vanilla.
    4. In a separate bowl, combine 1 ⅔ cups flour and next 4 ingredients (flour through salt), stirring well with a whisk. Add flour mixture to sugar mixture alternately with buttermilk, beginning and ending with flour mixture.
    5. Pour batter into prepared pan; bake in preheated oven for 1 hour or until a toothpick inserted in center comes out clean. Cool in pan 10 minutes on a wire rack; remove from pan.

    Recommended Products

    As an Amazon Associate and member of other affiliate programs, I earn from qualifying purchases.

    • Loaf Pan
      Loaf Pan
    • Stand Mixer
      Stand Mixer

    Nutrition Information:

    Yield:

    12

    Serving Size:

    1

    Amount Per Serving: Calories: 198Total Fat: 6gSaturated Fat: 4gTrans Fat: 0gUnsaturated Fat: 2gCholesterol: 30mgSodium: 173mgCarbohydrates: 32gFiber: 1gSugar: 18gProtein: 4g

    Did you make this recipe?

    Tag me in your Instagram photo - @fakeginger

    © Amanda Livesay

    Vanilla Bean Ice Cream

    Apr 13, 2012

    Homemade Vanilla Bean Ice Cream is the best vanilla ice cream! Only 6 ingredients and so easy.

    Homemade Vanilla Bean Ice Cream - the best vanilla ice cream! Only 6 ingredients and so easy.

    I’m not snobby about most food but homemade ice cream is one of the things I’m a total snob about. Homemade ice cream absolutely has to start with a custard. 

    No churn ice cream? NOPE. 

    I need my ice cream to start with cream, eggs, and sugar. 

    This Homemade Vanilla Bean Ice Cream is probably my favorite ice cream recipe because it’s so simple and just so pretty with the vanilla bean flecks throughout.

    If you are more of a chocolate person, my Chocolate Ganache Ice Cream is incredible! And I don’t usually like chocolate ice cream.

    Overhead shot of vanilla ice cream in a bowl

    Ingredients

    • Milk
    • Sugar
    • Heavy whipping cream
    • Salt – just a tiny bit to bring out the vanilla flavor.
    • Vanilla bean paste – you can find this in most large grocery stores with the vanilla and other extracts. You can also order it online.
    • Egg yolks – using egg yolks makes a really thick custard and, in my opinion, the best, creamiest ice cream.

    How To Make Vanilla Bean Ice Cream

    Vanilla Bean Ice Cream is so simple and requires just the most basic ice cream ingredients. 

    • Heat. Heat milk, heavy cream, sugar, salt, and vanilla bean paste over medium heat until it starts to bubble.
    • Prepare eggs. While the milk mixture is heating up, whisk 6 eggs yolks together in a large bowl.
    • Temper eggs. Once the milk mixture is hot, slowly stream about a cup of the milk into the egg yolks, whisking vigorously the entire time.
    • Combine. Pour egg yolk and milk mixture back into the pot.
    • Make custard. Continue heating over medium heat until the mixture is thick enough to coat the back of a spoon.
    • Strain. Pour custard through a fine mesh strainer into a bowl.
    • Chill. Chill until cold.
    • Freeze. Freeze according to ice cream maker’s instructions.

    How Long Is It Good For?

    Homemade ice cream is good for about a month in the freezer. I like to store it in these reusable ice cream containers.

    Bowl of vanilla ice cream with 2 drips going down the side

    More Homemade Ice Cream Recipes

    • Birthday Cake Ice Cream
    • Circus Animal Cookie Ice Cream
    • Caramel Corn Ice Cream
    • Mexican Hot Chocolate Ice Cream

    Make sure you subscribe to my email list to get all my new recipes delivered right to your inbox!

    You can also follow me on Instagram, Facebook, or Pinterest for even more! 

    📖 Recipe

    Yield: 8 servings

    Vanilla Bean Ice Cream

    Vanilla Bean Ice Cream

    Prep Time 20 minutes
    Cook Time 15 minutes
    Additional Time 2 hours
    Total Time 2 hours 35 minutes

    Ingredients

    • 1 cup milk
    • ½ cup sugar
    • 2 cups heavy whipping cream
    • pinch of salt
    • 1 teaspoon vanilla bean paste
    • 6 large egg yolks

    Instructions

    1. Warm the milk, sugar, heavy whipping cream, salt, and vanilla bean paste in a heavy-bottomed pot over medium heat just until it starts to bubble.
    2. While the milk mixture is heating, whisk together the egg yolks. Once the milk starts to bubble, slowly stream in about 1 cup of the milk while whisking constantly. Pour the egg yolk mixture into the pot you used to heat the milk.
    3. Heat the mixture over medium heat, stirring constantly, until the mixture thickens and coats the back of a spoon.
    4. Pour the custard through a fine mesh strainer and into a large bowl. Chill the mixture.
    5. Churn in ice cream maker according to manufacturer instructions. Store in freezer.

    Recommended Products

    As an Amazon Associate and member of other affiliate programs, I earn from qualifying purchases.

    • Ice Cream Maker
      Ice Cream Maker
    • Fine Mesh Strainer
      Fine Mesh Strainer
    • Vanilla Bean Paste
      Vanilla Bean Paste

    Nutrition Information:

    Yield:

    8

    Serving Size:

    1

    Amount Per Serving: Calories: 328Total Fat: 26gSaturated Fat: 15gTrans Fat: 1gUnsaturated Fat: 9gCholesterol: 232mgSodium: 103mgCarbohydrates: 16gFiber: 0gSugar: 14gProtein: 8g

    Did you make this recipe?

    Tag me in your Instagram photo - @fakeginger

    © Amanda Livesay
    Cuisine: American / Category: frozen goodies

    Sour Cream Coffee Cake

    Apr 12, 2012

    I think coffee cake might be one of my favorite things ever. It’s cake that you’re supposed to eat for breakfast! What’s not to love?

    I have a favorite coffee cake and this one is very similar to that recipe but the sour cream gave it a slightly different taste and a fluffy texture. And the layer of cinnamon sugar running through the center? Totally did me in. I also loved how the cinnamon sugar on top got crunchy in the oven!

    You better believe I’m having a piece (or two) for breakfast this morning!

    One year ago: Chocolate Chip Waffles
    Two years ago: Guacamole

    📖 Recipe

    Yield: 20 servings

    Sour Cream Coffee Cake

    Sour Cream Coffee Cake

    from Pass the Sushi

    Prep Time 30 minutes
    Cook Time 1 hour
    Total Time 1 hour 30 minutes

    Ingredients

    For the Crumb Topping:

    • ¾ cup flour
    • ¾ cup firmly packed dark brown sugar
    • ½ teas salt
    • ¾ cup pecans, toasted
    • 6 tbs unsalted butter, cold, cut into 1″ cubes

    For the Chocolate Cinnamon Swirl:

    • ½ cup sugar
    • 1 teas dark unsweetened cocoa powder
    • 1 teas cinnamon

    For the Sour Cream Cake:

    • 3 ½ cups flour
    • 1 teas baking powder
    • 1 ½ teas baking soda
    • ½ teas salt
    • 1 cup 2 sticks unsalted butter, soft but cool, cut into 1″ pieces
    • 2 ¼ cups sugar
    • 4 large eggs
    • 16 oz sour cream
    • 1 ½ teas pure vanilla extract

    Instructions

    1. To make the Crumb Topping: Pulse the flour, sugar, and salt in a food processor about 5 seconds to mix. Add the pecans and pulse until the pecans are finely chopped and thoroughly incorporated into the flour mixture, about 15 1 second pulses.
    2. Add butter and pulse until combined.You’re going for a mixture that looks like chunky sand. Cover with plastic wrap and refrigerate until ready to use.
    3. To make the Cinnamon Swirl: In a small bowl, stir together the sugar, cocoa powder, and cinnamon and set aside until ready to use.
    4. To make the Sour Cream Cake: Preheat the oven to 350F. Line a 9×13″ baking pan with parchment paper or spray with baking spray.
    5. In a mixing bowl, whisk together the flour, baking powder, baking soda, and salt. Set aside.
    6. In the bowl of a mixture fitted with the paddle attachment, beat the butter and sugar together until light and fluffy. Add the eggs, one at a time, beating well after each and scraping the sides as needed. Add the sour cream and vanilla and beat until everything is incorporated. Add the flour mixture and continue beating until just combined. Do not overmix!
    7. Pour half of the batter into the prepared baking pan. Cover with the cinnamon swirl mixture.
    8. Pour the remaining batter over the swirl mixture. and spread evenly. Top with the crumb topping. Use all of it even if it looks like too much - some of it will sink down into the cake.
    9. Bake for 1 hour, rotating half way through cooking time, until golden brown or a toothpick inserted in the center comes out clean. Let cool on a wire rack for 30 minutes before serving.

    Recommended Products

    As an Amazon Associate and member of other affiliate programs, I earn from qualifying purchases.

    • Stand Mixer
      Stand Mixer
    • 9x13-inch pan
      9x13-inch pan
    • My Favorite Food Processor
      My Favorite Food Processor

    Nutrition Information:

    Yield:

    20

    Serving Size:

    1

    Amount Per Serving: Calories: 432Total Fat: 21gSaturated Fat: 11gTrans Fat: 0gUnsaturated Fat: 9gCholesterol: 85mgSodium: 189mgCarbohydrates: 57gFiber: 1gSugar: 35gProtein: 5g

    Did you make this recipe?

    Tag me in your Instagram photo - @fakeginger

    © Amanda Livesay

    Asian Turkey Meatballs with Sesame Lime Dipping Sauce

    Apr 10, 2012

    One of the good things about the husband being deployed is that I can cook whatever I want. (Also, I can cook whenever I want and you bloggers know how important that is! Dinner at 3 pm to take advantage of perfect light? Totally flies right now.) But it’s taken me awhile to get into the groove of cooking. I’ve had a serious affair with Subway this past month – seriously though, $5 for lunch AND dinner! Five bucks! – but I’ve decided that it’s time for us to break up.

    I’ve had a list of “when the husband deploys” recipes for months now and this was on it. It’s just not something he would like but I knew it would be something I’d love. Even my 2 boys loved them – I got 18 meatballs out of the recipe and there were no leftovers! This is perfect for a night when you need something quick, healthy, and crowd-pleasing.

    Make sure you subscribe to my email list to get all my new recipes delivered right to your inbox!

    You can also follow me on Instagram, Facebook, or Pinterest for even more! 

    📖 Recipe

    Yield: 4 servings

    Asian Turkey Meatballs with Sesame Lime Dipping Sauce

    Asian Turkey Meatballs with Sesame Lime Dipping Sauce

    adapted from Skinny Taste

    Ingredients

    For the meatballs:

    • ¼ cup panko crumbs
    • 1-¼ lbs lean ground turkey
    • 1 egg
    • 1 tablespoon ginger, minced
    • 1 clove garlic, minced
    • ½ teaspoon salt
    • ¼ cup chopped fresh cilantro
    • 3 green onions, chopped
    • 1 tablespoon soy sauce
    • 1 teaspoon sesame oil

    For the dipping sauce:

    • 4 tablespoons soy sauce
    • 1 teaspoons sesame oil
    • 2 tablespoons fresh lime juice
    • 1 tablespoon water
    • 1 tablespoon chopped green onion

    Instructions

    1. Preheat oven to 450F.
    2. In a large bowl, use your hands (or a wooden spoon) to mix ground turkey, panko, egg, salt, scallions, ginger, cilantro, soy sauce, and sesame oil. Take a heaping spoonful of meat and shape into a ball, transfer to a rimmed baking sheet. Repeat with remaining mixture. Bake until cooked through, 15 - 18 minutes. Brush with the dipping sauce (below).

    For the dipping sauce:

    1. Whisk together soy sauce, sesame oil, lime juice, water, and green onion.
    2. (Serve remaining sauce alongside the meatballs.)

    Recommended Products

    As an Amazon Associate and member of other affiliate programs, I earn from qualifying purchases.

    • Sesame Oil
      Sesame Oil
    • OXO Mixing Bowls
      OXO Mixing Bowls

    Nutrition Information:

    Yield:

    4

    Serving Size:

    1

    Amount Per Serving: Calories: 1050Total Fat: 57gSaturated Fat: 14gTrans Fat: 1gUnsaturated Fat: 37gCholesterol: 518mgSodium: 1838mgCarbohydrates: 8gFiber: 1gSugar: 1gProtein: 127g

    Did you make this recipe?

    Tag me in your Instagram photo - @fakeginger

    © Amanda Livesay

    Orange Sweet Rolls

    Apr 07, 2012

    The best weekend breakfast! Orange Sweet Rolls are yeast rolls filled with cream cheese, orange marmalade, and pecans and topped with an orange glaze.

    Last minute Easter breakfast idea for you!

    These rolls are so amazing. Sweet dough with cream cheese, orange marmalade, and pecans on the inside, all topped with a glaze made from freshly squeezed orange juice. Seriously though, I skipped dinner last night so I could have a second one of these. That good.

    If you wanted to make this ahead of time, make the dough the night before, shape them into rolls, let them rise once, and then stick them in the fridge overnight. Pull them out about an hour before you want to bake them to take the chill off – they will have deflated overnight but should start to rise once you pull them out of the fridge. Bake them according to the recipe once they’ve risen. Easy peasy.

    Ingredients

    • Active dry yeast – make sure it’s active dry yeast and not instant.
    • Milk
    • Sugar – this is going in the dough and the cream cheese filling.
    • Butter – this make the yeast dough rich and delicious.
    • Fresh oranges – you are going to use the zest and the juice from the oranges.
    • Eggs
    • Salt
    • All-purpose flour
    • Cream cheese – this is used in the filling and creates a cheesecake-y like taste.
    • Orange marmalade – you can find this in the jam/jelly section of your grocery store.
    • Pecans
    • Powdered sugar – this gets mixed with fresh orange juice to create the glaze that goes on top of the rolls.

    How To Make Orange Rolls

    1. Make filling. Use an electric mixture to combine cream cheese, orange marmalade, sugar, and pecans. Set aside.
    2. Activate dough. Put yeast and milk in a large mixing bowl. Let sit about 5 minutes, until the yeast has dissolved and is slightly foamy.
    3. Add remaining ingredients. Beat in sugar, melted butter, orange zest, orange juice, eggs and salt at medium-low speed with a mixer until combined. Gradually add flour, beating until a soft dough forms.
    4. Knead. Turn dough out on a lightly floured surface. Knead dough for 6-8 minutes or until dough is smooth and elastic.
    5. Rise. Place dough in a lightly greased bowl. Cover and let rise in a warm place, for 1 hour or until dough is doubled in size.
    6. Make rolls. Roll out dough into a 24×12 inch rectangle. Spread orange-cream cheese filling over dough.. Roll up dough and cut into 1″ sections. Place rolls onto greased pan.
    7. Rise. Cover and let rise in a warm place for 1 hour or until doubled.
    8. Bake. Bake at 350F for 20-25 minutes or until golden brown.
    9. Make glaze. Whisk together powdered sugar and orange juice.
    10. Glaze rolls. Drizzle glaze over warm rolls when they are done baking.

    How Long Are They Good For?

    These rolls will be good for up to 3 days. Make sure to cover them tightly and store them in the fridge.

    When you are ready to serve them, warm them up slightly in the microwave.

    Can You Freeze Them?

    You can freeze orange rolls for up to 3 months. I recommend wrapping them individually in plastic wrap and then placing them in freeze ziploc bags.

    Let them defrost in the frige overnight. When you are ready to serve them, warm the up slightly in the microwave.

    More Yeast Breakfast Ideas

    • Yeast Waffles
    • Cinnamon Rolls with Cream Cheese Frosting
    • Caramel Apple Cinnamon Rolls
    • Maple Twists
    • Brown Butter Yeast Waffle

    Make sure you subscribe to my email list to get all my new recipes delivered right to your inbox!

    You can also follow me on Instagram, Facebook, or Pinterest for even more! 

    📖 Recipe

    Orange Sweet Rolls

    Orange Sweet Rolls

    Prep Time 30 minutes
    Cook Time 25 minutes
    Additional Time 2 hours
    Total Time 2 hours 55 minutes

    Ingredients

    For the dough:

    • 2 ¼ ounce packages active dry yeast
    • 1½ cup warm milk
    • 1 cup sugar
    • ¾ cup butter, melted
    • 1 tablespoon orange zest
    • ½ cup freshly squeezed orange juice
    • 3 large eggs
    • 1 teaspoon salt
    • 8-9 cups all-purpose flour

    For the filling:

    • 1 8 ounce block cream cheese, softened
    • ¼ cup orange marmalade
    • 2 tablespoons sugar
    • ½ cup chopped pecans

    For the glaze:

    • 1 cup powdered sugar
    • 2 tablespoons freshly squeezed orange juice

    Instructions

    To make the dough:

    1. Put yeast and milk in a large mixing bowl. Let side about In a large 5 minutes, until the yeast has dissolved and is slightly foamy. Beat in sugar, melted butter, orange zest, orange juice, eggs and salt at medium-low speed with a mixer until combined. Gradually add 7 cups flour, beating until smooth. Add enough of remaining flour to make a soft dough.
    2. Turn dough out on a lightly floured surface. Knead dough for 6-8 minutes or until dough is smooth and elastic. Place dough in a lightly greased bowl, turning to grease top. Cover and let rise in a warm place, for 1 hour or until dough is doubled in size.
    3. Spray a 9 x 13-inch baking pan with nonstick spray. Set aside.
    4. On a lightly floured surface, roll out dough into a 24x12 inch rectangle. Spread orange-cream cheese filling (instructions below) evenly over dough, leaving a ½ inch border. Roll up dough, jelly-roll fashion, starting with long side. Using a serrated knife, cut dough crosswise into 1 inch slices. Place rolls, cut side down, in prepared pans. Cover and let rise in a warm place, free from drafts, for 1 hour or until doubled in size.
    5. Preheat oven to 350F. Bake for 20-25 minutes or until golden brown. Let cool in pan for 10 minutes. Spoon orange glaze over warm rolls.

    To make the filling:

    1. Use an electric mixture to combine cream cheese, orange marmalade, sugar, and pecans.

    To make the glaze:

    1. In a small bowl, whisk together powdered sugar and orange juice until smooth.

    Recommended Products

    As an Amazon Associate and member of other affiliate programs, I earn from qualifying purchases.

    • Parchment Paper
      Parchment Paper
    • Rolling Pin
      Rolling Pin
    • Stand Mixer
      Stand Mixer

    Nutrition Information:

    Yield:

    48

    Serving Size:

    1

    Amount Per Serving: Calories: 778Total Fat: 8gSaturated Fat: 3gTrans Fat: 0gUnsaturated Fat: 3gCholesterol: 25mgSodium: 96mgCarbohydrates: 153gFiber: 6gSugar: 9gProtein: 21g

    Did you make this recipe?

    Tag me in your Instagram photo - @fakeginger

    © Amanda Livesay
    Cuisine: American / Category: breakfast

    Tomato Herb Focaccia

    Mar 21, 2012

    I have a mile long list of things that I want/need to accomplish during this deployment and at the top of my list is “BAKE MORE OFTEN”. And to go along with that: “blog more often”.

    So here we go. 9 months of baking!

    Bread has always been my favorite thing to bake, y’all know that. But it’s even more important to me these days because yeast doesn’t disappoint me at our crazy high elevation like baking powder or soda does. I’ve been saving this recipe for yummy tomatoes but I couldn’t wait any longer. I had to make it.

    Focaccia is probably my favorite bread because of it’s crisp exterior and almost airy inside. I just love it! But putting tomatoes and cheese on top of that focaccia crust that I love so much just sent it over the edge. It was definitely one of my favorites.

    The day after I made it, I sliced a piece in half and turned the tomato half upside down to make a sandwich (does that make sense?) and then grilled it on the panini press. Best sandwich of my life.

    Make sure you subscribe to my email list to get all my new recipes delivered right to your inbox!

    You can also follow me on Instagram, Facebook, or Pinterest for even more! 

    📖 Recipe

    Yield: 1 loaf

    Tomato Herb Focaccia

    Tomato Herb Focaccia

    Ingredients

    • 1 package (¼ ounce active dry yeast)
    • 1 cup warm water
    • 2 tablespoons olive oil (divided)
    • 1-½ teaspoons salt
    • 1 teaspoon sugar
    • 1 garlic clove (minced)
    • 1 teaspoon each dried oregano, thyme and rosemary (crushed)
    • ½ teaspoon dried basil
    • pinch of pepper
    • 2 to 2-½ cups all-purpose flour
    • 1 large tomato (thinly sliced)
    • ¼ cup shredded mozzarella cheese
    • ¼ cup grated Parmesan cheese

    Instructions

    1. In a large bowl, dissolve yeast in the warm water. Add 1 tablespoon olive oil, salt, sugar, garlic, dried herbs, pepper and 1-½ cups flour. Beat until smooth. Stir in enough of the remaining flour to form a soft, sticky dough.
    2. Turn onto a floured surface; knead until smooth, about 6-8 minutes. Place in a greased bowl. Cover and let rise in a warm place until doubled, about 1 hour
    3. Preheat oven to 400F
    4. Punch dough down. Cover and let rest for 10 minutes. Shape into a 13-in. x 9-in. rectangle; place on parchment paper covered baking sheet. Cover and let rise until doubled, about 30 minutes. Drizzle the remaining oil over the dough; use your fingertips to press dimples into the dough while spreading the oil around. Top with tomatoes and cheese.
    5. Bake in preheated oven for 20-25 minutes or until golden brown. Cool on a wire rack.

    Recommended Products

    As an Amazon Associate and member of other affiliate programs, I earn from qualifying purchases.

    • My Favorite Yeast
      My Favorite Yeast
    • Stand Mixer
      Stand Mixer

    Nutrition Information:

    Yield:

    12

    Serving Size:

    1

    Amount Per Serving: Calories: 116Total Fat: 3gSaturated Fat: 1gTrans Fat: 0gUnsaturated Fat: 2gCholesterol: 3mgSodium: 404mgCarbohydrates: 18gFiber: 1gSugar: 1gProtein: 3g

    Did you make this recipe?

    Tag me in your Instagram photo - @fakeginger

    © Amanda Livesay
    Cuisine: italian / Category: breads

    Irish Soda Bread Scones

    Mar 14, 2012

    Irish Soda Bread Scones – everything you love about Irish Soda Bread in a buttery, flaky scone! The perfect St. Patrick’s Day breakfast. 

    Irish Soda Bread Scones - everything you love about Irish Soda Bread in a buttery, flaky scone! The perfect St. Patrick's Day breakfast. 

    Saint Patrick’s Day is one of those holidays that I just can’t get into. Mostly because I look awful in green. Also because I don’t like beer which ruins the whole “OMGGREENBEER” thing for me.

    Last year, however, I found a reason to celebrate: Irish Soda Bread. I fell in love with it. Pretty sure I ate the whole loaf by myself.

    I wanted to make it again this year but in an effort to shake things up, I turned it into scones. Scones are awesome because they’re buttery and flaky and sweet but not overly so. They turned out perfect – I split mine in half and covered both sides with salted butter; so good!

    …

    Read More

    7-Layer Chili Dog Dip

    Feb 27, 2012

    Layers of chili, hot dogs, bacon, cheese, sour cream, red onion, and cilantro! This 7-Layer Chili Cheese Dog Dip is perfect for football season and always a hit!

    Some of my other favorite dips for football season are Jalapeno Popper Dip and Cheesy Sausage and Spinach Dip!

    7 Layer Chili Cheese Dog Dip - perfect for football season! Layers of chili, hot dogs, bacon, cheese, sour cream, red onion, and cilantro - it's so delicious!

    We celebrated my oldest’s 5th birthday this past weekend.

    Five! How am I old enough to have a 5 year old?!

    We had a small party including cake, a pinata, and way too many Power Rangers toys.

    (Him on his 1st birthday and on his 5th! Is that not the chunkiest baby you’ve ever seen?)

    Ingredients

    • Olive oil – you can use avocado oil or vegetable oil if you prefer.
    • Ground beef – ground turkey or ground chicken also works.
    • Onion
    • Chili powder
    • Cumin
    • Beef stock
    • Diced tomatoes
    • Bacon – you are going to cook the bason separately so that you can crispy bits of bacon on top of your dip.
    • Hot dogs – these get thinly sliced so you should hopefully get a bit of hot dog in each scoop of the dip.
    • Cheddar cheese – shredded so it melts and gets all gooey.
    • Sour cream – I like to either buy the squeeze bottle of sour cream or put sour cream in a ziploc bag and cut the corner off to create stripes across the finished dip.
    • Red onion – for topping the dip.
    • Cilantro
    • Tortilla chips – for serving. You can also use pita chips!

    How To Make Chili Dog Dip

    • Make chili. Cook ground beef, onion, diced tomatoes, beef stock, chili powder, and cumin together.
    • Cook bacon. In a separate skillet, cook bacon until crisp.
    • Cook hot dogs. Drain off almost all the bacon fat; cook sliced hot dogs in remaining bacon fat
    • Assemble. Layer the chili, hot dogs, and cheddar cheese in a casserole dish
    • Bake Bake until cheese is melted and bubbly, about 12 minutes
    • Add toppings. Top with crispy bacon, sour cream, diced red onion, and fresh cilantro
    • Serve. Serve with tortilla chips or dippers of choice
    7 Layer Chili Cheese Dog Dip - perfect for football season! Layers of chili, hot dogs, bacon, cheese, sour cream, red onion, and cilantro - it's so delicious!

    How Long Is It Good For?

    Chili dog dip is good for up to 3 days in the fridge. Make sure to store it in an airtight container to keep it fresh for as long as possible.

    You can reheat it in the microwave and add more toppings!

    Can You Make 7 Layer Chili Dog Dip Ahead?

    You can definitely do parts of the dip ahead of time! The chili can be made the night before and stored in the fridge until you are ready to assemble the dip. 

    I would do everything else fresh. You want crispy bacon and a little bit of a crisp on the hot dogs. But the chili takes the longest time so you can definitely get that out of the way. 

    7 Layer Chili Cheese Dog Dip - perfect for football season! Layers of chili, hot dogs, bacon, cheese, sour cream, red onion, and cilantro - it's so delicious!

    More Dip Recipes

    • Instant Pot Buffalo Chicken Dip
    • Chicken Burrito Dip
    • French Onion Dip
    • Crawfish Dip

    Make sure you subscribe to my email list to get all my new recipes delivered right to your inbox!

    You can also follow me on Instagram, Facebook, or Pinterest for even more! 

    7 Layer Chili Cheese Dog Dip - perfect for football season! Layers of chili, hot dogs, bacon, cheese, sour cream, red onion, and cilantro - it's so delicious!

    📖 Recipe

    Yield: about 12 servings

    7-Layer Chili Cheese Dog Dip

    7-Layer Chili Cheese Dog Dip

    Layers of chili, hot dogs, bacon, cheese, sour cream, red onion, and cilantro! This 7-Layer Chili Cheese Dog Dip is perfect for football season and always a hit!

    Prep Time 20 minutes
    Cook Time 30 minutes
    Total Time 50 minutes

    Ingredients

    For the chili:

    • 1 tablespoon olive oil
    • 1 pound ground beef
    • 1 small onion, chopped
    • 1 tablespoon chili powder
    • ½ tablespoon ground cumin
    • 1 cup beef stock
    • 1 can, 14-oz diced tomatoes

    For the Dip:

    • Chili
    • ½ pound bacon
    • 4 hot dogs, diced
    • 1½ cups shredded cheddar cheese
    • 1 cup sour cream
    • ¼ cup diced red onion
    • ¼ cup chopped cilantro
    • 1 bag tortilla or pita chips

    Instructions

    To make the chili:

    1. Heat the olive oil over medium high heat in a large pot. When the oil is hot, add the ground beef and onion. Cook, breaking up the beef, until it's browned and the onions have softened. Drain, if needed. Add the chili powder and cumin; cook another minute or 2, just until the spices are nice and fragrant.
    2. Add the beef stock and tomatoes and allow to come to a boil. Cook for about 10 minutes, until most of the liquid has evaporated.

    To assemble the dip:

    1. Preheat oven to 375.
    2. Heat a large pan over medium-high heat. Add bacon and cook, flipping as needed, until the bacon is crisp. Drain on paper towels; crumble once cool. Set aside.
    3. Pour off all but about a teaspoon of the bacon fat. Add diced hot dogs and cook, stirring frequently, until the hot dogs are browned. Remove from the heat and set aside.
    4. Spread the chili in the bottom of an 8x8-inch baking dish. Top with the hot dogs and then the cheese. Bake for 12 - 15 minutes, or until the cheese is melted and bubbly.
    5. Top with bacon, sour cream, red onion, and cilantro. Serve hot.

    Recommended Products

    As an Amazon Associate and member of other affiliate programs, I earn from qualifying purchases.

    • 8-inch Cake Pan
      8-inch Cake Pan

    Nutrition Information:

    Yield:

    12

    Serving Size:

    1

    Amount Per Serving: Calories: 435Total Fat: 31gSaturated Fat: 12gTrans Fat: 1gUnsaturated Fat: 15gCholesterol: 95mgSodium: 889mgCarbohydrates: 11gFiber: 2gSugar: 3gProtein: 27g

    Did you make this recipe?

    Tag me in your Instagram photo - @fakeginger

    © Amanda Livesay
    Cuisine: American / Category: appetizer

    Chicken Lettuce Wraps

    Feb 06, 2012

    After a short break, Secret Recipe Club is back! This month I was assigned to Cooking with Chopin, Living with Elmo, a delicious blog written by a fellow mom of young boys.

    My husband has been talking about lettuce wraps lately (and wanted one so badly that he made a bologna wrap one day. Yeah…) so when I stumbled across her recipe for Chicken & Red Pepper Lettuce Wraps, I was pretty excited. It’s very different from our usual wraps but I knew it would be a winner. Put bell peppers in anything and my husband would eat it.

    We really did love this one. The orange zest gave it an unexpected brightness that went amazingly well with the heaviness of the hoisin sauce. And it’s just so fun to wrap stuff in lettuce wraps!

    📖 Recipe

    Yield: 6 - 8 servings

    Chicken Lettuce Wraps

    Chicken Lettuce Wraps
    Prep Time 10 minutes
    Cook Time 20 minutes
    Total Time 30 minutes

    Ingredients

    • 1 head iceberg lettuce
    • 2 tablespoons olive oil
    • 1 pound boneless skinless chicken breasts, cut into bite-sized pieces
    • Salt and ground pepper
    • 2 tablespoons olive oil
    • 1 large onion thinly sliced
    • 1 red bell pepper ribs and seeds removed, thinly sliced
    • 3 cloves garlic minced
    • ¼ teaspoon dried ground ginger
    • ½ teaspoon orange zest
    • ⅛ teaspoon red pepper flakes optional
    • 1 8- ounce can water chestnuts
    • 1 teaspoon cornstarch mixed with 1 tablespoons water
    • 3 tablespoons soy sauce
    • 3 tablespoons rice vinegar
    • 1 tablespoons hoisin sauce

    Instructions

      1. Cut base off of lettuce heads. Gently peel off leaves, wash, and pat dry with paper towels. Refrigerate until ready to serve the dish.
      2. Season chicken well with salt and pepper.
      3. In a large skillet, heat 1 tablespoon oil over high heat. Add the chicken; cook, stirring constantly, until opaque throughout, 6 to 8 minutes. Transfer to a plate.
      4. Add remaining 1 tablespoons of oil to pan, along with the onion and bell pepper. Reduce heat to medium. Cook, stirring constantly, until onion is tender and golden, about 6 minutes.
      5. Add garlic, ginger, orange zest, and red-pepper flakes and water chestnuts; cook, stirring, until fragrant, 30 to 60 seconds.
      6. While garlic/ginger mixture is cooking, whisk the cornstarch and water together in a bowl. Add in the soy sauce, vinegar, and hoisin sauce; whisk.
      7. Pour cornstarch mixture over garlic/ginger mixture. Reduce heat to low. Add chicken to pan and toss to coat.
      8. Serve the chicken mixture wrapped in the lettuce leaves.

    Recommended Products

    As an Amazon Associate and member of other affiliate programs, I earn from qualifying purchases.

    • Rubber Spatulas
      Rubber Spatulas
    • My Favorite Skillet
      My Favorite Skillet

    Did you make this recipe?

    Tag me in your Instagram photo - @fakeginger

    Cuisine: Asian / Category: chicken

    Fried Pickles

    Feb 04, 2012

    Fried Pickles are pickles coated in a beer batter and fried until crispy and delicious.

    One last Superbowl idea for you!

    I don’t usually like doing fried foods when I’m entertaining. They take a lot of time and since you can’t really do them ahead of time, you wind up spending most of your time standing over the stove.

    But as we all know, fried foods are almost always crowd-pleasers! These fried pickles take no time at all so they’re perfect for cooking up right as your guests are walking through the door

    And umm… fried pickles? One of man’s greatest inventions!

    Ingredients

    • Pickles – I buy the already sliced pickles for fried pickles.
    • Egg
    • Beer – no need to use an expensive beer, you aren’t really going to taste it. It makes for a really nice, light batter.
    • Flour
    • Oil – I recommend vegetable oil, canola oil, or peanut oil for frying.

    How To Make Fried Pickles

    • Prep. Heat oil over medium-high in a heavy pot.
    • Make batter. Whisk together egg, 1 cup beer, flour, and salt until smooth.
    • Batter the pickles. Once oil is hot, dip pickles, one at a time, in the batter. Allow excess batter to drip off and then drop the pickles in the oil.
    • Fry. Fry until golden brown, about 2 minutes on each side.

    How Long Are Fried Pickles Good For?

    Fried pickles are best served when freshly fried but they will stay good for up to 4 days after frying. Make sure to store them in an airtight container in the fridge.

    I would reheat them in the air fryer if you have one. Otherwise, you can heat them in the oven or microwave.

    More Football Snacks

    • Honey Mustard Chicken Wings
    • Texas Cheese Fries
    • Potato Skins
    • Grilled Bacon-Wrapped Jalapeno Poppers
    • Sweet and Spicy Wings

    Make sure you subscribe to my email list to get all my new recipes delivered right to your inbox!

    You can also follow me on Instagram, Facebook, or Pinterest for even more! 

    📖 Recipe

    Yield: about 4 servings

    Fried Pickles

    Fried Pickles

    Fried Pickles - pickles coated in a beer batter and fried until crispy and delicious.

    Prep Time 10 minutes
    Cook Time 5 minutes
    Total Time 15 minutes

    Ingredients

    • 2 cups pickles drained and patted dry
    • 1 egg
    • 1 - 1¼ cup beer
    • 1 cup flour
    • ½ teaspoon salt
    • oil for frying

    Instructions

      1. Pour oil into a heavy pot, a couple inches high. Heat over medium-high.
      2. Whisk together egg, 1 cup beer, flour, and salt until smooth. If batter is too thick, add in the other ¼ cup beer.
      3. Once oil is hot, dip pickles, one at a time, in the batter. Allow excess batter to drip off and then drop the pickles in the oil. Fry until golden brown, about 2 minutes on each side.

    Recommended Products

    As an Amazon Associate and member of other affiliate programs, I earn from qualifying purchases.

    • Slotted Spoon
      Slotted Spoon

    Did you make this recipe?

    Tag me in your Instagram photo - @fakeginger

    © Amanda Livesay
    Cuisine: American / Category: appetizer

    Graham Crackers

    Jan 28, 2012

    If you asked my husband to describe me, I can almost guarantee that he would include the word “cheap” in the mile-long string of words that would follow. I can talk myself out of buying anything – I have to take my vacuum completely apart, clean it, and put it back together at least 3 times a week. It still works though! So why buy another one?!

    My cheapness thriftiness is okay with me most of the time. And then there are times when I realize I have a fridge full of brie that’s about to expire and nothing to spread it on! Because I refuse to buy cookies/crackers/whatever unless it’s on sale and I have a coupon. Gah.

    You guys. These have got to be the world’s best graham crackers. They’re almost like a shortbread! They’re really buttery and were the perfect vessel for my baked brie.

    Super simple too! It took me about 10 minutes to throw the dough together and after a quick chill all I had to do was roll it out and cut it. My only complaint is that I don’t think I rolled them thin enough which means I didn’t get a ton of cookies out of the recipe. Boo! Oh well, I won’t mind making them again!

    Graham Crackers

    • 2 cups unbleached all-purpose flour (plus more for rolling)
    • ½ cup whole-wheat flour
    • ¾ teaspoon kosher salt
    • ½ teaspoon baking soda
    • ½ teaspoon ground cinnamon
    • 8 ounces 2 sticks unsalted butter, cut into small pieces, at room temperature
    • ¼ cup packed dark brown sugar
    • ¼ cup granulated sugar
    • ¼ cup honey
    1. In a bowl, whisk together the all-purpose flour, whole-wheat flour, salt, baking soda, and cinnamon.
    2. In the bowl of an electric mixer fitted with the paddle attachment, combine the butter, dark brown sugar, granulated sugar, and honey. Mix on medium speed until well combined, about 1 minute. In two additions, add the dry ingredients, letting the first fully incorporate before you add the second.
    3. Turn the dough out and flatten it into a rectangular shape, wrap it tightly in plastic wrap, and refrigerate until chilled, about 30 minutes or up to 2 days. (The dough can be frozen, well wrapped, for up to 1 month.)
    4. Preheat the oven to 350 F. Line two baking sheets with parchment paper.
    5. Unwrap the chilled dough, and on a lightly floured surface, roll it out into a rectangle about â…› inch thick. Using a ruler and a pastry cutter or a sharp knife, cut the dough into 3-by-3-inch squares; use a spatula to transfer the rectangles to the prepared baking sheets as you go. Reroll the scraps of dough once, and cut out more cookies. Using a paring kninfe, gently score each square to create a line down the middle, taking care not to cut all the way through the dough. Using a fork, pierce each rectangle with two rows of six to eight marks.
    6. Bake the graham crackers, rotating the baking sheets halfway through, until they are golden brown, 15 to 20 minutes. Cool on a wire rack.
    7. The graham crackers will keep in an airtight container at room temperature for up to 1 week.
     
    « Previous Page
    Next Page »

    Primary Sidebar

    Amanda Livesay
    Hi, I'm Amanda! DFW food blogger, mom of boys, and crazy dog lady.
    Read more
    Privacy Policy
    Privacy Policy

    Footer

    ↑ back to top

    About

    • Privacy Policy
    • About Fake Ginger

    Newsletter

    • Sign Up for weekly emails featuring new recipes!

    As an Amazon Associate I earn from qualifying purchases.

    Copyright © 2024 FakeGinger.com