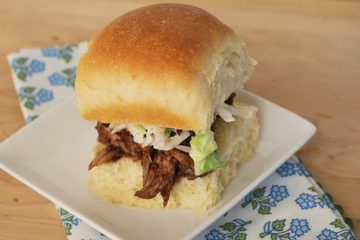

I have a newfound love of sliders. I’ve made them twice this week! There’s something so fun about how tiny they are – plus it’s just more fun to eat 3 little burgers instead of 1 big one!
My issue with sliders is that I hate having to buy the buns for them. We operate on a fairly tight grocery budget so having to buy extra bread? No bueno. Luckily, making slider buns is SO simple, especially with this recipe.
I cannot even tell you guys how many times I’ve made this recipe. It’s my go to for white bread, for dinner rolls, for regular sized buns, everything. It’s idiot proof. (Trust me: I forgot to add yeast last weekend, started wondering why it wasn’t rising, added yeast and kneaded again. Worked perfectly.) These turn out perfect every single time!
I usually use my bread machine to do the kneading these days (because it’s one of those recipes that doesn’t need adjusting) but you can use your stand mixer or your hands. It’s a really easy dough to work with so it’s perfect for someone who’s just starting to mess around with yeast.
(Don’t you worry your pretty little head, the slider recipe is coming soon!)
📖 Recipe

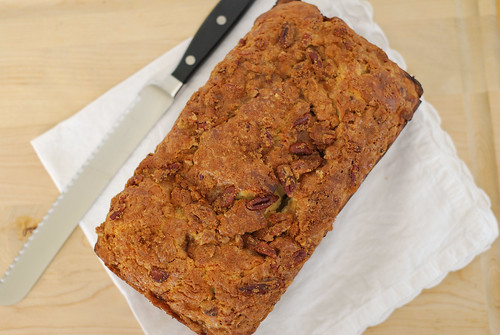
Slider Buns
Ingredients
- 4 ¼ cups 19 ounces unbleached bread flour
- 1 ½ teaspoons .38 ounces salt
- 3 tablespoons 1.5 ounces sugar
- 2 teaspoons .22 ounce instant yeast
- 1 large 1.65 ounces egg, slightly beaten, at room temperature
- ¼ cup 2 ounces butter, margarine, or shortening, at room temperature, or vegetable oil
- 1 ½ cups 12 ounces buttermilk or whole milk, at room temperature
- 1 egg whisked with 1 teaspoon water until frothy, for egg wash (optional)
Instructions
-
Mix together the flour, salt, sugar, and yeast in a 4-quart bowl (or in the bowl of an electric mixer). Pour in the egg, butter, and milk and mix with a large metal spoon (or on low speed of the electric mixer with the paddle attachment) until all the flour is absorbed and the dough forms a ball. If the dough seems very stiff and dry, trickle in more milk until the dough is soft and supple.
-
Sprinkle flour on the counter, transfer the dough to the counter, and begin kneading (or mix on medium speed with the dough hook), adding more flour, if necessary, to create a dough that is soft, supple, and tacky but not sticky. Continue kneading (or mixing) for 6 to 8 minutes. (In the electric mixer, the dough should clear the sides of the bowl but stick ever to slightly to the bottom.) The dough should pass the windowpane test and register 80F. Lightly oil a large bowl and transfer the dough to the bowl, rolling it to coat it with oil. Cover the bowl with plastic wrap.
-
Ferment at room temperature for 1½ to 2 hours, or until the dough doubles in size (the length of time will depend on the room temperature).
-
Spray a 9 x 13 inch baking dish with olive oil. Remove the fermented dough from the bowl and divide it into eighteen 2-ounce pieces. Shape the pieces into tight rounds and place in baking dish. They should be close together but not touching – you want to give them room to rise. Mist the dough lightly with spray oil and cover with a towel or plastic wrap. Proof the dough at room temperature for 60 to 90 minutes, or until it nearly doubles in size.
-
Preheat the oven to 400F. Brush the rolls or buns with the egg wash.
-
Bake the buns for approximately 15 minutes, or until they are golden brown and register just above 180F in the center. Let cool for about 15 minutes before serving.