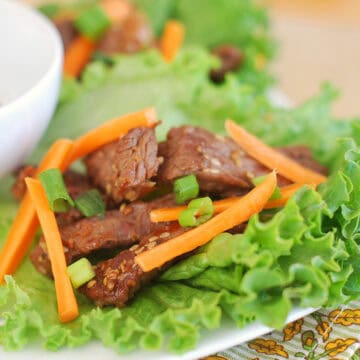
Honey Chipotle Turkey Meatballs are such a delicious and comforting dinner. Flavorful turkey meatballs in a sweet and spicy sauce.

So you know how I keep telling you guys that I suck at cooking dinner these days? Well I’m trying something new. I’m letting the boys each pick out a recipe every week so that they harass me until I eventually cook. I know, novel idea, cooking what my family wants and all. Anyway.
I sat both kids down in front of my Pinterest boards over the weekend and my 2 year old picked out these meatballs. (He also picked out the crinkle fries and corn on the cob. Smart kid.) Honey and chipotle is one of my favorite combinations and I knew it would be a hit with the boys as well. I did worry a little about the heat but I ended up using only 1 ½ chipotle peppers just to be safe.
They loved the meatballs, of course. Even the baby dug them! This was a quick and easy and definitely something I’ll be making again.
More Meatball Recipes
- Slow Cooker Salisbury Steak Meatballs
- Slow Cooker Cranberry Meatballs
- Thai Pork and Veggie Meatballs
- Slow Cooker Hawaiian Meatballs
- Pepper Jelly Meatballs
Make sure you subscribe to my email list to get all my new recipes delivered right to your inbox!
You can also follow me on Instagram, Facebook, or Pinterest for even more!
📖 Recipe
Honey Chipotle Turkey Meatballs

Ingredients
- 1 ½ pound ground turkey
- ½ yellow onion, diced small
- 2 garlic cloves, minced
- ½ teaspoon salt
- ¼ teaspoon black pepper
- 4 tablespoons honey
- 2-4 tablespoons chopped chipotle chiles in adobo sauce
- 4 teaspoons cider vinegar
- 1 tablespoon olive oil
Instructions
- Preheat oven to 375F.
- In a medium mixing bowl, combine the turkey, onion, garlic, salt, and black pepper. Use your hands to make sure it;s uniformly mixed but be careful not to overmix. Form into 16 golf ball-sized meatballs.
- Put a large ovenproof skillet over medium to medium-high heat and add the olive oil. Once it is shimmering, add the meatballs. Cook until they are browned on all sides, about 10 minutes. Move the skillet to the oven and bake for 5 minutes. Remove the pan from the oven and pour the sauce over the meatballs. Bake for another 5 minutes (swirling the pan at the halfway point), or until the sauce has reduced to glaze the meatballs and the meatballs are cooked through. Make sure not to overcook!
Recommended Products
As an Amazon Associate and member of other affiliate programs, I earn from qualifying purchases.
Nutrition Information:
Yield:
6Serving Size:
1Amount Per Serving: Calories: 396Total Fat: 23gSaturated Fat: 6gTrans Fat: 0gUnsaturated Fat: 14gCholesterol: 120mgSodium: 295mgCarbohydrates: 20gFiber: 3gSugar: 16gProtein: 30g