Happy Monday to you!
Today we’re talking holiday baking. Why? Because I was invited to visit the Unilever Test Kitchens in NYC week to participate in a holiday bake-off for I Can’t Believe It’s Not Butter!
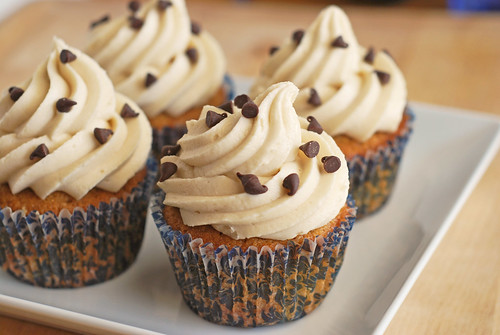
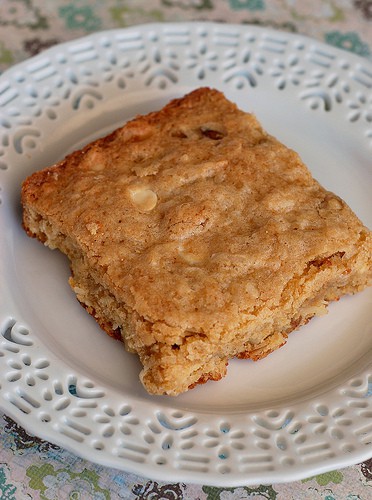
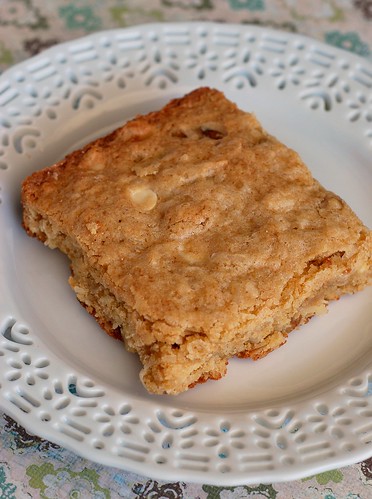
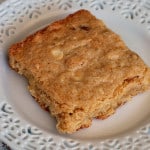
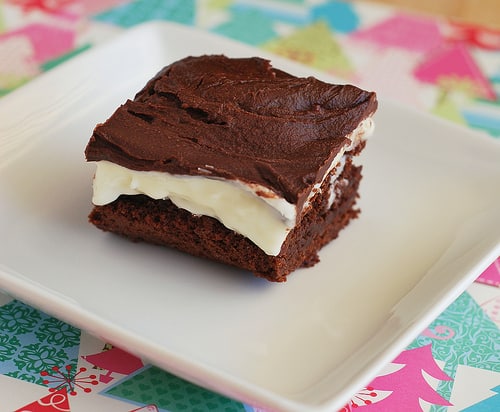
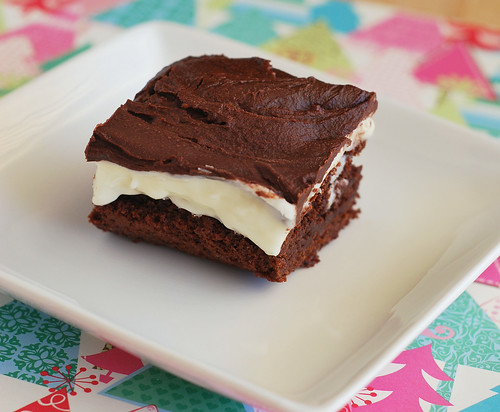
I had such trouble coming up with a recipe! I was dead set on white chocolate and peppermint because that screams holidays to me (thanks for Peppermint White Mochas from Starbucks) but the white chocolate just wasn’t working out for me and finally, after 3 failed batches of goodies, I gave up and switched to regular chocolate and made these delicious brownies. The filling is supposed to be like the filling of those York Peppermint Patties and seriously tastes just like it. Yum!
There’s a giveaway below the recipe so make sure you enter! Part of the competition is to get the most votes on this post so please, comment, comment, comment! :P
📖 Recipe
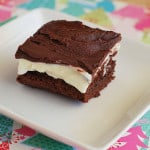
Peppermint Patty Brownies + Giveaway!
Ingredients
For the brownies:
- ½ cup 1 stick I Can’t Believe It’s Not Butter!
- 8 ounces semisweet chocolate finely chopped
- 1 cup sugar
- 3 eggs
- 1 teaspoon vanilla
- ¼ teaspoon salt
- ¾ cup all-purpose flour
For the peppermint patty:
- ¾ cup sweetened condensed milk
- 1 ½ teaspoons peppermint extract
- 3 cups powdered sugar
For the glaze:
- 5 ounces semi-sweet chocolate
- 2 tablespoons I Can’t Believe It’s Not Butter!
Instructions
-
Preheat oven to 350F. Line an 8 x 8 baking pan with aluminum foil and spray with oil.
-
To make brownies, in a double boiler or a heatproof boil set over a pot of simmering water, melt I Can’t Believe It’s Not Butter! and chocolate over low heat, stirring frequently. Once melted, pour over sugar in a mixing bowl. Stir to combine and to cool chocolate down. Add eggs and stir vigorously until everything is combined. Stir in vanilla and salt. Sift in flour and stir just until flour is incorporated.
-
Pour batter into prepared pan. Bake in preheated oven for 25 – 30 minutes or until a toothpick inserted into the center comes out clean. Allow to cool.
-
To make peppermint patty, use a mixer to combine sweetened condensed milk and extract. Mix in powdered sugar ½ cup at a time until combined. Spread on top of cooled brownies. Pop in fridge (or freezer) to allow the peppermint to set.
-
For the glaze, melt chocolate and I Can’t Believe It’s Not Butter! in a double boiler. Spread glaze over peppermint patty mixture. Put in fridge to set.
What about the giveaway? Oh yes.
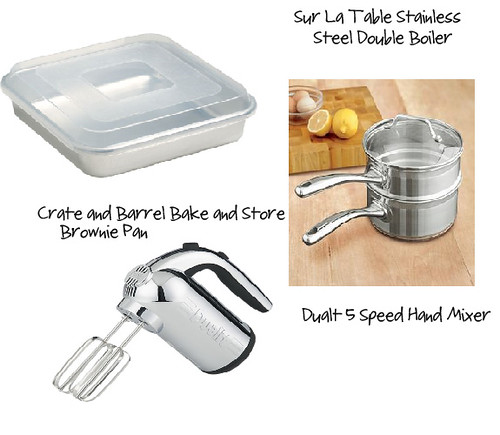
This awesome giveaway consists of:
Crate and Barrel Bake and Store Brownie Pan
Sur La Table Basics Stainless Steel Double Boiler
Dualt 5 Speed Chrome Hand Mixer
coupon for I Can’t Believe It’s Not Butter! product
To be entered to win, comment and let me know you’re favorite holiday treat. Leave a link if you want!
For extra entries:
- Like Fake Ginger on Facebook. Come back and leave another comment saying that you did. Also comment if you are already a fan.
- Follow I Can’t Believe It’s Not Butter on Twitter. Come back and leave another comment saying that you did. Also comment if you are already an ICBINB follower.
- Become a subscriber either by email or RSS of Fake Ginger. (Subscription form is at the very top of the page.) Leave another comment if you did that. Also comment if you are already a subscriber.
Giveaway is open to US residents only, sorry! The giveaway will close on Friday November 12 at 8 am Eastern.
In addition to this giveaway, I’m receiving an all-expenses paid trip to NYC and the Unilever Kitchens.
And the winner is!


Congrats Amy! You should have an email from me! :)