• Skip to primary navigation
  • Skip to main content
  • Skip to primary sidebar
  • Home
  • About
  • Recipes

Fake Ginger

menu icon
go to homepage
  • Recipe Index
  • About
  • Subscribe
    • Facebook
    • Instagram
    • Pinterest
  • subscribe
    search icon
    Homepage link
    • Recipe Index
    • About
    • Subscribe
    • Facebook
    • Instagram
    • Pinterest
  • ×
    Home » Page 29

    S’mores Frozen Hot Chocolate

    S’mores Frozen Hot Chocolate

    Aug 10, 2016

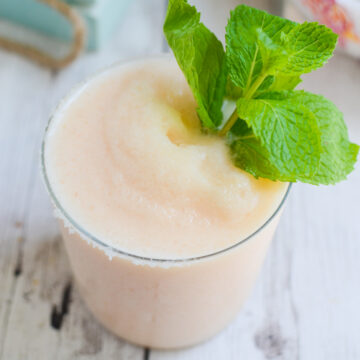
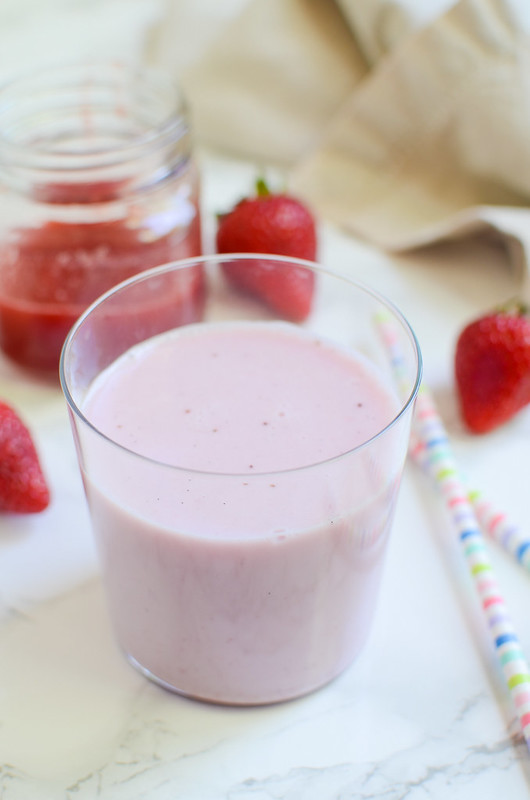
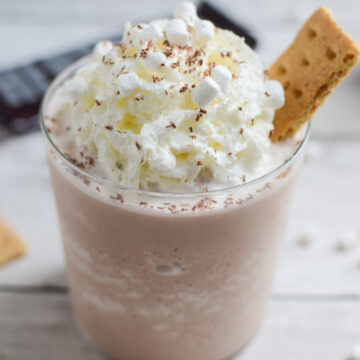
    S’mores Frozen Hot Chocolate is the best chocolate milkshake you’ll ever had! It’s made with hot chocolate powder and marshmallow sauce and topped with whipped cream, marshmallow bits, chocolate shavings, and a graham cracker.

    S'mores Frozen Hot Chocolate! You won't believe how delicious this is!

    Have you ever had a frozen hot chocolate? They are amazing and don’t even start with the, “Isn’t that just a chocolate shake?”

    NO.

    I used to think so, too, and then I tried one. It’s a hot chocolate. But frozen. And it will change your life.

    My original Frozen Hot Chocolate recipe is one of my most popular blog posts of all time and I knew I needed to transform it for s’mores week.

    And why mess with a great recipe too much? So I used that exact recipe to create this S’mores Frozen Hot Chocolate but I added in some marshmallow sauce!

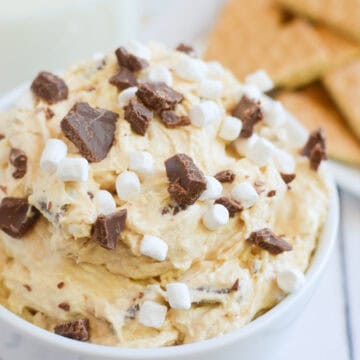
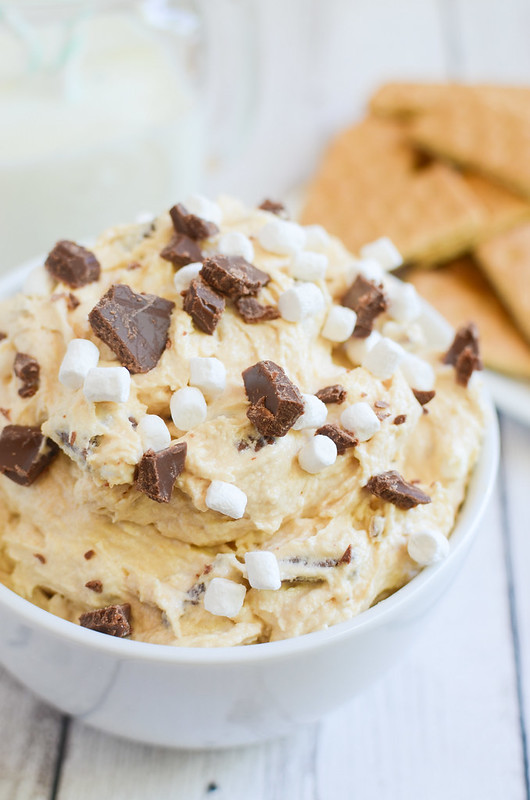
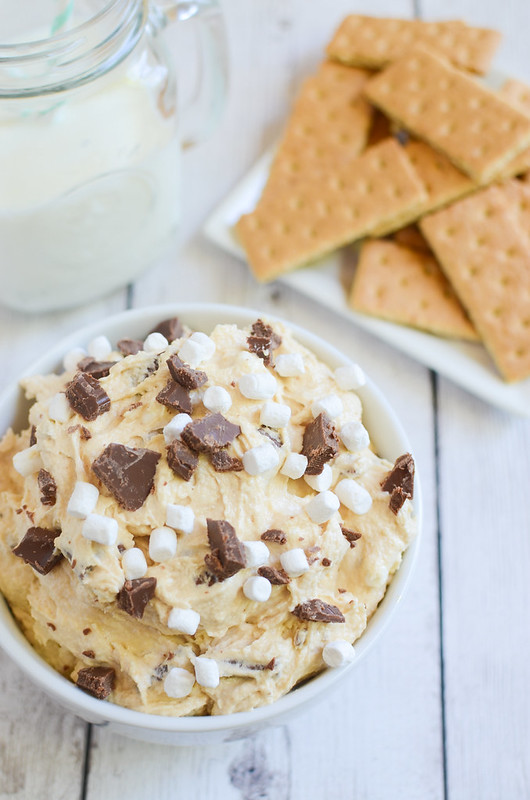
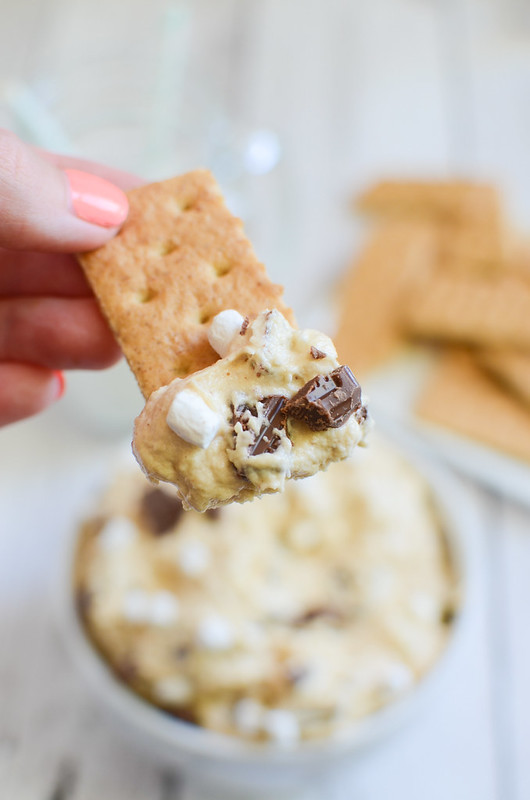
    So it’s like a hot chocolate and marshmallow milkshake! I didn’t want to risk weird graham cracker chunks so I just popped a piece of one on top of the shake. You could also crumble some on top of the whipped cream if that’s your thing.

    Seriously, if you haven’t had frozen hot chocolate yet, try it this weekend!

    S'mores Frozen Hot Chocolate! You won't believe how delicious this is!

    Ingredients

    • Milk – dairy or non-dairy, whatever you have in your fridge.
    • Hot chocolate mix – use your favorite kind. I used the kind without any added marshmallows or anything extra. You could play around with using different flavors!
    • Marshmallow sauce – this is with the sundae toppings in the grocery store.
    • Ice
    • Whipped cream – homemade, store-bought, Cool Whip. Whatever you like!
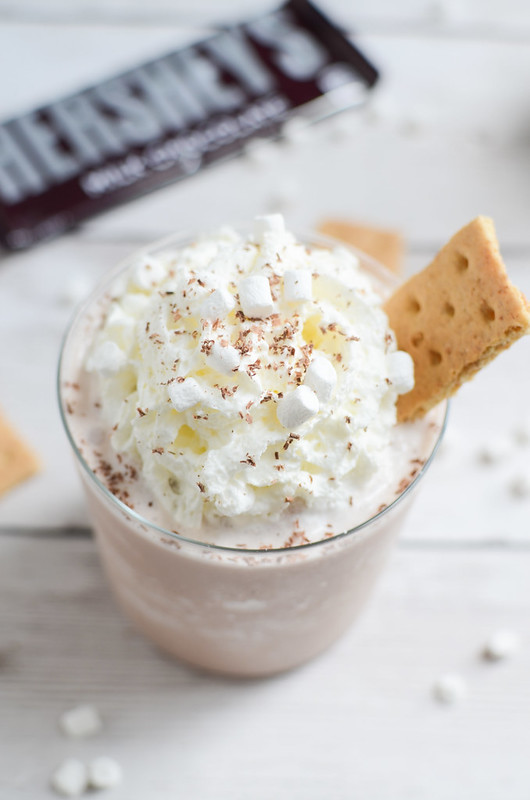
    • Chocolate – this is just for the shavings on top. I used a microplane and a regular Hershey’s bar.
    • Marshmallow bits – these are the tiny dehydrated marshmallows. Think Lucky Charms marshmallows but just normal marshmallow shape. They are with the normal marshmallows in my local grocery store. You can also order a big bag online.
    • Graham crackers – just for garnish.

    How To Make S’mores Frozen Hot Chocolate

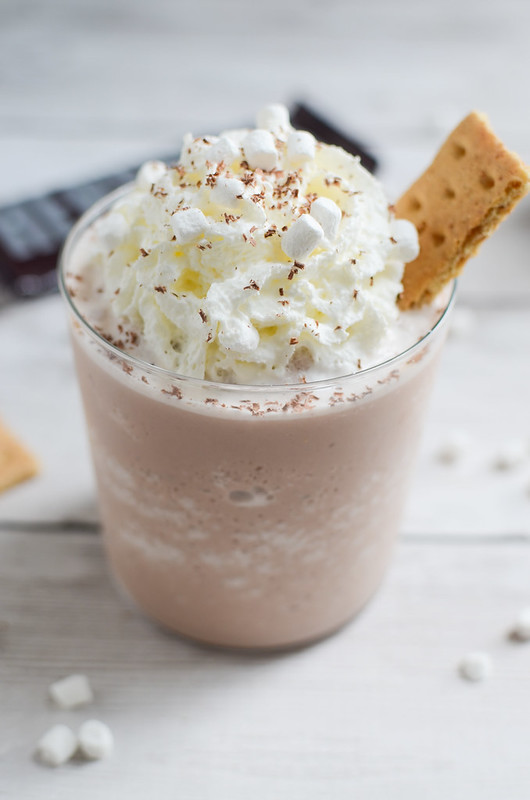
    • Make frozen hot chocolate. Combine milk, hot chocolate mix, marshmallow sauce, and ice in a blender and blend until smooth.
    • Transfer. Pour into a glass and top with whipped cream.
    • Top. Use a microplane to shave chocolate on top of the whipped cream and sprinkle with marshmallow bits. Top with graham cracker.

    More S’mores Recipes

    • S’mores Rice Krispies Treats
    • S’mores Campfire Cones
    • Doughnut S’mores
    • S’mores Ice Box Cake
    • Peanut Butter S’mores Dip

    Make sure you subscribe to my email list to get all my new recipes delivered right to your inbox!

    You can also follow me on Instagram, Facebook, or Pinterest for even more! 

    📖 Recipe

    Yield: 1 serving

    S’mores Frozen Hot Chocolate

    S’mores Frozen Hot Chocolate

    S'mores Frozen Hot Chocolate is the best chocolate milkshake you'll ever had! It's made with hot chocolate powder and marshmallow sauce and topped with whipped cream, marshmallow bits, chocolate shavings, and a graham cracker.

    Prep Time 5 minutes
    Total Time 5 minutes

    Ingredients

    • ¾ - 1 cup milk
    • 1 packet hot chocolate mix
    • 2 heaping tablespoons marshmallow sauce
    • 1 cup ice
    • whipped cream
    • chocolate, for topping
    • marshmallow bits, for topping
    • graham cracker, for topping

    Instructions

    1. Combine milk, hot chocolate mix, marshmallow sauce, and ice in a blender and blend until smooth.
    2. Pour into a glass and top with whipped cream. Use a microplane to shave chocolate on top of the whipped cream and sprinkle with marshmallow bits. Top with graham cracker.

    Recommended Products

    As an Amazon Associate and member of other affiliate programs, I earn from qualifying purchases.

    • Marshmallow Sauce
      Marshmallow Sauce
    • Marshmallow Bits
      Marshmallow Bits
    • My Favorite Blender
      My Favorite Blender

    Nutrition Information:

    Yield:

    1

    Serving Size:

    1

    Amount Per Serving: Calories: 431Total Fat: 12gSaturated Fat: 6gTrans Fat: 0gUnsaturated Fat: 5gCholesterol: 24mgSodium: 902mgCarbohydrates: 70gFiber: 4gSugar: 40gProtein: 12g

    Did you make this recipe?

    Tag me in your Instagram photo - @fakeginger

    © Amanda Livesay
    Cuisine: American / Category: frozen goodies

    Peanut Butter S’mores Dip

    Aug 09, 2016

    Peanut Butter S’mores Dip is the most delicious dessert dip! Peanut butter with chocolate and marshmallows. Serve with graham crackers for the ultimate s’mores experience!

    Peanut Butter S'mores Dip - the most delicious dessert dip! Peanut butter with chocolate and marshmallows! Serve with graham crackers for the ultimate s'mores experience!

    You know I love a dessert dip. It took me forever to come around on them but now I am all in.

    Invite me to your next party. I’m looking for an excuse to make s’more.

    Get it?

    I know, I’m sorry.

    Peanut Butter S’mores Dip has a peanut butter cream cheese base (think cream cheese frosting – yum!) and then it’s got chopped Hershey’s bars and those teeny tiny marshmallows mixed in. Sprinkle some more chocolate and marshmallows on top to make it pretty and then serve with graham crackers.

    Peanut Butter S'mores Dip - the most delicious dessert dip! Peanut butter with chocolate and marshmallows! Serve with graham crackers for the ultimate s'mores experience!

    Ingredients

    • Unsalted butter – make sure to bring it to room temperature before beginning.
    • Creamy peanut butter – you could use chunky if you want peanut chunks.
    • Brown sugar
    • Cream cheese – make sure to bring it to room temperature before beginning.
    • Powdered sugar – powdered sugar blends better than granulated sugar so make sure you are using powdered sugar.
    • Vanilla
    • Hershey’s bars – you could use any kind of milk chocolate that you like.
    • Marshmallow bits – these are the dehydrated tiny marshmallows. They’re with the normal marshmallows in my grocery store but you can also order a big bag online.
    • Graham crackers – for dipping. You could always use other cookies. I think animal crackers would be delicious!

    Instructions

    • Combine ingredients. In the bowl of a stand mixer fitted with a paddle attachment, beat butter, peanut butter, and brown sugar until light and fluffy. Add cream cheese and beat until mixture is smooth, scraping down the sides as necessarily. Slowly beat in powdered sugar, vanilla, and salt. Use a rubber spatula to fold in about ¾ of the chopped Hershey’s bars and ¾ of the marshmallow bits.
    • Add toppings. Sprinkle the remaining chocolate and marshmallows on top. Chill until ready to serve.
    • Serve. Serve with graham crackers.

    How Long Is It Good For?

    This dessert dip will be good for about 5 days in the fridge. Make sure to store it in an airtight container.

    I recommend letting it sit at room temperature for 10 – 15 minutes before serving so that it becomes dippable.

    What To Serve With It

    • Graham crackers
    • Apple slices
    • Animal crackers
    • Sliced strawberries
    • Vanilla wafers
    Peanut Butter S'mores Dip - the most delicious dessert dip! Peanut butter with chocolate and marshmallows! Serve with graham crackers for the ultimate s'mores experience!

    More S’mores Recipes

    • S’mores Cheesecake Bars
    • Doughnut S’mores
    • S’mores Monster Cookies
    • S’mores Frozen Yogurt

    Make sure you subscribe to my email list to get all my new recipes delivered right to your inbox!

    You can also follow me on Instagram, Facebook, or Pinterest for even more! 

    📖 Recipe

    Yield: 12 servings

    Peanut Butter S’mores Dip

    Peanut Butter S’mores Dip

    Peanut Butter S'mores Dip is the most delicious dessert dip! Peanut butter with chocolate and marshmallows. Serve with graham crackers for the ultimate s'mores experience!

    Prep Time 10 minutes
    Total Time 10 minutes

    Ingredients

    • ½ cup 1 stick unsalted butter, softened
    • ½ cup creamy peanut butter
    • ½ cup brown sugar
    • 1 8-ounce block cream cheese, softened
    • 1 cup powdered sugar
    • 1 teaspoon vanilla
    • pinch salt
    • 1 cup chopped Hershey's bars, divided
    • 1 cup marshmallow bits
    • graham crackers, for serving

    Instructions

    1. In the bowl of a stand mixer fitted with a paddle attachment, beat butter, peanut butter, and brown sugar until light and fluffy. Add cream cheese and beat until mixture is smooth, scraping down the sides as necessarily. Slowly beat in powdered sugar, vanilla, and salt. Use a rubber spatula to fold in about ¾ of the chopped Hershey's bars and ¾ of the marshmallow bits.
    2. Sprinkle the remaining chocolate and marshmallows on top. Chill until ready to serve. Serve with graham crackers.

    Recommended Products

    As an Amazon Associate and member of other affiliate programs, I earn from qualifying purchases.

    • Electric Mixer
      Electric Mixer
    • Marshmallow Bits
      Marshmallow Bits

    Nutrition Information:

    Yield:

    12

    Serving Size:

    1

    Amount Per Serving: Calories: 281Total Fat: 20gSaturated Fat: 10gTrans Fat: 0gUnsaturated Fat: 8gCholesterol: 39mgSodium: 134mgCarbohydrates: 25gFiber: 1gSugar: 21gProtein: 4g

    Did you make this recipe?

    Tag me in your Instagram photo - @fakeginger

    © Amanda Livesay
    Cuisine: American / Category: snack

    Paleo Korean Beef Bowls

    Aug 05, 2016

    Paleo Korean Beef Bowls is a delicious 20 minute meal! Spicy and sweet beef served over cauliflower rice! 

    Paleo Korean Beef Bowls - delicious 20 minute meal! Spicy and sweet beef served over cauliflower rice!

    I love all things sweet and spicy. This sweet and spicy Paleo Korean beef is inspired by Korean bulgogi which is a slightly sweet and slightly spicy beef dish. This is a much quicker way to do it, using ground beef that cooks in just a few minutes

    This dish comes together in about 20 minutes. While I’m cooking, I put a bag of microwavable cauliflower rice in to cook and pull out whatever leftover veggies I have in my fridge. It’s one of my favorite easy weeknight meals. 

    Paleo Korean Beef Bowls - delicious 20 minute meal! Spicy and sweet beef served over cauliflower rice!

    Ingredients

    • Coconut aminos – you can use soy sauce if not paleo.
    • Honey – for just a hint of sweetness to balance out the spice.
    • Sesame oil
    • Garlic
    • Fresh ginger – you can use ground ginger if you don’t have fresh.
    • Green onions – the white of the green onions are going in the sauce and the green parts are for garnish.
    • Chili paste – such as sambal oelek. If you aren’t paleo, you can use gochujang instead to make it more authentic. It does contain sugar (and some have wheat) so it’s not a paleo ingredient.
    • Ground beef – you can use ground turkey or chicken if you prefer.
    • Toasted sesame seeds –
    • Cauliflower rice – or regular rice if not paleo.
    • Broccoli florets – you could do green beans if you prefer.

    How To Make Paleo Korean Beef

    • Make sauce. Stir together coconut aminos, honey, sesame oil, garlic, ginger, white parts of scallions, pepper, and chili paste.
    • Cook beef. Heat cooking oil over medium-high heat in a skillet; cook ground beef, breaking it up as it cooks.
    • Combine. Once beef is cooked, add sauce and simmer until thickened, about 4 minutes
    • Serve. Serve topped with sesame seeds and sliced green onions

    How Long Is Korean Beef Good For?

    This Paleo Korean Beef is good for up to 3 – 4 days when stored in an airtight container in the refrigerator. I would keep it separate from the cauliflower rice (if using) or the cauliflower will absorb all of the sauce. 

    Can You Freeze Korean Beef?

    Yes, you can definitely freeze this Paleo Korean Beef. Make sure to wrap it tightly or use a ziploc bag with all the air squeezed out of it. Consume within 3 months.

    When you are ready to serve, defrost in the fridge overnight and reheat in the microwave.

    More Paleo Recipes

    • Paleo Sloppy Joes
    • Paleo Apple Pie Ice Cream
    • Paleo Chocolate Chip Cookies
    • Chipotle Shrimp Jicama Tacos with Pineapple Salsa

    Make sure you subscribe to my email list to get all my new recipes delivered right to your inbox!

    You can also follow me on Instagram, Facebook, or Pinterest for even more! 

    📖 Recipe

    Yield: 4 servings

    Paleo Korean Beef Bowls

    Paleo Korean Beef Bowls

    Paleo Korean Beef Bowls is a delicious 20 minute meal! Spicy and sweet beef served over cauliflower rice! 

    Prep Time 10 minutes
    Cook Time 20 minutes
    Total Time 30 minutes

    Ingredients

    • ⅓ cup coconut aminos (or soy sauce if not paleo)
    • 2 ½ tablespoons honey
    • 2 tablespoons sesame oil
    • 3 garlic cloves, minced
    • 1 tablespoon grated fresh ginger
    • 1 bunch green onions, chopped, white and green parts separated
    • ½ teaspoon black pepper
    • ½ teaspoon chili paste
    • 2 tablespoons cooking oil
    • 1 ½ pounds ground beef
    • 1 tablespoon toasted sesame seeds
    • 3 - 4 cups cauliflower rice (or regular rice if not paleo)
    • 1 pound broccoli florets, steamed

    Instructions

    1. In a small bowl, stir together the coconut aminos, honey, sesame oil, garlic, ginger, white green onion parts, pepper, and chili paste.
    2. In a large skillet set over medium-high heat, heat the cooking oil. Brown the meat for 5 to 8 minute, break it up with a spatula as it cooks. Continue cooking until the meat is no longer pink. Add the sauce to the skillet, bringing it to a quick boil, and then reduce the heat to low. Cover and simmer for about 4 minutes.
    3. Serve warm, sprinkle with the green onion tops and sesame seeds over the cauliflower rice with steamed broccoli on the side.

    Recommended Products

    As an Amazon Associate and member of other affiliate programs, I earn from qualifying purchases.

    • Meat Chopper
      Meat Chopper
    • Coconut Aminos
      Coconut Aminos

    Did you make this recipe?

    Tag me in your Instagram photo - @fakeginger

    © Amanda Livesay
    Category: beef

    Cantaloupe Coconut Margaritas

    Aug 04, 2016

    Cantaloupe Coconut Margarita is your new favorite frozen summer cocktail! It has fresh cantaloupe, coconut milk, lime juice, and tequila. It’s the perfect mix of a margarita and a tropical cocktail.

    Cantaloupe Coconut Margarita - your new favorite frozen summer cocktail! Fresh cantaloupe, coconut milk, lime juice, and tequila!

    I’m having a major thing with coconut milk right now.

    I make sunshine sauce at least once a day, usually for breakfast, with sweet potato noodles and ground turkey and it’s amazing and delicious and then I crave coconut milk all day long.

    So, of course, I love a margarita made with coconut milk.

    This one has the coconut milk, plus cantaloupe, fresh lime juice, tequila, and orange liqueur.

    And you know that I don’t love a frozen drink but I do love a really tropical tasting frozen drink. And this one fits the bill. I’d never had a cantaloupe drink before this and it really reminded me more of a pina colada than a margarita. So delicious and it’s going to be my official summer frozen drink.

    frozen cantaloupe coconut margarita with salt on the rim and a fresh mint garnish

    Ingredients

    • Cantaloupe – try to make this when cantaloupe is in season and the melons are really sweet. If you get one that’s not sweet, you can always add a splash of simple syrup.
    • Fresh lime juice – you can use the bottled lime juice if you already have it on hand.
    • Coconut milk – you can use lite coconut milk to try to make it a little lighter if you want.
    • Tequila – use your favorite brand. I would use a clear one and not a gold one.
    • Orange liqueur – use your favorite brand. I always just use a cheap triple sec.
    • Ice
    • Fresh mint – you can skip the garnish but it makes the drink really pretty.

    How To Make Coconut Cantaloupe Margaritas

    • Blend. In a blender, combine cantaloupe, lime juice, coconut milk, tequila, and triple sec. Blend until smooth.
    • Add ice.
    • Add enough ice to reach desired consistency and blend.
    • Serve. Pour into 2 glasses and garnish with fresh mint.

    More Margarita Recipes

    • Blue Margaritas
    • Skinny Kiwi Margaritas 
    • Raspberry Margaritas
    • Frozen Prickly Pear Margaritas
    • Mango Margaritas

    Make sure you subscribe to my email list to get all my new recipes delivered right to your inbox!

    You can also follow me on Instagram, Facebook, or Pinterest for even more! 

    📖 Recipe

    Yield: 2 servings

    Cantaloupe Coconut Margaritas

    Cantaloupe Coconut Margaritas

    Cantaloupe Coconut Margarita is your new favorite frozen summer cocktail! It has fresh cantaloupe, coconut milk, lime juice, and tequila. It's the perfect mix of a margarita and a tropical cocktail.

    Prep Time 10 minutes
    Total Time 10 minutes

    Ingredients

    • 2 cups cantaloupe (coarsely chopped)
    • ¼ cup fresh lime juice
    • ½ cup coconut milk
    • 4 ounces tequila
    • 2 ounces orange liqueur
    • ice
    • fresh mint (for garnish)

    Instructions

    In a blender, combine cantaloupe, lime juice, coconut milk, tequila, and triple sec. Blend until smooth. Add enough ice to reach desired consistency and blend. Pour into 2 glasses and garnish with fresh mint.

    Recommended Products

    As an Amazon Associate and member of other affiliate programs, I earn from qualifying purchases.

    • Stimless Margarita Glasses
      Stimless Margarita Glasses
    • Margarita Salt
      Margarita Salt
    • My Favorite Blender
      My Favorite Blender

    Nutrition Information:

    Yield:

    2

    Serving Size:

    1

    Amount Per Serving: Calories: 393Total Fat: 12gSaturated Fat: 11gTrans Fat: 0gUnsaturated Fat: 1gCholesterol: 0mgSodium: 37mgCarbohydrates: 25gFiber: 2gSugar: 20gProtein: 3g

    Did you make this recipe?

    Tag me in your Instagram photo - @fakeginger

    © Amanda Livesay
    Cuisine: Mexican / Category: drink

    Homemade Strawberry Milk

    Aug 03, 2016

    Homemade Strawberry Milk - make a homemade version of your childhood fave! So easy and so delicious!

    Homemade Strawberry Milk - make a homemade version of your childhood fave! So easy and so delicious!

    📖 Recipe

    Homemade Strawberry Milk

    Homemade Strawberry Milk

    Ingredients

    • 2 pounds strawberries stems removed and quartered
    • ½ cup sugar
    • ¼ cup water

    For serving:

    • Milk

    Instructions

    1. In a pan over medium heat, combine strawberries, sugar, and water. Simmer for about 10 minutes, until the strawberries have softened and released a lot of their juices. Remove from heat and cool completely.
    2. Strain mixture through a fine mesh sieve, using a rubber spatula to press down strawberries to make sure you get all the syrup. Discard solids. Chill syrup for at least an hour before making strawberry milk.
    3. To make strawberry milk, add ¼ cup syrup to 8 ounces of cold milk. Stir to combine.
    4. Store syrup in refrigerator for up to one week.

    Recommended Products

    As an Amazon Associate and member of other affiliate programs, I earn from qualifying purchases.

    • Mesh Strainer
      Mesh Strainer

    Did you make this recipe?

    Tag me in your Instagram photo - @fakeginger

    © Amanda Livesay

    New Orleans Trip Recap

    Aug 02, 2016

    What to Eat in New Orleans - the favorites of a frequent New Orleans traveler!

    I’m finally getting around to talking about the roadtrip the boys and I took back in June.

    I know, get your life together, Amanda.

    I’ve been struggling with talking about more personal stuff because part of me felt like I’d been lying to you guys since January. And yay, now you know, and we can go back to me telling you way too much about my life.

    (PS, Yes, we are in the process of divorce. I’ll tell you why I haven’t left Fort Hood soon. And I’ll start responding to all the emails I received about that post soon, I promise. My life has been a mess for the past 6 months and I’m forever behind on everything. But thank you for all the kind emails. They mean more than I can say.)

    So, yeah, New Orleans! My favorite aunt and uncle and cousins live right outside of New Orleans and now that I’m within a day drive, it’s been nice to be able to escape there. If I didn’t have so many dogs, I’d be there right now.

    …

    Read More

    Loaded Cauliflower Mac and Cheese

    Aug 01, 2016

    Loaded Cauliflower Mac and Cheese – cauliflower tossed in a delicious paleo cheese sauce and topped with bacon. Get your mac and cheese fix without the guilt! 

    Loaded Cauliflower Mac and Cheese - cauliflower tossed in a delicious paleo cheese sauce and topped with bacon. Get your mac and cheese fix without the guilt!

    Heeeey guys! Happy Monday!

    I discovered that Crazy Ex-Girlfriend is now on Netflix and umm, it changed my life. You guys. No one told me that it’s a musical series.

    A musical!

    Anyway, it’s really good and I’m not gonna tell you how many episodes I watched while I was catching up on some work that I’m waaaay behind on.

    Loaded Cauliflower Mac and Cheese - cauliflower tossed in a delicious paleo cheese sauce and topped with bacon. Get your mac and cheese fix without the guilt!

    How To Make Loaded Cauliflower Mac and Cheese!

    It’s not really mac and cheese, I know. But when you’re doing the paleo thing, this works. I grilled up some chicken thighs and threw them on top and called it dinner several nights in a row. But it’s also an excellent side dish!

    Wait, Amanda, you can’t have cheese when you’re paleo.

    The sauce calls for nutritional yeast which has a cheesy quality and is also really good for you.

    Steps for making Loaded Cauliflower Mac and Cheese:

    • Cook bacon in a large skillet until crispy; remove bacon and drain off most of the fat
    • While bacon is cooking, steam cauliflower florets in microwave
    • Once the cauliflower is cooked, transfer it to the pan with the bacon fat. 
    • Add full-fat canned coconut milk, nutritional yeast, salt, and black pepper
    • Stir in half the bacon
    • Transfer to serving platter and sprinkle with remaining bacon and fresh chives

    More Cauliflower Recipes

    • Dirty Cauliflower Rice
    • Mexican Cauliflower Rice

    Make sure you subscribe to my email list to get all my new recipes delivered right to your inbox!

    You can also follow me on Instagram, Facebook, or Pinterest for even more! 

    📖 Recipe

    Yield: 4 - 6 servings

    Loaded Cauliflower Mac and Cheese

    Loaded Cauliflower Mac and Cheese

    from Fed & Fit

    Prep Time 15 minutes
    Cook Time 30 minutes
    Total Time 45 minutes

    Ingredients

    • ½ pound bacon, thinly sliced
    • 2 heads cauliflower
    • ½ cup full-fat coconut milk
    • ½ cup nutritional yeast
    • ½ teaspoon sea salt
    • ¼ teaspoon ground black pepper
    • 1 teaspoon finely chopped fresh chives

    Instructions

    1. In a wide soup pot or heavy-bottomed saucepan, cook the bacon over medium-high heat until crispy. Using a slotted spoon, scoop the bacon into a bowl. Drain off most of the fat remaining in the pan, but don't wipe the pan down.
    2. While the bacon is cooking, cut the cauliflower florets away from the stems. (You should have 6 cups of florets.) Steam the cauliflower by placing the cauliflower in a large microwavable bowl with ¼ cup water. Cover and microwave on high for 5 minutes, or until the cauliflower is fork tender.
    3. Transfer the steamed cauliflower to the pot you used to cook the bacon. Add the remaining ingredients, except the chives, and stir to combine. Stir in half of the bacon and transfer to a serving dish. Garnish with the remaining bacon and the chives. Serve warm.

    Recommended Products

    As an Amazon Associate and member of other affiliate programs, I earn from qualifying purchases.

    • Nutritional Yeast
      Nutritional Yeast

    Nutrition Information:

    Yield:

    4

    Serving Size:

    1

    Amount Per Serving: Calories: 442Total Fat: 28gSaturated Fat: 12gTrans Fat: 0gUnsaturated Fat: 14gCholesterol: 56mgSodium: 1276mgCarbohydrates: 20gFiber: 11gSugar: 6gProtein: 33g

    Did you make this recipe?

    Tag me in your Instagram photo - @fakeginger

    © Amanda Livesay
    Category: Sides


    Grilled Lemon Thyme Pork Chops with Peaches

    Jul 28, 2016

    Grilled Lemon Thyme Pork Chops with Peaches is a delicious and easy way to cook pork chops! Pork chops and peaches marinated in a lemon thyme marinade and grilled to perfection. Ready in 20 minutes!

    Grilled Lemon Thyme Pork Chops with Peaches - delicious and easy way to cook pork chops! Pork chops and peaches marinated in a lemon thyme marinade and grilled to perfection. Ready in 20 minutes!

    Happy almost Friday, guys!

    I’ve got the urge to get out of town this weekend but I have too many dogs and too many kids to just pick up and leave. So I’m probably going to settle for lying in a beach chair in my backyard and watching all of season 5 of New Girl.

    Aaaaaand I bought a new grill this week so I’ll probably grill every meal. I’m pretty excited about that.

    Grilled Lemon Thyme Pork Chops with Peaches

    I’m really into grilling fruit if you didn’t already know. If I bring fruit into my house right now, it’s going on the grill.

    So, of course, when I decided to grill these beautiful chops, I also needed to grill some fruit and peaches are so juicy and delicious right now!

    You just need to make one marinade for both the pork chops and the peaches. It’s really simple – just olive oil, lemon juice, fresh thyme, and salt and pepper. Marinate the pork chops and the peaches in separate containers and then throw them on the grill!

    Pork chops typically take 6 – 9 minutes per side, depending on the thickness of the chops. The peaches just take a couple minutes to soften up and get those grill marks.

    This was a super quick and super easy weeknight meal. I roasted some asparagus in the oven while I was grilling and we were good to go in less than 30 minutes.

    Grilled Lemon Thyme Pork Chops with Peaches - delicious and easy way to cook pork chops! Pork chops and peaches marinated in a lemon thyme marinade and grilled to perfection. Ready in 20 minutes!

    More Grilling Recipes

    • Rosemary Ranch Chicken Kabobs
    • Grilled Ginger-Sesame Pork Chops with Pineapple and Scallions
    • Grilled Bacon-Wrapped Jalapeno Poppers
    Grilled Lemon Thyme Pork Chops with Peaches - delicious and easy way to cook pork chops! Pork chops and peaches marinated in a lemon thyme marinade and grilled to perfection. Ready in 20 minutes!

    Make sure you subscribe to my email list to get all my new recipes delivered right to your inbox!

    You can also follow me on Instagram, Facebook, or Pinterest for even more! 

    📖 Recipe

    Yield: 4 servings

    Grilled Lemon Thyme Pork Chops with Peaches

    Grilled Lemon Thyme Pork Chops with Peaches

    Ingredients

    • 2 tablespoons olive oil
    • 2 tablespoons fresh lemon juice
    • 2 tablespoons chopped fresh thyme
    • salt and pepper
    • 1 pound Smithfield All Natural Bone-in Pork Chops
    • 1 peach, pitted and sliced

    Instructions

    1. In a bowl, whisk together olive oil, fresh lemon juice, fresh thyme, and salt and pepper.
    2. Put pork chops in a shallow dish, drizzle about ¾ of the olive oil mixture over them.
    3. In a separate bowl, drizzle the remaining olive oil mixture over the peaches; toss to coat.
    4. Add everything to pre-heated grill. Grill peaches until tender, just a couple minutes on each side. Grill the chops 6 - 9 minutes on each side, until pork reaches an internal temperature of 145F.

    Notes

    If you love your pork medium rare, you should cook it to an internal temperature of 145 degrees (followed by a three-minute rest). If you like your chops a little more done, you can cook them to an internal temperature of 160 degrees.

    Nutrition Information:

    Yield:

    4

    Serving Size:

    1

    Amount Per Serving: Calories: 317Total Fat: 19gSaturated Fat: 5gTrans Fat: 0gUnsaturated Fat: 12gCholesterol: 95mgSodium: 137mgCarbohydrates: 5gFiber: 1gSugar: 4gProtein: 30g

    Did you make this recipe?

    Tag me in your Instagram photo - @fakeginger

    © Amanda Livesay
    Cuisine: American / Category: pork

    Grilled Stuffed Peppers

    Jul 02, 2016

    Grilled Stuffed Peppers – quick and healthy dinner! Stuffed with ground turkey, rice, fresh corn, and zucchini!

    Grilled Stuffed Peppers - quick and healthy dinner! Stuffed with ground turkey, rice, fresh corn, and zucchini!

    Big news, guys!

    I have figured out how to turn my grill on!

    Yep, had that grill for, like, 6 years and I just now figured out how to work it.

    Next challenge: the smoker.

    Anyway, I haven’t stopped using it since I figured it out. I’m obsessed.

    How To Make Grilled Stuffed Peppers

    • Heat olive oil in a large skillet over medium heat
    • Cook ground turkey, diced onion, and diced zucchini until turkey is cooked through
    • Add corn and garlic and cook another minutes
    • Stir in rice, marinara, and chicken broth
    • Simmer for 3 – 4 minutes, until most of the liquid has been absorbed
    • Spoon the mixture into the halved bell peppers
    • Grill for about 10 minutes over indirect heat, until the peppers are tender
    • Sprinkle with cheese and continue grilling just until cheese is melted
    • Sprinkle with cilantro before serving

    Easy, easy, easy! And filled with things that are good for you!

    Grilled Stuffed Peppers - quick and healthy dinner! Stuffed with ground turkey, rice, fresh corn, and zucchini!

    How Long Are Grilled Stuffed Peppers Good For?

    Grilled stuffed peppers will be good for up to 3 – 4 days in the refrigerator. Make sure to cover them tightly before storing. 

    Can You Freeze Grilled Stuffed Peppers?

    Yes, you can freeze these grilled stuffed peppers! Allow them to cool completely before freezing. 

    Make sure the container you use is airtight and consume the peppers within 3 months. Defrost in the fridge overnight before reheating and serving. 

    Grilled Stuffed Peppers - quick and healthy dinner! Stuffed with ground turkey, rice, fresh corn, and zucchini!

    More Grilling Recipes

    • Grilled Corn and Avocado Salad
    • Grilled Lemon Thyme Pork Chops with Peaches
    • Grilled Tequila Steak Pizza
    • Pineapple Jerk Grilled Pork Tenderloin

    Make sure you subscribe to my email list to get all my new recipes delivered right to your inbox!

    You can also follow me on Instagram, Facebook, or Pinterest for even more! 

    📖 Recipe

    Yield: 4 servings

    Grilled Stuffed Peppers

    Grilled Stuffed Peppers
    Prep Time 10 minutes
    Cook Time 20 minutes
    Total Time 30 minutes

    Ingredients

    • 1 teaspoon olive oil
    • 1 pound ground turkey
    • 1 onion, diced
    • 1 zucchini, diced
    • 1 cup fresh corn
    • 2 cloves garlic, minced
    • 1 cup white rice, cooked
    • ½ cup marinara sauce
    • ½ cup chicken broth
    • salt and pepper, to taste
    • 4 bell peppers, split in half and seeds and ribs removed
    • ½ cup cheddar, shredded
    • cilantro, optional, for serving

    Instructions

    1. Heat olive oil in a large skillet over medium heat. Add turkey, onion, and zucchini and cook until turkey is cooked through and onion is translucent, stirring frequently to break up meat. Add corn and garlic and cook another minute. Stir in rice, marinara, and chicken broth. Bring to a low simmer and let cook 3 - 4 minutes, until most of the liquid has been absorbed. Season with salt and pepper to taste.
    2. Spoon them mixture into the halved bell peppers.
    3. Grill for about 10 minutes over indirect heat, until the peppers are tender. Sprinkle with cheese and continue grilling just until cheese is melted.
    4. Sprinkle with cilantro, if desired.

    Recommended Products

    As an Amazon Associate and member of other affiliate programs, I earn from qualifying purchases.

    • Meat Chopper
      Meat Chopper

    Nutrition Information:

    Yield:

    4

    Serving Size:

    1

    Amount Per Serving: Calories: 549Total Fat: 30gSaturated Fat: 9gTrans Fat: 0gUnsaturated Fat: 17gCholesterol: 145mgSodium: 536mgCarbohydrates: 34gFiber: 4gSugar: 8gProtein: 39g

    Did you make this recipe?

    Tag me in your Instagram photo - @fakeginger

    © Amanda Livesay
    Cuisine: American / Category: chicken

    Monster Trail Mix

    Jun 17, 2016

    Monster Trail Mix is an easy and delicious snack idea! Pretzels, peanuts, raisins, chocolate chips, peanut butter chips, and M&Ms.

    Monster Trail Mix - the ultimate roadtrip snack mix! Pretzels, chocolate chips, peanut butter chips, raisins, peanuts, and M&Ms!

    Are you loving summer?

    I’m loving summer. This has been the best summer of my life and we’re only a few weeks in. My kids are all at really good ages for outdoorsy things right now and we’re just really loving everything central Texas has to offer.

    Plus, we’re counting down the days to our next roadtrip!

    Wait. Another roadtrip with 3 boys and a dog?

    Amanda, are you crazy?

    Maybe.

    Monster Trail Mix - the ultimate roadtrip snack mix! Pretzels, chocolate chips, peanut butter chips, raisins, peanuts, and M&Ms!

    In honor of summer and roadtrips, I made our favorite roadtrip snack. I make this pretty much every time we travel. It’s the ultimate snack mix because it has sweet and salty, crunchy and chewy, everything you could want while on a forever long car ride.

    You just toss together pretzels, chocolate chips, peanut butter chips, raisins, peanuts, and M&Ms. Super easy and much cheaper than buying a bag of premade trail mix.

    I separate the mix into small snack size bags so that when someone starts complaining about being hungry/bored/tired of being in the car, I can just toss a bag to them.

    Monster Trail Mix - the ultimate roadtrip snack mix! Pretzels, chocolate chips, peanut butter chips, raisins, peanuts, and M&Ms!

    Make sure you subscribe to my email list to get all my new recipes delivered right to your inbox!

    You can also follow me on Instagram, Facebook, or Pinterest for even more! 

    📖 Recipe

    Yield: about 8 servings

    Monster Trail Mix

    Monster Trail Mix

    Monster Trail Mix is an easy and delicious snack idea! Pretzels, peanuts, raisins, chocolate chips, peanut butter chips, and M&Ms.

    Prep Time 10 minutes
    Total Time 10 minutes

    Ingredients

    • 2 cups small pretzels
    • 1 cup milk chocolate chips
    • 1 cup peanut butter chips
    • 1 cup dry roasted salted peanuts
    • 1 cup M&Ms
    • 1 cup raisins

    Instructions

    1. Place all ingredients in a large bowl and gently toss to combine.
    2. Store in airtight container.

    Recommended Products

    As an Amazon Associate and member of other affiliate programs, I earn from qualifying purchases.

    • Mixing Bowls
      Mixing Bowls
    • Peanut Butter Chips
      Peanut Butter Chips

    Nutrition Information:

    Yield:

    8

    Serving Size:

    1

    Amount Per Serving: Calories: 564Total Fat: 28gSaturated Fat: 12gTrans Fat: 0gUnsaturated Fat: 13gCholesterol: 9mgSodium: 317mgCarbohydrates: 70gFiber: 5gSugar: 48gProtein: 13g

    Did you make this recipe?

    Tag me in your Instagram photo - @fakeginger

    © Amanda Livesay
    Cuisine: American / Category: snack

    Lemon Meringue Pie Bars

    Jun 13, 2016

    Lemon Meringue Pie Bars – buttery shortbread crust with tart lemon filling, topped with fluffy toasted meringue! 

    Lemon Meringue Pie Bars - buttery shortbread crust with tart lemon filling, topped with fluffy toasted meringue!


    Happy Monday!

    I hope your weekend was fabulous. I spent mine recovering from our roadtrip.

    You guys, we drove through Houston when it was still raining. It was the scariest thing I’ve ever done. And OF COURSE I’d planned to stop at a doughnut place and was dumb enough to get off the interstate because it didn’t click in my pea-sized brain that Houston was flooded.

    Survived that, got back on the interstate, and the freakin’ interstate was flooded.

    I spent a solid 2 hours in Houston trying to figure out how I was going to save all 3 kids and the dog if the Jeep got swept away.

    No, I don’t overreact. Why do you ask?

    I don’t recommend coming to Texas until it’s done raining. Just stay away. Not a good situation.

    …

    Read More

    Weekend in Salt Lake City – Girls Trip to Salt Lake City

    Jun 10, 2016

    Salt Lake City Temple

    Okay guys, finally.

    I’ve been meaning to put this post up since I got home from Salt Lake City but my life has been crazy.

    So last month I traveled to SLC for Everything Food Conference, which is a fabulous food blogging conference that I definitely recommend if you’re into that sort of thing.

    I say that I went for the conference but the reality is that I mostly went to hang out with Nicole because it’s been FOUR YEARS since we’ve seen each other.

    Anyway, I thought I would share some of my faves from my weekend there. Places to eat, where to stay, where to get tattoos, the usual.

    …

    Read More

    Chocolate Chip Pizookie

    Jun 07, 2016

    Chocolate Chip Pizookie is chocolate chip cookie dough baked in a skillet and topped with vanilla ice cream! Just serve it in the skillet and let everyone dig in! 

    Chocolate Chip Pizookie - chocolate chip cookie dough baked in a skillet and topped with vanilla ice cream! Just serve it in the skillet and let everyone dig in!

    I love a giant chocolate chip cookie. Either a chocolate chip cookie cake or a hot, fresh from the oven chocolate chip pizookie topped with vanilla ice cream.

    Give me all the huge chocolate chip cookies. 

    This is such an easy recipe and cleanup is minimal since I just hand everyone a spoon and serve it right in the cast iron skillet. 

    The outside of the pizookie gets browned and crispy and the inside stays soft, a little bit gooey, and so delicious. I love everything about this pizookie. 

    Chocolate Chip Pizookie - chocolate chip cookie dough baked in a skillet and topped with vanilla ice cream! Just serve it in the skillet and let everyone dig in!

    Ingredients

    • All-purpose flour
    • Baking soda
    • Salt
    • Butter
    • Granulated sugar
    • Brown sugar
    • Vanilla
    • Eggs
    • Semisweet chocolate chips
    • Vanilla ice cream

    How To Make A Pizookie

    • Whisk together flour, baking soda, and sat
    • Beat together butter, granulated sugar, brown sugar, and vanilla
    • Add eggs to butter mixture
    • Gradually add flour mixture to butter mixture, beating well after each addition
    • Stir in chocolate chips
    • Spread batter into cast iron skillet 
    • Bake 20 – 25 minutes, until the outside is browned and the inside is mostly set
    • Serve warm with vanilla ice cream on top

    What Skillet Do I Use For a Pizookie

    This 8-inch cast iron skillet is the exact one I use. I think the 8-inch skillet is perfect because you get a thick cookie. If you use a bigger skillet your pizookie will be thinner and might not stay a little bit gooey in the center. 

    Chocolate Chip Pizookie - chocolate chip cookie dough baked in a skillet and topped with vanilla ice cream! Just serve it in the skillet and let everyone dig in!

    More Chocolate Chip Cookies Recipes

    • Candied Bacon Chocolate Chip Cookies
    • M&Ms Chocolate Chip Pudding Cookies
    • Chocolate Chip Pudding Cookies
    • Chocolate Chip Cookie Cake
    • Soft and Chewy Chocolate Chip Cookies

    Make sure you subscribe to my email list to get all my new recipes delivered right to your inbox!

    You can also follow me on Instagram, Facebook, or Pinterest for even more! 

    📖 Recipe

    Yield: 12 servings

    Chocolate Chip Pizookie

    Chocolate Chip Pizookie

    Chocolate Chip Pizookie is chocolate chip cookie dough baked in a skillet and topped with vanilla ice cream! Just serve it in the skillet and let everyone dig in! 

    Prep Time 15 minutes
    Cook Time 25 minutes
    Total Time 40 minutes

    Ingredients

    • 2 ¼ cups all-purpose flour
    • 1 teaspoon baking soda
    • 1 teaspoon salt
    • 1 cup 2 sticks butter, softened
    • ¾ cup granulated sugar
    • ¾ cup packed brown sugar
    • 1 teaspoon vanilla extract
    • 2 large eggs
    • 2 cups semisweet chocolate chips
    • vanilla ice cream, for serving

    Instructions

    1. Preheat oven to 400F.
    2. Whisk together flour, baking soda and salt in small bowl.
    3. Beat butter, granulated sugar, brown sugar and vanilla extract in large mixer bowl until creamy. Add eggs, one at a time, beating well after each addition. Gradually beat in flour mixture. Stir in chocolate chips.
    4. Spread batter into a 8-inch cast iron skillet. Bake 20 - 25 minutes or until golden brown and mostly done. Check after 15 minutes and cover if it looks like it's turning too dark, too quick.
    5. Serve warm with vanilla ice cream on top.

    Recommended Products

    As an Amazon Associate and member of other affiliate programs, I earn from qualifying purchases.

    • 8-inch Cast Iron Skillet
      8-inch Cast Iron Skillet

    Nutrition Information:

    Yield:

    12

    Serving Size:

    1

    Amount Per Serving: Calories: 487Total Fat: 26gSaturated Fat: 16gTrans Fat: 1gUnsaturated Fat: 9gCholesterol: 76mgSodium: 430mgCarbohydrates: 63gFiber: 2gSugar: 42gProtein: 5g

    Did you make this recipe?

    Tag me in your Instagram photo - @fakeginger

    © Amanda Livesay
    Cuisine: American / Category: cookie

    25+ No Bake Desserts

    May 30, 2016

    25+ No Bake Desserts! These are perfect for summer when it's too hot to turn the oven on. So many delicious recipes here!

    Happy Monday, guys!

    I hope everyone takes a minute today to remember all the men and women (and dogs) that gave it all.

    What are the plans for today? Big barbecue?

    I’ve got a crazy busy week so I’m gonna use today to get ahead on some work stuff. And maybe force my kids to help me clean the house. And I need to finish cutting the grass because I totally gave up halfway through on Saturday after getting attacked by the mutant ants that live in central Texas.

    And then I think I’m going to grill some burgers!

    If you are looking for a last minute dessert to take to a party or just to enjoy at home, I’ve got a list of over 25 no bake desserts! You’re guaranteed to find something you will love here! And, of course, since they’re no bake, you don’t even have to turn the oven on!

    No Bake Peanut Butter Pie

    No Bake Avalanche Cookies

    No Bake Million Dollar Pie Bars

    White Chocolate Peanut Butter Ritz Crackers

    Key Lime Pie Shooters

    Key Lime Pie Shooters by Domestic Superhero

    No Bake Funfetti Cheesecakes

    No Bake Funfetti Cheesecakes by Wine and Glue

    Frozen Lemonade Pie by Love Bakes Good Cakes

    Frozen Lemonade Pie by Love Bakes Good Cakes

    No Bake Peanut Butter Cheesecake by Dinners, Dishes, and Desserts

    No Bake Peanut Butter Cheesecake by Dinners, Dishes, and Desserts

    No Bake Lemon Ladyfinger Cheesecake by Self Proclaimed Foodie

    No Bake Lemon Ladyfinger Cheesecake by Self Proclaimed Foodie

    Lemon Panna Cotta with Raspberry Sauce by Culinary Ginger

    Lemon Panna Cotta with Raspberry Sauce by Culinary Ginger

    No-Bake Mile High Banana Split Pie by Lets Dish

    No-Bake Mile High Banana Split Pie by Lets Dish

    Chocolate Marshmallow Meltaways by White Lights on Wednesday

    Chocolate Marshmallow Meltaways by White Lights on Wednesday

    Cake Batter Oreo Cheesecake Dessert by Kleinworth & Co.

    Cake Batter Oreo Cheesecake Dessert by Kleinworth & Co.

    No-Bake Cookies and Cream Swiss Roll Cake by Belly Full

    No-Bake Cookies and Cream Swiss Roll Cake by Belly Full

    Lemon Fluff Dessert by Mandy's Recipe Box

    Lemon Fluff Dessert by Mandy’s Recipe Box

    Strawberry Cheesecake Parfaits by That Skinny Chick Can Bake

    Strawberry Cheesecake Parfaits by That Skinny Chick Can Bake

    No Bake Tutle Cheesecake Dip by A Dash of Sanity

    No Bake Turtle Cheesecake Dip by A Dash of Sanity

    No Bake Reese Peanut Butter Chocolate Banana Cream Pie by The Recipe Rebel

    No Bake Reese Peanut Butter Chocolate Banana Cream Pie by The Recipe Rebel

    Cotton Candy Oreo Truffles by Wishes and Dishes

    Cotton Candy Oreo Truffles by Wishes and Dishes

    Key Lime Pie Trifle by Lemons For Lulu

    Key Lime Pie Trifle by Lemons For Lulu

    Frozen Strawberry Yogurt Pie by The Love Nerds

    Frozen Strawberry Yogurt Pie by The Love Nerds

    Lemon Cheesecake by 365 Days of Baking and More

    Lemon Cheesecake by 365 Days of Baking and More

    Pink Lemonade Ice Cream Pie by Cravings of a Lunatic

    Pink Lemonade Ice Cream Pie by Cravings of a Lunatic

    No Bake Granola Bars by Eazy Peazy Mealz

    No Bake Granola Bars by Eazy Peazy Mealz

    Chocolate Eclair Dessert by Big Bear's Wife

    Chocolate Eclair Dessert by Big Bear’s Wife

    Ice Cream Pizza by My Suburban Kitchen

    Ice Cream Pizza by My Suburban Kitchen

    Cookies & Cream Meltaways by Lemon Tree Dwelling

    Cookies & Cream Meltaways by Lemon Tree Dwelling

    No-Bake Cheesecake Parfaits by Yumy Healthy Easy

    No-Bake Cheesecake Parfaits by Yummy Healthy Easy

    Homemade No-Churn Funfetti Ice Cream Cake by Cupcakes and Kale Chips

    Homemade No-Churn Funfetti Ice Cream Cake by Cupcakes and Kale Chips

    No-Bake Blueberry Chocolate Tart by Cooking and Beer

    No-Bake Blueberry Chocolate Tart by Cooking and Beer

    Pink Berry Sangria

    May 26, 2016

    Your new favorite summer drink! Pink Berry Sangria has rosé, strawberry vodka, Sprite, and fresh berries.

    Your new favorite summer drink! Pink Berry Sangria has rosé, strawberry vodka, Sprite, and fresh berries.

    Heeeeeey guys!

    Happy almost 3 day weekend! We just have to survive today and tomorrow and then we’ll get to relax, grill up some burgers, and drink some sangria!

    If you l love a sweet, bubbly sangria to sip by the pool, you are going to love this drink. It has rosé, strawberry vodka, and Sprite. It’s crisp, delicious, and going to be your favorite summer cocktail!

    Your new favorite summer drink! Pink Berry Sangria has rosé, strawberry vodka, Sprite, and fresh berries.

    Ingredients

    • Strawberries
    • Blueberries
    • Raspberries – you could do blackberries if you prefer those.
    • Rosé – no need to get an expensive bottle of rosé. We’re adding so much that you won’t even be able to tell.
    • Strawberry vodka – you could do another berry flavor if you prefer.
    • Sprite – or other lemon lime soda. You could do diet to make it lighter or, if you don’t want it as sweet, a lime sparkling water would be delicious too.

    How To Make Pink Berry Sangria

    • Combine. In a pitcher, combine strawberries, blueberries, raspberries, rosé, and vodka.
    • Chill. Refrigerate until ready to serve.
    • Finish. When ready to serve, add Sprite and stir to combine.
    • Serve. Serve over ice, making sure each glass gets some of the berries! 

    Can You Make It Ahead?

    You can combine the fruit, wine, and vodka up to 8 hours in advance. The fruit will infused the liquids the longer it sits. Don’t add the Sprite until you are ready to serve so that it’s nice and bubbly.

    stemless wine glass full of berry sangria with a pink and white striped straw

    More Sangria Recipes

    • Melon Ball Sangria
    • Peach Cherry Sangria
    • Pear Cider Sangria
    • Pear Pomegranate Sangria
    • Tropical Sangria

    Make sure you subscribe to my email list to get all my new recipes delivered right to your inbox!

    You can also follow me on Instagram, Facebook, or Pinterest for even more! 

    📖 Recipe

    Yield: about 6 servings

    Pink Berry Sangria

    Pink Berry Sangria

    Your new favorite summer drink! Pink Berry Sangria has rosé, strawberry vodka, Sprite, and fresh berries.

    Prep Time 10 minutes
    Total Time 10 minutes

    Ingredients

    • 1 cup strawberries, sliced
    • ½ cup blueberries
    • ½ cup raspberries
    • 1 (750 mL) bottle rosé
    • ½ cup strawberry vodka
    • 2 cups Sprite or 7Up

    Instructions

      In a pitcher, combine strawberries, blueberries, raspberries, rosé, and vodka. Refrigerate until ready to serve.When ready to serve, add Sprite and stir to combine.

      Serve over ice, making sure each glass gets some of the berries! 

    Nutrition Information:

    Yield:

    6

    Serving Size:

    1

    Amount Per Serving: Calories: 119Total Fat: 0gSaturated Fat: 0gTrans Fat: 0gUnsaturated Fat: 0gCholesterol: 0mgSodium: 10mgCarbohydrates: 15gFiber: 2gSugar: 13gProtein: 1g

    Did you make this recipe?

    Tag me in your Instagram photo - @fakeginger

    © Amanda Livesay
    Category: drink
    « Previous Page
    Next Page »

    Primary Sidebar

    Amanda Livesay
    Hi, I'm Amanda! DFW food blogger, mom of boys, and crazy dog lady.
    Read more
    Privacy Policy
    Privacy Policy

    Footer

    ↑ back to top

    About

    • Privacy Policy
    • About Fake Ginger

    Newsletter

    • Sign Up for weekly emails featuring new recipes!

    As an Amazon Associate I earn from qualifying purchases.

    Copyright © 2024 FakeGinger.com