• Skip to primary navigation
  • Skip to main content
  • Skip to primary sidebar
  • Home
  • About
  • Recipes

Fake Ginger

menu icon
go to homepage
  • Recipe Index
  • About
  • Subscribe
    • Facebook
    • Instagram
    • Pinterest
  • subscribe
    search icon
    Homepage link
    • Recipe Index
    • About
    • Subscribe
    • Facebook
    • Instagram
    • Pinterest
  • ×
    Home » Page 25

    Apple Cinnamon Monkey Bread

    Apple Cinnamon Monkey Bread

    Sep 21, 2017

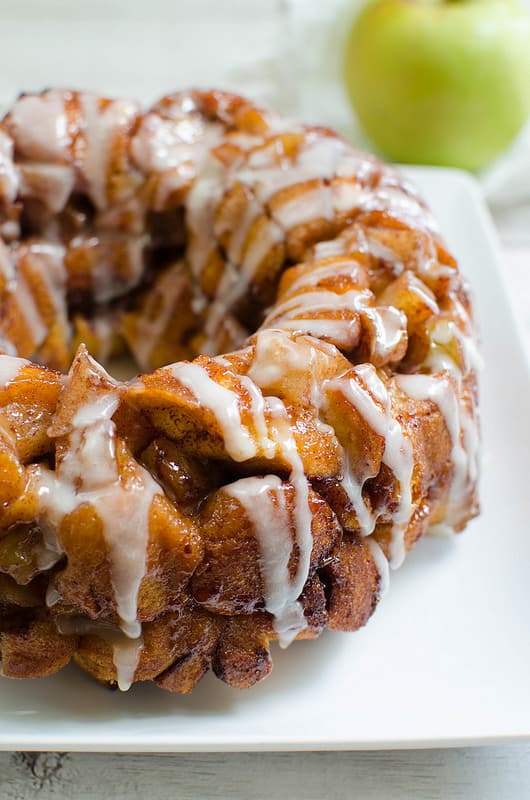
    Apple Cinnamon Monkey Bread is an easy breakfast recipe that starts with refrigerated cinnamon rolls! The perfect fall breakfast!

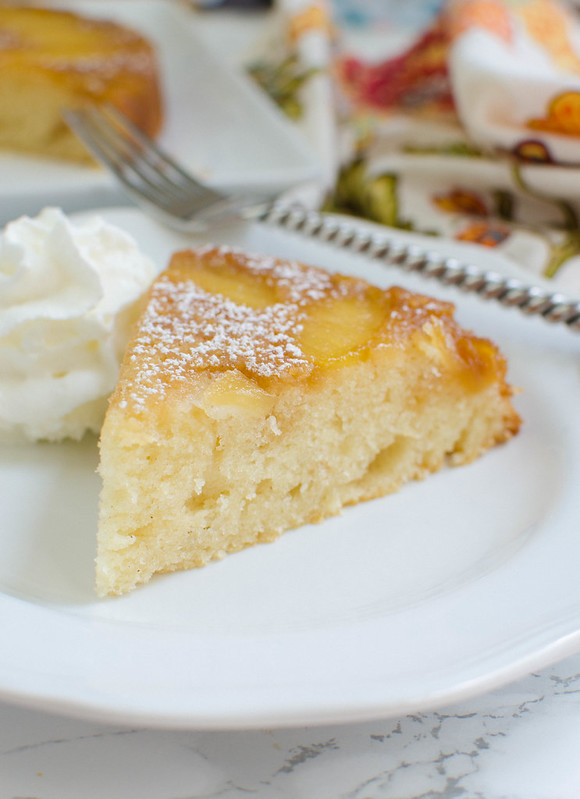
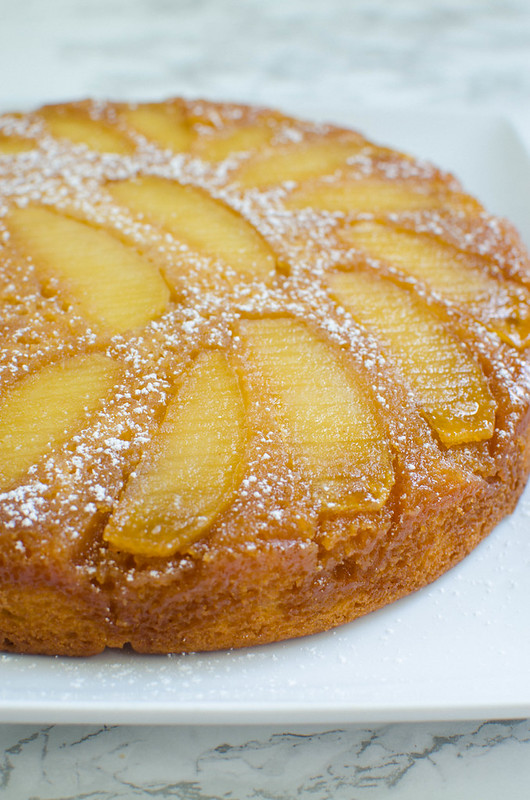
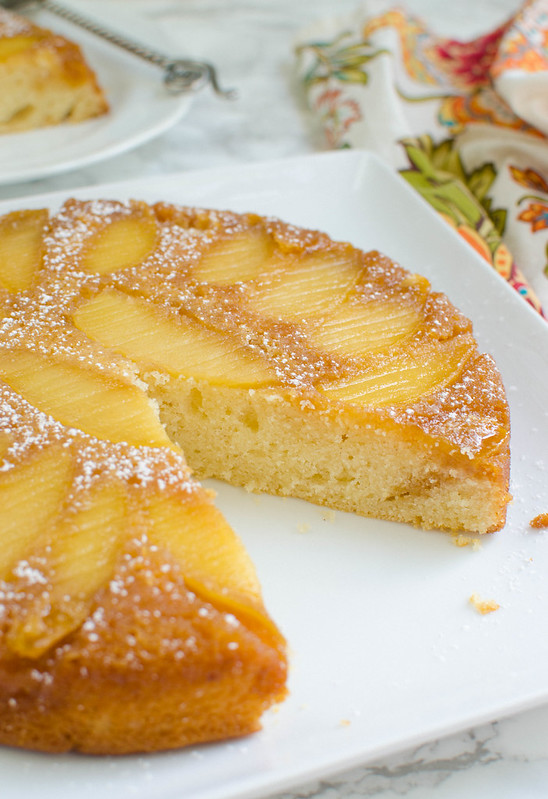
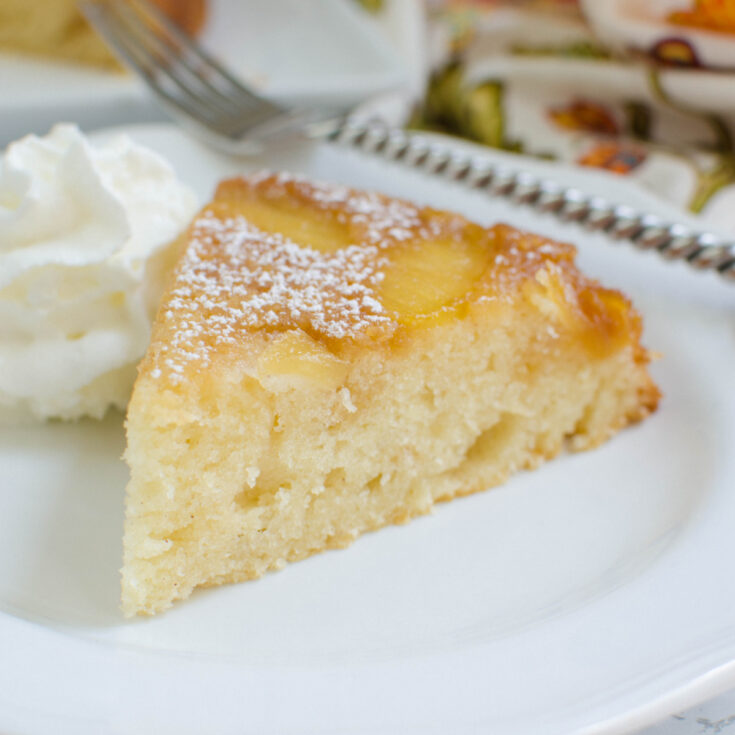
    I love baking with apples in the fall. Some of my other favorites are Caramel Apple Cinnamon Rolls, Apple Spice Cupcakes, and Apple Upside Down Cake.

    Apple Cinnamon Monkey Bread - easy breakfast recipe that starts with refrigerated cinnamon rolls! The perfect fall breakfast!

    Happy Friday eve!

    I think we may have made our final lake trip of the year last weekend.

    It was cold.

    I think I lasted 30 minutes before I wrapped myself in all 4 of our towels and then they eventually followed me out.

    So depressing.

    Not really sure what I’m going to do with my weekends now besides bake yummy fall treats.

    This Apple Cinnamon Monkey Bread is the easiest monkey bread you’ll ever make.

    I have always made monkey bread from scratch so it’s kind of an all day event. You’re not making homemade monkey bread and having it for breakfast. It’s just not happening. Maybe lunch. If you’re the kind of person that gets up and is immediately ready to cook.

    I am not. I need 3 cups of coffee and to catch up on my inbox before I even consider cooking anything.

    But for this monkey bread, all you have to do is cut up a couple cans of refrigerated biscuits and roll them in cinnamon sugar and then layer them in a bundt pan with diced apple that’s also been rolled in cinnamon sugar. Bake until golden and delicious and then drizzle the icing from the cinnamon rolls on top.

    Apple Cinnamon Monkey Bread - easy breakfast recipe that starts with refrigerated cinnamon rolls! The perfect fall breakfast!

    Ingredients

    • Refrigerated cinnamon rolls with icing – I like the ones with the cream cheese frosting for this recipe
    • Granny smith apple – you want a tart green apple for this recipe since everything else is sweet
    • Sugar
    • Cinnamon
    • Butter

    Instructions

    • Prepare. Preheat oven to 350F. Spray a bundt pan with oil.
    • Cut cinnamon rolls. Cut each container of cinnamon rolls into 5 pieces and cut each of those pieces into quarters.
    • Dice apples. Put diced apple in a small bowl.
    • Make cinnamon sugar. In a separate bowl, whisk together cinnamon and sugar. Pour half on top of the apple and toss to combine.
    • Assemble. Place half of the apples in the bottom of the prepared pan. Toss the remaining sugar with the cut cinnamon rolls. Put half of the cinnamon rolls in the bundt and top with the rest of the apples. Finish with the rest of the cinnamon rolls.
    • Add butter. Drizzle with the melted butter.
    • Bake. Bake 40 – 45 minutes or until golden brown.
    • Cool completely. Let cool for about 10 minutes on a wire rack. Run a knife around the sides to loosen any stuck bits. Flip onto a serving platter and drizzle with icing.

    How Long Is It Good For?

    Monkey bread is good for up to a week in the fridge. Make sure to store it in an airtight container to keep it from drying out.

    I recommend reheating in the microwave before serving.

    More Monkey Bread Recipes

    • Rolo Monkey Bread
    • S’mores Monkey Bread

    Make sure you subscribe to my email list to get all my new recipes delivered right to your inbox!

    You can also follow me on Instagram, Facebook, or Pinterest for even more! 

    📖 Recipe

    Yield: 8 servings

    Apple Cinnamon Monkey Bread

    Apple Cinnamon Monkey Bread
    Prep Time 20 minutes
    Cook Time 40 minutes
    Total Time 1 hour

    Ingredients

    • 2 cans refrigerated cinnamon rolls with icing
    • 1 large granny smith apple, peeled and diced
    • ⅓ cup sugar
    • 1 teaspoon cinnamon
    • ¼ cup butter, melted

    Instructions

    1. Preheat oven to 350F. Spray a bundt pan with oil.
    2. Cut each container of cinnamon rolls into 5 pieces and cut each of those pieces into quarters.
    3. Put diced apple in a small bowl.
    4. In a separate bowl, whisk together cinnamon and sugar. Pour half on top of the apple and toss to combine. Place half of the apples in the bottom of the prepared pan.
    5. Toss the remaining sugar with the cut cinnamon rolls. Put half of the cinnamon rolls in the bundt and top with the rest of the apples. Finish with the rest of the cinnamon rolls. Drizzle with the melted butter.
    6. Bake 40 - 45 minutes or until golden brown. Let cool for about 10 minutes on a wire rack. Run a knife around the sides to loosen any stuck bits. Flip onto a serving platter and drizzle with icing.

    Recommended Products

    As an Amazon Associate and member of other affiliate programs, I earn from qualifying purchases.

    • Bundt Pan
      Bundt Pan
    • OXO Mixing Bowls
      OXO Mixing Bowls

    Nutrition Information:

    Yield:

    8

    Serving Size:

    1

    Amount Per Serving: Calories: 191Total Fat: 9gSaturated Fat: 5gTrans Fat: 1gUnsaturated Fat: 2gCholesterol: 15mgSodium: 227mgCarbohydrates: 27gFiber: 1gSugar: 18gProtein: 1g

    Did you make this recipe?

    Tag me in your Instagram photo - @fakeginger

    © Amanda Livesay
    Category: breakfast

    Balela Salad (Trader Joe’s Copycat)

    Sep 18, 2017

    Trader Joe’s copycat recipe! Middle Eastern bean salad with veggies, fresh herbs, and a light citrus dressing. Balela Salad is the perfect cold side dish for spring and summer.

    Looking for more recipes with chickpeas? Try Roasted Red Pepper Hummus!

    Balela Salad - Trader Joe's copycat recipe! Middle Eastern bean salad with veggies, fresh herbs, and a light citrus dressing. So easy, so delicious, and perfect for meal prep!

    Happy Monday, guys! Let’s start this week healthy.

    Because tomorrow I’ve got a cinnamon apple monkey bread and we are going to indulge.

    ANYWAY.

    How was the weekend?

    Mine was pretty boring. I’m not even sure that I left the house.

    The highlight was me freaking out for over an hour last night because I lost the memory card that had SIX RECIPES still on it. I had put it in the pocket of my sweatpants and then I started working on some yoga stuff and put it on my nightstand so that I wouldn’t lose it.

    And yep, went looking for it not long after and it was GONE.

    Found it in my running shoes an hour later.

    Still don’t know how it happened but hey, I found it and now we have this Balela Salad to talk about.

    Balela Salad - Trader Joe's copycat recipe! Middle Eastern bean salad with veggies, fresh herbs, and a light citrus dressing. So easy, so delicious, and perfect for meal prep!

    What Is Balela Salad?

    It’s something at Trader Joe’s that I buy every time I’m there and then eat the entire thing as soon as I get home. And since our TJ’s is an hour away, I’ve had to learn to make it myself.

    But really, it’s a super simple Middle Eastern bean salad that can really be a main dish or a side dish. Also perfect for meal prepping because it’s the kind of thing that gets better after a couple days in the fridge.

    I usually put it on a bed of greens and then just skip any sort of salad dressing because it’s that flavorful on it’s own.

    Ingredients

    • Chickpeas – the star of the recipe! Make sure to rinse and drain them before beginning.
    • Black beans – these add a nice textural contrast with the chickpeas. They need to be rinsed and drained before beginning.
    • Grape tomatoes – you can always use a bigger tomato but if it’s a juicy one, I would squeeze out the juice and seeds before chopping.
    • Red onion – red onion isn’t as sharp as a white or yellow onion so it works well in a raw salad.
    • Fresh mint – fresh mint is a staple in middle eastern cooking. It adds so much flavor to the salad.
    • Fresh parsley – this adds such a great brightness to the salad.
    • Olive oil – you can use another oil if you prefer.
    • Fresh lemon juice – if you don’t have fresh lemon juice, the bottled stuff will be fine.
    • Apple cider vinegar – this adds just enough tang to the salad.
    • Garlic – you can use garlic powder if you don’t have fresh garlic.

    How To Make Balela Salad

    • Combine. Stir together chickpeas, black beans, fresh tomatoes, mint, and parsley.
    • Make dressing. Whisk together olive oil, lemon juice, apple cider vinegar, and garlic. Season with salt and pepper.
    • Assemble. Pour dressing over chickpea mixture and toss until everything is well coated.
    • Chill. Refrigerate until ready to serve.

    How Long Is Bean Salad Good For?

    Balela Salad is good for 3 – 4 days in the refrigerator. Make sure to store it in an airtight container – these super airtight glass containers are my favorite for our leftovers.

    Since you serve this bean salad cold or at room temperature, there’s no need to reheat before serving, unless you prefer it warm.

    Can You Freeze It?

    I don’t recommend freezing this bean salad. The fresh herbs and veggies won’t do well once frozen and defrosted.

    Balela Salad - Trader Joe's copycat recipe! Middle Eastern bean salad with veggies, fresh herbs, and a light citrus dressing. So easy, so delicious, and perfect for meal prep!

    More Delicious Salad Recipes

    • Farro Salad with Cranberries, Feta, and Pecans
    • Greek Farro Salad
    • Quinoa and Brussels Sprouts Salad

    Make sure you subscribe to my email list to get all my new recipes delivered right to your inbox!

    You can also follow me on Instagram, Facebook, or Pinterest for even more! 

    📖 Recipe

    Yield: 8 servings

    Balela Salad

    Balela Salad

    Trader Joe's copycat recipe! Middle Eastern bean salad with veggies, fresh herbs, and a light citrus dressing. Balela Salad is the perfect cold side dish for spring and summer.

    Prep Time 10 minutes
    Total Time 10 minutes

    Ingredients

    • 2 15-ounce cans chickpeas, drained and rinsed
    • 2 15-ounce cans black beans, drained and rinsed
    • 2 cups grape tomatoes, halved
    • ½ cup red onion, finely diced
    • ½ cup fresh mint, chopped
    • ½ cup fresh parsley, chopped
    • ¼ cup olive oil
    • 3 tablespoons fresh lemon juice
    • 3 tablespoons apple cider vinegar
    • 2 cloves garlic, minced
    • salt and pepper

    Instructions

    1. In a large bowl, combine chickpeas, black beans, tomatoes, red onion, mint, and parsley.
    2. In a small bowl, whisk together olive oil, lemon juice, apple cider vinegar, and garlic. Pour over the chickpea mixture and toss to combine. Season with salt and pepper to taste.
    3. Store in an airtight container in the fridge until ready to serve.

    Recommended Products

    As an Amazon Associate and member of other affiliate programs, I earn from qualifying purchases.

    • Citrus Juicer
      Citrus Juicer
    • OXO Mixing Bowls
      OXO Mixing Bowls

    Nutrition Information:

    Yield:

    8

    Serving Size:

    1

    Amount Per Serving: Calories: 392Total Fat: 10gSaturated Fat: 1gTrans Fat: 0gUnsaturated Fat: 8gCholesterol: 0mgSodium: 491mgCarbohydrates: 58gFiber: 18gSugar: 7gProtein: 20g

    Did you make this recipe?

    Tag me in your Instagram photo - @fakeginger

    © Amanda Livesay
    Cuisine: Middle Eastern / Category: Sides

    Caramel Corn Treats

    Sep 11, 2017

    Caramel Corn Treats are the perfect sweet and salty fall snack! Caramel corn, pretzels, cheddar Goldfish, and candy corn all coated in melted marshmallow! You won’t be able to stop snacking on these!

    Caramel Corn Treats are the perfect sweet and salty fall snack! Caramel corn, pretzels, cheddar Goldfish, and candy corn all coated in melted marshmallow! You won't be able to stop snacking on these!

    Okay, I know what you’re thinking.

    Are those CHEESE GOLDFISH coated in marshmallows with candy corn sprinkled in?

    Yeah, it is.

    I don’t know why, I don’t know how, but it just works. The sweet and salty is so perfect together.

    They also have pretzels and caramel corn and lots of butter, of course.

    They’re so good. If you make one Halloween treat from my blog, make it this!

    And if you’re a candy corn lover like me, make the Candy Corn Fudge too!

    Caramel Corn Treats are the perfect sweet and salty fall snack! Caramel corn, pretzels, cheddar Goldfish, and candy corn all coated in melted marshmallow! You won't be able to stop snacking on these!

    Ingredients

    • Caramel corn
    • Cheddar Goldfish crackers
    • Mini pretzels
    • candy corn
    • Unsalted butter
    • Mini marshmallows

    Instructions

    • Dry ingredients. Combine caramel corn, Goldfish, pretzels, and candy corn.
    • Make marshmallow mixture. Stir together butter and mini marshmallows on low heat until smooth.
    • Combine. Pour over the caramel corn mixture and toss gently to make sure everything is coated in marshmallow.
    • Transfer. Press into a 9×9-inch pan.
    • Decorate. Top with remaining candy corn and press gently to make sure it sticks.
    • Serve. Let set before slicing and serving.
    Caramel Corn Treats are the perfect sweet and salty fall snack! Caramel corn, pretzels, cheddar Goldfish, and candy corn all coated in melted marshmallow! You won't be able to stop snacking on these!

    How Long Are They Good For?

    These Caramel Corn Treats are good for about a week. Make sure to store them in an airtight container at room temperature to keep them fresh for as long as possible.

    They will start to dry out as the days go on so keep that in mind.

    Can You Freeze Them?

    I don’t recommend freezing these. I think the pretzels and goldfish would both soften a lot when frozen and defrosted.

    More Halloween Treats

    • Halloween Confetti Cookies
    • Ghostly Snack Mix
    • Halloween Sugar Cookie Bars
    • Candy Corn Roll-Up Cookies
    • Batty Brownies

    📖 Recipe

    Yield: about 9 servings

    Caramel Corn Treats

    Caramel Corn Treats
    Prep Time 15 minutes
    Cook Time 5 minutes
    Total Time 20 minutes

    Ingredients

    • 4 cups caramel corn
    • 1 cup cheddar Goldfish crackers
    • 2 cups mini pretzels
    • 1 cup candy corn, divided
    • ¼ cup unsalted butter
    • 1 10-ounce bag mini marshmallows

    Instructions

    1. In a large mixing bowl, combine caramel corn, Goldfish, pretzels, and ¾ cup of the candy corn.
    2. In a large pan, melted together butter and mini marshmallows on low heat, stirring the entire time, until smooth. Pour over the caramel corn mixture and toss gently to make sure everything is coated in marshmallow.
    3. Press into a 9x9-inch pan. Top with remaining candy corn and press gently to make sure it sticks. Let set before slicing and serving.

    Recommended Products

    As an Amazon Associate and member of other affiliate programs, I earn from qualifying purchases.

    • Cheddar Goldfish
      Cheddar Goldfish
    • Candy Corn
      Candy Corn
    • 9x9-inch Square Pan
      9x9-inch Square Pan
    • Parchment Paper
      Parchment Paper

    Nutrition Information:

    Yield:

    9

    Serving Size:

    1

    Amount Per Serving: Calories: 378Total Fat: 9gSaturated Fat: 4gTrans Fat: 0gUnsaturated Fat: 3gCholesterol: 14mgSodium: 256mgCarbohydrates: 74gFiber: 1gSugar: 48gProtein: 3g

    Did you make this recipe?

    Tag me in your Instagram photo - @fakeginger

    © Amanda Livesay
    Cuisine: American / Category: holiday

    Apple Upside Down Cake

    Aug 31, 2017

    Simple and delicious Apple Upside Down Cake! Moist cinnamon-spiced cake topped with apples in a buttery brown sugar sauce. 

    Apple season is the best season! Try Creamy Caramel Apple Dip, Apple Spice Cupcakes, or Honeycrisp Apple Sangria!

    Apple Upside Down Cake - simple and delicious apple cake! Moist cinnamon-spiced cake topped with apples coated in butter and brown sugar.

    Not to be dramatic but this Apple Upside Down Cake is my favorite thing I’ve made in forever.

    And you know that I don’t usually like any dessert with fruit.

    But see, I’ve been craving pineapple upside down cake for literally months now and I was too lazy to make one so I finally broke down and bought one last week while I was in the middle of a week long argument with the boyfriend.

    And then I couldn’t even enjoy it because I was too busy saying things like, “I keep dreaming about these giant bugs and google tells me that means I have anxiety and you won’t kill them for me!”

    And no, the argument wasn’t about the bugs.

    That just happened to come up.

    A few times.

    Apple Upside Down Cake - simple and delicious apple cake! Moist cinnamon-spiced cake topped with apples coated in butter and brown sugar.

    Ingredients

    • Butter – you are going to use butter in the apple topping and the cake batter itself. It needs to be melted both times so don’t worry about bringing it to room temperature.
    • Brown sugar – this is going to caramelize the apples on top and be so delicious!
    • Apple – use your favorite apple. A lot of apple baked goods recipes call for a granny smith so that they aren’t so sweet but I love a Honeycrisp or Pink Lady in this recipe.
    • Granulated sugar
    • Eggs
    • Milk
    • Vanilla
    • Flour
    • Baking powder
    • Cinnamon – all apple desserts need cinnamon!
    • Salt
    • Powdered sugar – this is just for dusting on top of the finished cake. Optional but makes it look so pretty!

    Instructions

    • Prepare. Preheat oven to 350F. Line a 9-inch round cake pan with parchment paper.
    • Make upside down part. Stir together 4 tablespoon butter, ½ cup brown sugar, and pinch of salt until butter and sugar are melted. Pour into the cake pan. Top with sliced apples.
    • Combine wet ingrdients. Beat 12 tablespoons melted butter and sugar together. Beat in eggs, one at a time. Add milk and vanilla and beat until combined.
    • Combine dry ingredients. Whisk together flour, baking powder, cinnamon, and salt until no lumps remain.
    • Combine everything. Add to the butter mixture and stir until just combined.
    • Transfer. Pour the batter over the apples and use a rubber spatula to smooth it out.
    • Bake. Bake in preheated oven for about 35 minutes.
    • Cool. Let cool for about 30 minutes in pan on top of wire rack. Flip onto a plate.
    • Dust. Dust with powdered sugar.
    Apple Upside Down Cake - simple and delicious apple cake! Moist cinnamon-spiced cake topped with apples coated in butter and brown sugar.

    How Long Is Apple Cake Good For?

    Upside Down Apple Cake is good for 4 – 5 days at room temperature. Make sure to keep it in an airtight container to keep it fresh for as long as possible.

    You can prolong it’s life a day or 2 by keeping it in the fridge but it may dry out the cake slightly.

    Can You Freeze It?

    You can freeze this apple cake for up to 3 months. I recommend wrapping it tightly in plastic wrap and then placing it in a freezer ziploc bag.

    When you are ready to serve it, let it defrost at room temperature for several hours.

    More Apple Recipes

    • Caramel Apple Cinnamon Rolls
    • Apple Cranberry Streusel Pie
    • Slow Cooker Caramel Apple Crumble
    • Apple Galette
    • Oatmeal Cookie Apple Crisp

    Make sure you subscribe to my email list to get all my new recipes delivered right to your inbox!

    You can also follow me on Instagram, Facebook, or Pinterest for even more! 

    📖 Recipe

    Yield: 12 servings

    Apple Upside Down Cake

    Apple Upside Down Cake

    Simple and delicious Apple Upside Down Cake! Moist cinnamon-spiced cake topped with apples in a buttery brown sugar sauce. 

    Prep Time 20 minutes
    Cook Time 35 minutes
    Total Time 55 minutes

    Ingredients

    For the topping:

    • 4 tablespoons unsalted butter
    • ½ cup brown sugar
    • pinch salt
    • 1 small apple, peeled, cored, and sliced

    For the cake:

    • 12 tablespoons (1 ½ sticks) unsalted butter, melted
    • 1 cup granulated sugar
    • 2 eggs
    • ½ cup milk
    • 1 teaspoon vanilla
    • 1 ½ cups flour
    • 1 ½ teaspoons baking powder
    • ½ teaspoon cinnamon
    • 1 teaspoon salt
    • powdered sugar, for dusting

    Instructions

    1. Preheat oven to 350F. Line a 9-inch round cake pan with parchment paper. Spray the sides with oil. Set aside.
    2. To make the topping, combine 4 tablespoons butter, ½cup brown sugar, and pinch of salt in a small saucepan over low heat. Stir until melted and combined. Pour into the cake pan. Top with sliced apples.
    3. In a mixing bowl, beat melted butter and sugar together. Beat in eggs, one at a time. Add milk and vanilla and beat until combined.
    4. In a separate bowl, whisk together flour, baking powder, cinnamon, and salt until no lumps remain. Add to the butter mixture and stir until just combined. Pour the batter over the apples and use a rubber spatula to smooth it out.
    5. Bake in preheated oven for about 35 minutes or until a toothpick inserted into the center comes out clean.
    6. Let cool for about 30 minutes in pan on top of wire rack. Run a knife around the outside of the cake to loose any stuck edges. Flip onto a plate. Let cool completely before dusting with powdered sugar and serving.

    Recommended Products

    As an Amazon Associate and member of other affiliate programs, I earn from qualifying purchases.

    • 9-inch Cake Pan
      9-inch Cake Pan

    Nutrition Information:

    Yield:

    12

    Serving Size:

    1

    Amount Per Serving: Calories: 350Total Fat: 16gSaturated Fat: 10gTrans Fat: 0gUnsaturated Fat: 6gCholesterol: 72mgSodium: 270mgCarbohydrates: 49gFiber: 1gSugar: 35gProtein: 3g

    Did you make this recipe?

    Tag me in your Instagram photo - @fakeginger

    © Amanda Livesay
    Cuisine: American / Category: cake


    Stuffed Hatch Peppers

    Aug 30, 2017

    Stuffed Hatch Peppers are going to be a family favorite during hatch pepper season! Delicious spicy hatch chiles stuffed with ground turkey, black beans, corn, salsa, and topped with monterey jack cheese.

    I also have a Hatch Chile Cheese Dip recipe!

    Stuffed Hatch Peppers - delicious spicy hatch chiles stuffed with ground turkey, black beans, corn, salsa, and topped with monterey jack cheese. Easy and healthy dinner!

    Heeeey guys!

    I don’t know that I’ve ever mentioned this but hatch pepper season is my favorite time of year since moving to Texas.

    We used to get hatch chiles in Colorado but it’s nowhere near like it is in Texas.

    Like, you walk into HEB and they’ve got barrels of mild hatch peppers here and the spicy ones are over there and if you want your hatch peppers already roasted, you’re in luck!

    Because they’ve got roasted ones and roasted diced ones and, by the way, they’re sampling hatch pepper guacamole over there and hatch pepper cornbread in the bakery and, oh, hatch pepper empanadas right here.

    There are even hatch pepper fake Oreos and I have 11 boxes of them in my freezer right now to last until next year and you can take your judgement somewhere else.

    Roasted Hatch Peppers

    How To Roast Hatch Peppers

    Naturally, I come home with bags of hatch peppers every time I go the store. And then I roast them, dice them, and put them into everything I make.

    Couldn’t be easier to roast them.

    I just pop them under the broiler for about 5 minutes on each side, until they are good and charred, and then I put them in a bowl with a pretty tight lid and let them steam themselves until the outer layer peels off easily.

    Then you can dice them up and throw them in some melty queso dip or a tortilla soup or you can fill them up with a bunch of yummy things like these Stuffed Hatch Peppers.

    Stuffed Hatch Peppers - delicious spicy hatch chiles stuffed with ground turkey, black beans, corn, salsa, and topped with monterey jack cheese. Easy and healthy dinner!

    How Long Are They Good For?

    Stuffed hatch peppers are good for up to 3 days. Make sure to store them in an airtight container in the refrigerator.

    You can reheat them in the oven or microwave.

    Can You Freeze Them?

    You can freeze stuffed hatch peppers for up to 3 months. After baking them, let them cool completely and then wrap tightly in plastic wrap. Place them in a freezer-safe container and pop them in the freezer.

    Let them defrost overnight when you are ready to serve them. Reheat in the oven or microwave.

    Stuffed Hatch Peppers - delicious spicy hatch chiles stuffed with ground turkey, black beans, corn, salsa, and topped with monterey jack cheese. Easy and healthy dinner!

    More Ground Beef Recipes

    • Ground Beef Stroganoff
    • Teriyaki Ground Beef
    • Baked Spaghetti Casserole
    • Frito Pie Casserole

    Make sure you subscribe to my email list to get all my new recipes delivered right to your inbox!

    You can also follow me on Instagram, Facebook, or Pinterest for even more! 

    📖 Recipe

    Yield: 8 peppers

    Stuffed Hatch Peppers

    Stuffed Hatch Peppers

    Stuffed Hatch Peppers are going to be a family favorite during hatch pepper season! Delicious spicy hatch chiles stuffed with ground turkey, black beans, corn, salsa, and topped with monterey jack cheese.

    Cook Time 30 minutes
    Additional Time 15 minutes
    Total Time 45 minutes

    Ingredients

    • 8 mild hatch peppers
    • 1 tablespoon olive oil
    • 1 pound lean ground chicken or turkey
    • 1 large white onion, diced
    • 2 cloves garlic, minced
    • 1 teaspoon chili powder
    • 1 teaspoon cumin
    • ½ teaspoon oregano
    • ¼ teaspoon cinnamon
    • 1 cup black beans, rinsed and drained
    • 1 cup frozen corn
    • 1 cup salsa
    • 1 4 ounce can green chiles
    • salt and pepper, to taste
    • 1 cup monterey jack, shredded
    • fresh cilantro, optional

    Instructions

    1. Preheat broiler. Place peppers on a baking sheet and broil for about 5 minutes on each side, until charred. Remove from oven and immediately place in a bowl with a a cover to steam. Let sit covered for about 15 minutes. Remove skin. Split each pepper down the center and remove seeds. Place in casserole dish you plan to use.
    2. Preheat oven to 350F.
    3. Heat oil in a large skillet over medium-high heat. Add chicken and onion and cook, breaking up the turkey, until it's cooked completely and the onion is translucent. Add garlic, chili powder, cumin, oregano, and cinnamon and cook until fragrant, about 30 seconds. Add black beans, corn, salsa, and green chiles; stir to combine.
    4. Use a small spoon to fill each pepper with the turkey mixture. Divide the cheese evenly among the peppers.
    5. Bake 15 minutes or until cheese is melted and peppers are heated through.

    Nutrition Information:

    Yield:

    8

    Serving Size:

    1

    Amount Per Serving: Calories: 305Total Fat: 14gSaturated Fat: 5gTrans Fat: 0gUnsaturated Fat: 8gCholesterol: 89mgSodium: 480mgCarbohydrates: 23gFiber: 5gSugar: 6gProtein: 25g

    Did you make this recipe?

    Tag me in your Instagram photo - @fakeginger

    © Amanda Livesay
    Cuisine: Mexican / Category: chicken

    Carrot Apple Salad

    Aug 28, 2017

    Carrot Apple Salad is the perfect quick, healthy side dish! It’s a kid favorite and so easy to put together. Thinly sliced carrots and apples with raisins in a creamy sweet and tangy dressing. 

    Carrot Apple Salad - sliced carrots and apples with raisins in a sweet and tangy dressing! So easy and so delicious! My kids love this!

    You guuuuys.

    It’s finally the first day of school around here!

    Y’all know I love summer but man, this was a long one. This was the first summer in years that we didn’t take several roadtrips so it was just me and 3 boys.

    All summer.

    In central Texas. Where from the hours of 9 am to 7 pm, it’s too hot to play outside most days.

    ANYWAY.

    So now we’re transitioning to school and soccer and football and whatever else the boys plan on getting into. I’m anticipating a very busy fall.

    This Carrot Apple Salad is kind of like a cole slaw but it doesn’t have cabbage and I refuse to call anything without cabbage a slaw so we’re calling it a salad.

    But it’s thinly sliced carrots and apples in a creamy cole slaw dressing that’s sweet and tangy and delicious.

    Oh, and then you toss in some raisins for extra sweetness and a little chewiness.

    It takes minutes to put together AND you probably already have everything in your fridge/pantry.

    My 6 year old is obsessed with this salad. Obsessed. I packed it in his lunchbox this morning.

    Carrot Apple Salad - sliced carrots and apples with raisins in a sweet and tangy dressing! So easy and so delicious! My kids love this!

    Ingredients

    • Carrots
    • Granny Smith Apples – you can use any type of apple but I think the tartness of a granny smith works really well in this salad.
    • Raisins
    • Mayo
    • Sour Cream
    • Sugar
    • Apple Cider Vinegar

    How To Make Carrot Apple Salad

    • Prep ingredients. Combine carrots, apples, and raisins in a large mixing bowl.
    • Make dressing. Whisk together mayo, sour cream, sugar, apple cider vinegar, and salt and pepper until well combined.
    • Combine. Pour over the carrot mixture and toss to combine.
    Carrot Apple Salad - sliced carrots and apples with raisins in a sweet and tangy dressing! So easy and so delicious! My kids love this!

    How Long Is It Good For?

    Carrot apple salad is good for up to 3 days. Make sure to store it in an airtight container in the refrigerator.

    The carrots and apple will continue to soften the longer it sits so by day 3, it may be a little mushy.

    📖 Recipe

    Yield: about 8 servings

    Carrot Apple Salad

    Carrot Apple Salad

    Carrot Apple Salad is the perfect quick, healthy side dish! It's a kid favorite and so easy to put together. Thinly sliced carrots and apples with raisins in a creamy sweet and tangy dressing. 

    Prep Time 15 minutes
    Total Time 15 minutes

    Ingredients

    • 4 cups carrots, very thinly sliced
    • 2 cups Granny Smith apples, very thinly sliced
    • 1 cup raisins
    • ¼ cup mayo
    • 2 tablespoons sour cream
    • 2 tablespoons sugar
    • 2 tablespoons apple cider vinegar
    • salt and pepper, to taste

    Instructions

    1. Combine carrots, apples, and raisins in a large mixing bowl.
    2. In a separate bowl, whisk together mayo, sour cream, sugar, apple cider vinegar, and salt and pepper until well combined. Pour over the carrot mixture and toss to combine. Refrigerate until ready to serve.

    Nutrition Information:

    Yield:

    8

    Serving Size:

    1

    Amount Per Serving: Calories: 167Total Fat: 6gSaturated Fat: 1gTrans Fat: 0gUnsaturated Fat: 5gCholesterol: 5mgSodium: 129mgCarbohydrates: 29gFiber: 4gSugar: 20gProtein: 1g

    Did you make this recipe?

    Tag me in your Instagram photo - @fakeginger

    © Amanda Livesay
    Cuisine: American / Category: Sides

    Doughnut S’mores

    Aug 11, 2017

    The most delicious ways to make s’mores is Doughnut S’mores! Glazed donuts, Hershey’s bars, and toasted marshmallows.

    Try S’mores Campfire Cones if you love s’mores as much as I do!

    Doughnut S'mores! These are a must make for summer. Milk chocolate and toasted marshmallows on a warm glazed doughnut!

    Hi guys, happy Friday!

    I’m totally cheating with the final post for S’mores Week.

    There’s not even a recipe.

    But if you follow me literally anywhere, you know that my favorite hobby is taking a glazed doughnut and making it into a breakfast sandwich so when I bought a dozen doughnuts for sandwiches this week, I knew s’mores had to happen.

    All I did was slice a glazed doughnut (from Shipley’s if you must know) and then I heated it cut side down in a pan just until it was warm enough to melt the chocolate a little bit. And then I used the classic Hershey’s bar and a couple big marshmallows that I toasted on my stove. Then just smushed it all together and took photos of it outside while the neighbor kids asked me a million questions about what I was doing and why.

    Yes, these are really sweet. Yes, they are amazing. And yes, you should chase it with a bacon, egg, and cheese doughnut sandwich.

    Doughnut S'mores! These are a must make for summer. Milk chocolate and toasted marshmallows on a warm glazed doughnut!

    Ingredients

    • Glazed doughnut – use whatever your favorite glazed doughnut is.
    • Hershey’s chocolate bar – you an use whatever chocolate you like but Hershey’s is the classic.
    • Toasted marshmallows – you can toast them over a fire, your grill, your gas stove, whatever way you have.

    How To Make Donut S’mores

    • Prep doughnut. Slice the doughnut in half and place on a hot pan until toasty.
    • Add chocolate. Remove doughnut from heat and immediately place chocolate on the bottom half.
    • Add marshmallow. Top with toasted marshmallows and add the top of the doughnut.
    • Enjoy! Enjoy immediately.

    More S’mores Recipes

    • Chocolate Covered S’mores
    • S’mores Frozen Hot Chocolate
    • Peanut Butter S’mores Dip
    • Raspberry White Chocolate S’mores
    • Edible S’mores Cookie Dough

    Make sure you subscribe to my email list to get all my new recipes delivered right to your inbox!

    You can also follow me on Instagram, Facebook, or Pinterest for even more! 

    📖 Recipe

    Yield: 1 serving

    Doughnut S'mores

    Doughnut S'mores

    The most delicious ways to make s'mores is Doughnut S'mores! Glazed donuts, Hershey's bars, and toasted marshmallows.

    Prep Time 5 minutes
    Total Time 5 minutes

    Ingredients

    • 1 glazed doughnut
    • 2 rectangles of Hershey's chocolate bar
    • 2 toasted marshmallows

    Instructions

    1. Slice the doughnut in half and place on a hot pan until toasty. Remove and immediately place chocolate on the bottom half.
    2. Top with toasted marshmallows and add the top of the doughnut.
    3. Enjoy immediately.

    Recommended Products

    As an Amazon Associate and member of other affiliate programs, I earn from qualifying purchases.

    • Metal Skewers
      Metal Skewers

    Nutrition Information:

    Yield:

    1

    Serving Size:

    1

    Amount Per Serving: Calories: 755Total Fat: 41gSaturated Fat: 22gTrans Fat: 0gUnsaturated Fat: 7gCholesterol: 39mgSodium: 284mgCarbohydrates: 94gFiber: 3gSugar: 71gProtein: 10g

    Did you make this recipe?

    Tag me in your Instagram photo - @fakeginger

    © Amanda Livesay
    Cuisine: American / Category: snack

    Chocolate Covered S’mores

    Aug 08, 2017

    Chocolate Covered S’mores are inside out s’mores! Graham crackers with toasted marshmallows, all coated in milk chocolate!

    Chocolate Covered S'mores - a twist on the classic with the chocolate on the outside!

    Heeeeey guys, day 2 of S’mores Week!

    This is definitely one of the simpler recipes we’ve shared for s’mores week but it’s still such a good one.

    These Chocolate Covered S’mores are just your classic s’mores but with the chocolate on the outside.

    If you ever need to make a bunch of s’mores in advance for whatever reason, this is totally the way to go. Just make them with enough time to set and you can pack them up and take them to a school party or a barbecue or whatever.

    If you really, really, really want to love these, put a Reeses cup in the center with the marshmallow before coating it in chocolate. Yes, it will be messy. No, you won’t get a decent photo for Instagram. But omg, it will change your life.

    Chocolate Covered S'mores - a twist on the classic with the chocolate on the outside!

    Ingredients

    • Graham crackers – use whatever kind you like.
    • Marshmallows – the big ones. If you can find the flat ones that are meant for s’mores, those work really well here.
    • Melting chocolate – you can use the discs of melting chocolate or chocolate almond bark.

    How To Make Chocolate Covered S’mores

    • Assemble. Assemble the s’mores by placing a marshmallow in the middle of each set of graham crackers. Set aside while you melt the chocolate.
    • Melt. Melt the chocolate in a double boiler over low heat, stirring until smooth. Remove from heat and, working quickly, dip each s’more into the melted chocolate, flip the coat both sides, and transfer to wax paper.
    • Cool. Let cool completely before serving.

    📖 Recipe

    Yield: 8 s'mores

    Chocolate Covered S’mores

    Chocolate Covered S’mores

    Chocolate Covered S'mores - inside out s'mores! Graham crackers with toasted marshmallows, all coated in milk chocolate!

    Prep Time 15 minutes
    Cook Time 5 minutes
    Total Time 20 minutes

    Ingredients

    • 8 graham crackers, halved
    • 8 large marshmallows, toasted
    • 1 12-ounce package melting chocolate

    Instructions

    1. Assemble the s'mores by placing a marshmallow in the middle of each set of graham crackers. Set aside while you melt the chocolate.
    2. Melt the chocolate in a double boiler over low heat, stirring until smooth. Remove from heat and, working quickly, dip each s'more into the melted chocolate, flip the coat both sides, and transfer to wax paper. Let cool completely before serving. Store in refrigerator.

    Nutrition Information:

    Yield:

    8

    Serving Size:

    1

    Amount Per Serving: Calories: 87Total Fat: 2gSaturated Fat: 0gTrans Fat: 0gUnsaturated Fat: 1gCholesterol: 0mgSodium: 75mgCarbohydrates: 18gFiber: 1gSugar: 8gProtein: 1g

    Did you make this recipe?

    Tag me in your Instagram photo - @fakeginger

    © Amanda Livesay
    Cuisine: American / Category: snack

    Glazed Blueberry Biscuits

    Jul 24, 2017

    Glazed Blueberry Biscuits – delicious lightly sweetened biscuits with fresh blueberries and a glaze. Bojangles copycat!

    Glazed Blueberry Biscuits - delicious lightly sweetened biscuits with fresh blueberries and a glaze. Bojangles copycat!

    Hey guys, happy Monday!

    I had a week last week and I am so excited for a fresh start today.

    Especially because today starts #SummerDessertWeek! We’ve got 25 bloggers sharing over 70 summer-inspired recipes this week and the lovely Angie organized all of it. I’ve got a list at the bottom of this post of all the recipes being shared today so make sure you check those out.

    For the first recipe I’m sharing this week, I’ve got these gorgeous Glazed Blueberry Biscuits!

    It’s a copycat recipe for the blueberry biscuits from Bojangles which I’ve never had (despite living literally 2 minutes from a Bojangles back when I lived in Mobile) but have only heard amazing things about them.

    So they’re lightly sweetened biscuits and then I folded in some blueberries. And then once they’re out of the oven, you drizzle a simple glaze.

    I don’t want to tell you what to do but you definitely need to make these, split them in half, and fill them with sliced strawberries and fresh whipped cream.

    Glazed Blueberry Biscuits - delicious lightly sweetened biscuits with fresh blueberries and a glaze. Bojangles copycat!

    Ingredients

    • All-purpose flour
    • Baking powder
    • Salt
    • Sugar
    • Butter
    • Milk
    • Blueberries
    • Powdered sugar
    • Vanilla extract

    Instructions

    • Preheat oven to 450F. Line a baking sheet with parchment paper.
    • In a large mixing bowl, whisk together flour, baking powder, salt, and sugar until no lumps remain.
    • Use a pastry cutter to cut butter into the mixture until butter is pea-sized.
    • Use a rubber spatula to stir in milk, trying not to overwork the dough.
    • Fold in blueberries.
    • Turn the dough out onto a well flour surface and pat to spread out. Use a biscuit cutter to cut biscuits and transfer to baking sheet.
    • Bake 9 – 12 minutes, depending on size of biscuits, until golden brown.
    • Remove from oven and brush with remaining tablespoon of butter.
    • To make the glaze, whisk together powdered sugar, vanilla, and milk until it reaches desired consistency. Drizzle over biscuits.
    Glazed Blueberry Biscuits - delicious lightly sweetened biscuits with fresh blueberries and a glaze. Bojangles copycat!

    More Blueberry Recipes

    • Blueberry Orange Coffee Cake
    • Blueberry Bran Muffins
    • Blueberry Sour Cream Pancakes
    • Blueberry Lemon Sweet Rolls with Lemon Cream Cheese Glaze
    • Meyer Lemon Blueberry Bundt Cake
    • Blueberry Lemon Bread

    📖 Recipe

    Yield: about 8 biscuits

    Glazed Blueberry Biscuits

    Glazed Blueberry Biscuits

    Ingredients

    • 2 cups all-purpose flour, plus more for rolling
    • 4 teaspoons baking powder
    • 1 teaspoon salt
    • ⅓ cup sugar
    • 5 tablespoons butter, plus 1 tablespoon to brush the biscuits
    • 1 cup milk
    • ½ cup blueberries

    For the glaze:

    • 1 cup powdered sugar
    • 1 teaspoon vanilla extract
    • 3-4 tablespoons milk

    Instructions

    1. Preheat oven to 450F. Line a baking sheet with parchment paper.
    2. In a large mixing bowl, whisk together flour, baking powder, salt, and sugar until no lumps remain. Use a pastry cutter to cut butter into the mixture until butter is pea-sized. Use a rubber spatula to stir in milk, trying not to overwork the dough. Fold in blueberries.
    3. Turn the dough out onto a well flour surface and pat to spread out. Use a biscuit cutter to cut biscuits and transfer to baking sheet.
    4. Bake 9 - 12 minutes, depending on size of biscuits, until golden brown. Remove from oven and brush with remaining tablespoon of butter.
    5. To make the glaze, whisk together powdered sugar, vanilla, and milk until it reaches desired consistency. Drizzle over biscuits.

    Recommended Products

    As an Amazon Associate and member of other affiliate programs, I earn from qualifying purchases.

    • Biscuit Cutters
      Biscuit Cutters
    • Pastry Blender
      Pastry Blender

    Nutrition Information:

    Yield:

    8

    Serving Size:

    1

    Amount Per Serving: Calories: 297Total Fat: 9gSaturated Fat: 5gTrans Fat: 0gUnsaturated Fat: 3gCholesterol: 22mgSodium: 597mgCarbohydrates: 51gFiber: 1gSugar: 23gProtein: 5g

    Did you make this recipe?

    Tag me in your Instagram photo - @fakeginger

    © Amanda Livesay
    Category: breakfast

    Matcha Frappe

    Jul 20, 2017

    This shop has been compensated by Collective Bias, Inc. and its advertiser. All opinions are mine alone. #FrappeYourWay #CollectiveBias

    Matcha Frappe - this delicious 3 ingredient frozen drink is the perfect way to cool off in the summer!

    Heeeey guys!

    We’ve officially reached that point in summer when people are complaing about how hot it is and wishing for fall.

    Also? I saw pumpkin stuff at the grocery store.

    Pumpkin. In July.

    Anyway, we’ve had to move our lake trips from midday to evening because, Texas.

    It’s hot, y’all.

    We even tried to hike last weekend and I thought that since it was mostly shaded, we’d be fine. No. We sat in the stream for an hour and then went for burgers.

    This means that it’s officially frozen drink season.

    …

    Read More

    Paleo Sloppy Joes

    Jul 19, 2017

    You don’t have to give up your favorite comfort food just because you’re paleo! Paleo Sloppy Joes are easy, delicious, and maybe even better than the original!

    Paleo Sloppy Joes - a paleo take on the classic, using sweet potatoes! Easy and delicious - even the non-paleo people in your ilfe will love it!

    One of the hardest things about being paleo is missing those classic foods that you grew up on that are comforting just because mom made them.

    You know, things like spaghetti and meatballs, tacos, or, for me, sloppy joes.

    I love sloppy joes so much. We did dinner at the table every night of my life growing up but for some reason, I only have really distinct memories about sloppy joes.

    And the occasional meatloaf night because we would pick on my dad for mixing his meatloaf, mashed potatoes, and peas all together. But that’s beside the point.

    So, since I love sloppy joes so much and make them so often, my kids have also developed a love for them and I’ve had to find a way to make them paleo for me but still really delicious for them.

    Because who wants to make two different sloppy joes recipes for dinner? Not me!

    Paleo Sloppy Joes - a paleo take on the classic, using sweet potatoes! Easy and delicious - even the non-paleo people in your ilfe will love it!

    Ingredients

    • Coconut Oil – you can use olive oil or avocado oil if you prefer.
    • Ground Beef – you can substitute ground turkey or chicken to make it a little bit lighter.
    • Onion
    • Red Bell Pepper – use whatever color you like, I think red has the best flavor for these sloppy joes.
    • Garlic
    • Chili Powder
    • Tomato Sauce
    • Honey
    • Coconut Aminos – this is the paleo substitutre for soy sauce. You can also use tamari which is gluten free.
    • Red Wine Vinegar
    • Dijon Mustard
    • Crushed Red Pepper Flakes – leave this out if you don’t want any spiciness in your sloppy joes.
    • 6 Sweet Potatoes – you are going to bake these until they are fork tender and then serve the sloppy joes over top.

    How To Make Paleo Sloppy Joes

    • Cook ground beef, onion, and red bell pepper in coconut oil.
    • Add garlic and cook 30 seconds.
    • Add chili powder, salt and pepper, tomato sauce, water honey, coconut aminos, red wine vinegar, dijon mustard, and red pepper flakes.
    • Simmer until it reaches desired consisteny.
    • To serve, spoon mixture into warm sweet potatoes.
    What To Serve With Them

    You could totally make your own paleo bread to make it more authentic but I really enjoy the sloppy joes mixture on sweet potatoes because I make my sloppy joes a little bit spicy. The sweet and spicy combo is perfect.

    To cook my sweet potatoes, I poke a bunch of holes with a fork into the skins so the steam escapes and then roast them at 425F until they are tender enough to slice and fluff the insides with a fork. Just spoon the paleo sloppy joe mixture into the sweet potatoes and serve! 

    Make sure you subscribe to my email list to get all my new recipes delivered right to your inbox!

    You can also follow me on Instagram, Facebook, or Pinterest for even more! 

    More Paleo Dinner Recipes

    • Paleo Korean Beef Bowls
    • Paleo Crispy Pork Carnitas

    📖 Recipe

    Yield: 6 servings

    Paleo Sloppy Joes

    Paleo Sloppy Joes

    You don't have to give up your favorite comfort food just because you're paleo! Paleo Sloppy Joes are easy, delicious, and maybe even better than the original!

    Prep Time 10 minutes
    Cook Time 20 minutes
    Total Time 30 minutes

    Ingredients

    • 1 tablespoon Coconut Oil
    • 1 pound Lean Ground Beef
    • 1 small Onion, diced
    • 1 Red Bell Pepper, diced
    • 2 cloves Garlic, minced
    • 1 teaspoon Chili Powder
    • Salt and Pepper
    • 1 15 ounce can Tomato Sauce
    • ¼ cup Water
    • 2 tablespoons Honey
    • 1 tablespoon Coconut Aminos
    • 1 teaspoon Red Wine Vinegar
    • 1 teaspoon Dijon Mustard, paleo-friendly
    • 1 teaspoon Crushed Red Pepper Flakes
    • 6 Sweet Potatoes, baked until tender and split open

    Instructions

    1. Heat coconut oil in a large skillet over medium-high heat. Add ground beef, onion, and red bell pepper.
    2. Cook, breaking up the beef, until the vegetables are softened and the beef is cooked through. Drain if necessary.
    3. Add garlic and cook 30 seconds, just until fragrant.
    4. Add chili powder, salt and pepper, tomato sauce, water honey, coconut aminos, red wine vinegar, dijon mustard, and red pepper flakes.
    5. Bring to a simmer and let cook until thickened to desired consistency.
    6. To serve, spoon mixture into warm sweet potatoes.

    Did you make this recipe?

    Tag me in your Instagram photo - @fakeginger

    © Amanda Livesay
    Cuisine: American / Category: paleo


    Frozen Prickly Pear Margaritas

    Jul 14, 2017

    Frozen Prickly Pear Margaritas – fresh prickly pears, lime juice, and tequila! Is there anything better than a gorgeous bright pink margarita?!

    Frozen Prickly Pear Margaritas - fresh prickly pears, lime juice, and tequila! Is there anything better than a gorgeous pink margarita?!

    You guys.

    I’m having a thing with the Korean market right now.

    I mean, I’ve always enjoyed the Korean market buuuut I’ve definitely been there 3 times this week.

    And each time I make my kids wander around because I’m not actually looking for anything and then I get super excited and shout, “LOOK AT THAT [insert obscure vegetable]”. Then I make them look at all the fish and other dead creatures and finally I try to convince them to try super spicy noodles.

    Three times this week, guys.

    I’m honestly shocked they haven’t refused to go with me yet.

    …

    Read More

    Guacamole Bacon Burger

    Jul 13, 2017

    Guacamole Bacon Burger – delicious turkey burgers topped with pepper jack cheese, crispy bacon, and creamy guacamole. So spicy and delicious!

    Guacamole Bacon Burger - delicious turkey burgers topped with pepper jack cheese, crispy bacon, and creamy guacamole. So spicy and delicious!

    Heeeey guys! Happy almost Friday!

    How’s the week been?

    We’ve been spending a lot of time at the lake and I’ve been doing a whole lot of stress baking. I need a vacation.

    Guacamole Bacon Burger - delicious turkey burgers topped with pepper jack cheese, crispy bacon, and creamy guacamole. So spicy and delicious!

    I was totally craving a spicy burger when I made these so I topped them with a slice of pepper jack cheese and then some salty, crispy bacon, and finally some guacamole.

    Guacamole Bacon Burger - delicious turkey burgers topped with pepper jack cheese, crispy bacon, and creamy guacamole. So spicy and delicious!

    Make sure you subscribe to my email list to get all my new recipes delivered right to your inbox!

    You can also follow me on Instagram, Facebook, or Pinterest for even more! 

    Guacamole Bacon Burger - delicious turkey burgers topped with pepper jack cheese, crispy bacon, and creamy guacamole. So spicy and delicious!

    📖 Recipe

    Yield: 6 burgers

    Guacamole Bacon Burger

    Guacamole Bacon Burger
    Cook Time 20 minutes
    Total Time 20 minutes

    Ingredients

    • 6 seasoned frozen Turkey Burgers
    • 6 slices pepper jack cheese
    • 6 to asted buns
    • 12 slices bacon, cooked and halved
    • 1 ½ cups guacamole

    Instructions

    1. Grill burgers according to package instructions, melting cheese on top in the last minute or 2.
    2. Place on toasted bun and top with bacon and ¼ cup guacamole. Serve immediately.

    Nutrition Information:

    Yield:

    6

    Serving Size:

    1

    Amount Per Serving: Calories: 977Total Fat: 62gSaturated Fat: 20gTrans Fat: 1gUnsaturated Fat: 36gCholesterol: 170mgSodium: 1589mgCarbohydrates: 53gFiber: 6gSugar: 8gProtein: 54g

    Did you make this recipe?

    Tag me in your Instagram photo - @fakeginger

    © Amanda Livesay

    Mango Coconut Popsicles

    Jun 23, 2017

     This shop has been compensated by Collective Bias, Inc. and its advertiser, Walmart Family Mobile. All opinions are mine alone. #SummerIsForSavings #CollectiveBias #WFM1

    Mango Coconut Popsicles - the best way to cool off! Fresh mango is blended with coconut milk and layered with coconut yogurt! Easy, fresh, and delicious!

    Summer means a couple things for my kids.

    One: they’re stuck going on all my weird adventures. If I need to drive an hour for something for a blog post, they’re all going with me and we’re stopping at a taco place, a beach, whatever happens to be in my Yelp bookmarks on the way.

    They’re already over it.

    And two: all their friends move. Every summer, man. Every summer all their friends move. #armylife

    It’s rough. My oldest always has a great group of friends at the end of the school year and then they leave and he’s bored.

    So last year when it happened I get him his first phone.  And this year I decided to upgrade the phone and his plan to make it easier for him to keep up with his friends.

    And also to keep him entertained when I impulsively decide to drive across the state of Texas for perfect chips and queso.

    …

    Read More

    Peach Cherry Sangria

    Jun 16, 2017

    Peach Cherry Sangria is the perfect summer sangria! Peaches, cherries, and fresh basil in white wine and brandy. Mix up a big batch of this for all your summer pool parties!

    Peach Cherry Sangria - white wine sangria with peaches, cherries, and fresh basil! The perfect summer drink!

    Hey guys, happy Friday! How was your week? Are you also depressed that there was no Bachelorette this week?

    Anyway, my mom came in yesterday!

    Kicked that off by realizing that the Jeep had a flat tire minutes before I needed to leave for the airport to get her. Luckily the boyfriend was here and got it changed for me because otherwise?

    I would’ve sat in my driveway and cried.

    I haven’t seen my mom in almost a year – crazy, right? I mean, we talk pretty much every day of our lives but still.

    Of course the boys started begging to go to the lake as soon as she stepped off the plane so we ended up spending a couple hours floating around.

    Peach Cherry Sangria - white wine sangria with peaches, cherries, and fresh basil! The perfect summer drink!

    Peach Cherry Sangria!

    Is everyone stupid excited for cherries and peaches? I’ve bought, like, 4 bags of cherries intending to make sangria with them and then we just end up snacking on them. And the peaches have all gone into pie.

    So good. I just love summer fruits.

    This Peach Cherry Sangria is the perfect summer sangria because it uses both peaches and cherries and my other current obsession, fresh basil. Use whatever inexpensive white wine you like. You chill the cherries in the wine overnight so it turns red and delicious.

    It’s super simple – just soak the cherries overnight in the wine and a tiny bit of brandy and then before you head to your barbecue or pool party or whatever, just drop in the sliced peaches and basil. Top with a little sparkling water and it’s all done.

    More Drink Recipes

    • Sarasota Lemonade
    • Raspberry Peach Bellini Popsicles

    Make sure you subscribe to my email list to get all my new recipes delivered right to your inbox!

    You can also follow me on Instagram, Facebook, or Pinterest for even more! 

    📖 Recipe

    Yield: about 10 servings

    Peach Cherry Sangria

    Peach Cherry Sangria
    Prep Time 15 minutes
    Additional Time 12 hours
    Total Time 12 hours 15 minutes

    Ingredients

    • ¼ cup simple syrup
    • ¼ cup Brandy
    • 2 cups pitted cherries
    • 1 bottle white wine
    • 2 cups peaches, sliced
    • ¼ cup fresh basil
    • 1 cup chilled sparkling water

    Instructions

    1. In a pitcher, combine simple syrup, brandy, cherries, and white wine. Chill overnight. Stir in peaches, basil, and sparkling water before serving.

    Recommended Products

    As an Amazon Associate and member of other affiliate programs, I earn from qualifying purchases.

    • Cherry Pitter
      Cherry Pitter
    • Simple Syrup
      Simple Syrup

    Nutrition Information:

    Yield:

    10

    Serving Size:

    1

    Amount Per Serving: Calories: 116Total Fat: 0gSaturated Fat: 0gTrans Fat: 0gUnsaturated Fat: 0gCholesterol: 0mgSodium: 4mgCarbohydrates: 13gFiber: 1gSugar: 11gProtein: 1g

    Did you make this recipe?

    Tag me in your Instagram photo - @fakeginger

    © Amanda Livesay
    Cuisine: American / Category: drink


    « Previous Page
    Next Page »

    Primary Sidebar

    Amanda Livesay
    Hi, I'm Amanda! DFW food blogger, mom of boys, and crazy dog lady.
    Read more
    Privacy Policy
    Privacy Policy

    Footer

    ↑ back to top

    About

    • Privacy Policy
    • About Fake Ginger

    Newsletter

    • Sign Up for weekly emails featuring new recipes!

    As an Amazon Associate I earn from qualifying purchases.

    Copyright © 2024 FakeGinger.com