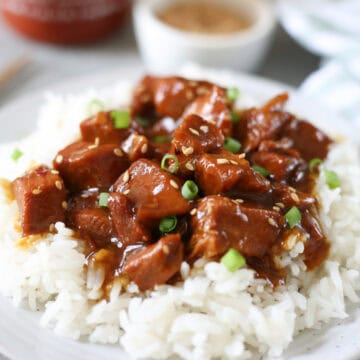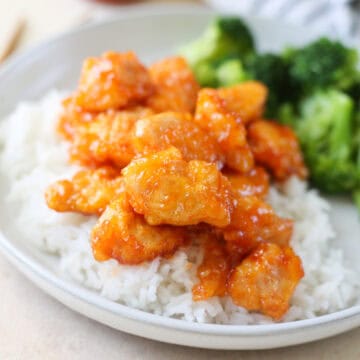
Sweet and Sour Chicken tastes just like takeout! Chicken is pan fried and then baked in a delicious, sticky sweet and sour sauce.
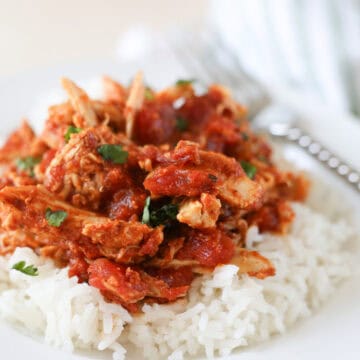
I also have a Sweet and Sour Pork recipe!

Originally posted July 12, 2012. Updated March 18, 2025.
This sweet and sour chicken has been one of my kids favorite dinners since they were little. It’s pan fried crispy chicken that’s baked in a Chinese takeout-style sweet and sour sauce that gets sticky and delicious in the oven.
I, as a rule, do not fry things in my house. It’s just too much work. But this chicken is shallow fried in just ¼ cup of oil and since it’s going in the oven, you don’t even have to worry about it being cooked through. This recipe is well worth it.

Ingredients
- Boneless, skinless chicken breasts – you could use thighs in your want but because they are fattier than breasts, your sauce may not be as thick and sticky.
- Cornstarch – this is going to give the chicken a light, crispy coating.
- Eggs – these are being used in the coating for the chicken.
- Canola or vegetable oil – the chickens are getting fried in this oil so you want something neutral flavored, not an olive oil or coconut oil.
- Sugar – sweet and sour sauce is mostly sugar.
- Ketchup – adds tang, a little more sweetness, and makes the sauce red.
- White vinegar – the sour part of the sauce! Be careful when you stir the dish – the smell of cooking vinegar is intense!
- Soy sauce – you can also use coconut aminos to make this dish gluten free.
- Garlic powder
Keep scrolling for ingredient amounts!

How To Make Sweet and Sour Chicken
- Prepare chicken. Cut your chicken into bite-sized pieces. Season with salt and pepper.
- Prepare coating. Put the cornstarch in a shallow dish. In a separate bowl, beat the eggs.
- Coat chicken. Coat the chicken pieces with cornstarch, then dip into the eggs.
- Fry chicken. Heat your ¼ cup oil in a large skillet over medium heat until hot. Add the chicken and cook until browned on all sides but not cooked through.
- Make sauce. While your chicken is cooking, whisk together all ingredients for the sauce. Set aside.
- Transfer. When chicken is browned, transfer the chicken to the prepared baking dish. Pour the sauce over top.
- Bake. Bake at 325F for one hour; stirring the chicken every 15 minutes.
- Serve. Serve over rice.

How Long Is It Good For?
Sweet and sour chicken is good for up to 3 days. Make sure to store it in an airtight container in the fridge.
You can reheat it in the microwave when you are ready to serve.
Can You Freeze It?
You can freeze the chicken for up to 3 months. The chicken will likely lose it’s crispiness but will still be delicious.
When you are ready to serve it, let it defrost overnight in the fridge and then reheat in the microwave.

More Chicken Recipes
- Chicken and Biscuits
- Buffalo Chicken Meatballs
- BBQ Chicken Quesadillas
- Cheesy Chicken Broccoli Stuffed Shells
- Cream Cheese Chicken Enchiladas
Make sure you subscribe to my email list to get all my new recipes delivered right to your inbox!
You can also follow me on Instagram, Facebook, or Pinterest for even more!
📖 Recipe
Sweet and Sour Chicken

Sweet and Sour Chicken tastes just like takeout! Chicken is pan fried and then baked in a delicious, sticky sweet and sour sauce.
Ingredients
For the chicken:
- 1 pound boneless, skinless chicken breasts
- salt + pepper
- 1 cup cornstarch
- 2 eggs
- ¼ cup canola or vegetable oil
For the sauce:
- ¾ cup sugar
- 4 tablespoons ketchup
- ½ cup white vinegar
- 1 tablespoons soy sauce
- 1 teaspoon garlic powder
- salt to taste
Instructions
- Preheat oven to 325F. Spray a 9x13-inch baking dish with oil.
- Cut your chicken into bite-sized pieces. Season with salt and pepper.
- Put the cornstarch in a shall dish. In a separate bowl, beat the eggs.
- Coat the chicken pieces with cornstarch, then dip into the eggs.
- Heat your ¼ cup oil in a large skillet over medium heat until hot. Add the chicken and cook until browned on all sides but not cooked through.
- While your chicken is cooking, whisk together all ingredients for the sauce. Season to taste with salt. Set aside.
- When chicken is browned, use a slotted spoon to transfer the chicken to the prepared baking dish. Pour the sauce over top.
- Bake for one hour; stirring the chicken every 15 minutes. Serve over rice.
Recommended Products
As an Amazon Associate and member of other affiliate programs, I earn from qualifying purchases.


Nutrition Information:
Yield:
4Serving Size:
1Amount Per Serving: Calories: 638Total Fat: 20gSaturated Fat: 3gTrans Fat: 0gUnsaturated Fat: 16gCholesterol: 189mgSodium: 779mgCarbohydrates: 72gFiber: 1gSugar: 41gProtein: 39g