• Skip to primary navigation
  • Skip to main content
  • Skip to primary sidebar
  • Home
  • About
  • Recipes

Fake Ginger

menu icon
go to homepage
  • Recipe Index
  • About
  • Subscribe
    • Facebook
    • Instagram
    • Pinterest
  • subscribe
    search icon
    Homepage link
    • Recipe Index
    • About
    • Subscribe
    • Facebook
    • Instagram
    • Pinterest
  • ×
    Home » Page 34

    20+ Halloween Treats

    20+ Halloween Treats

    Sep 16, 2015

    Happy Wednesday! I hope you guys love this post as much as I do. I just love seeing all the fun Halloween treats ideas!

    Would you be shocked if I told you that I bought the kids’ Halloween costumes on Monday? Or that I’ve had the dogs’ costumes for at least a month? Or that I ordered Halloween decorations from Target.com because I got tired of waiting on my Target to put stuff out?

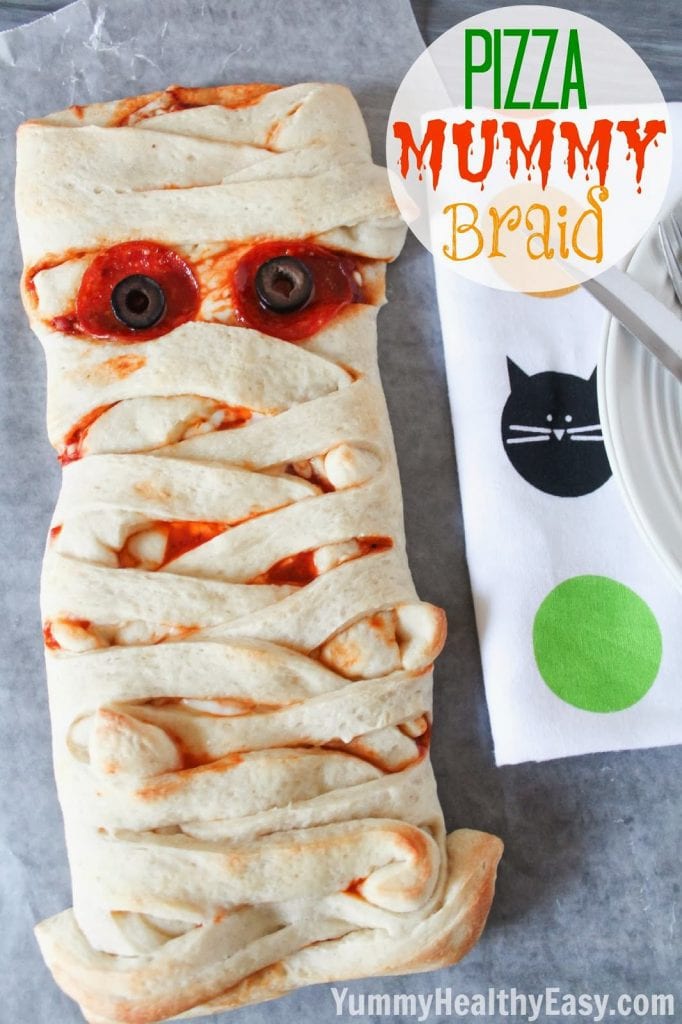
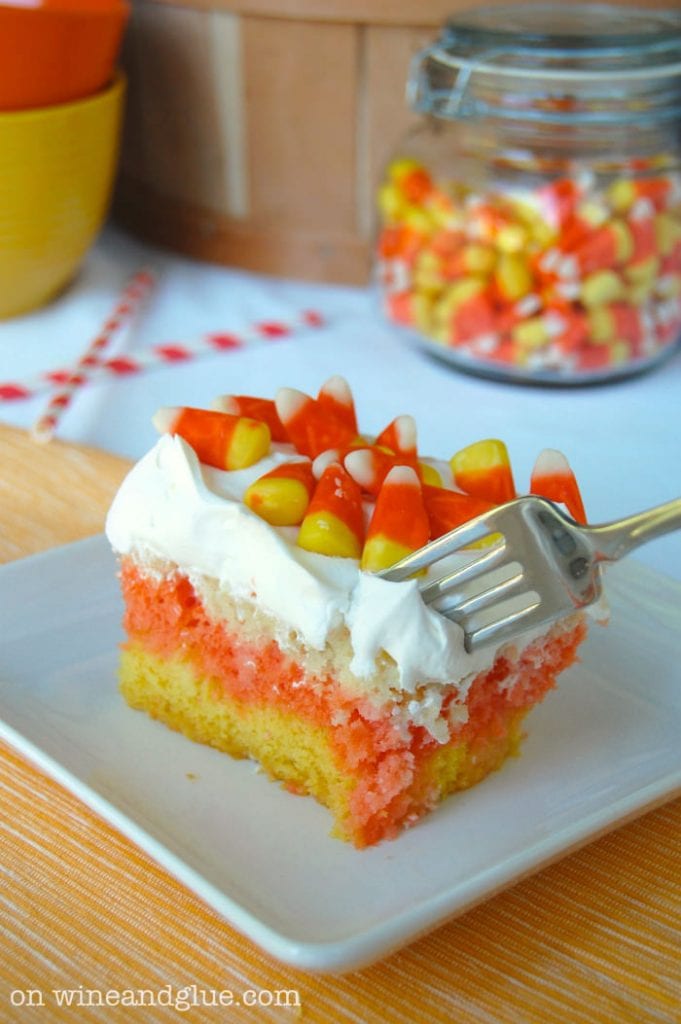
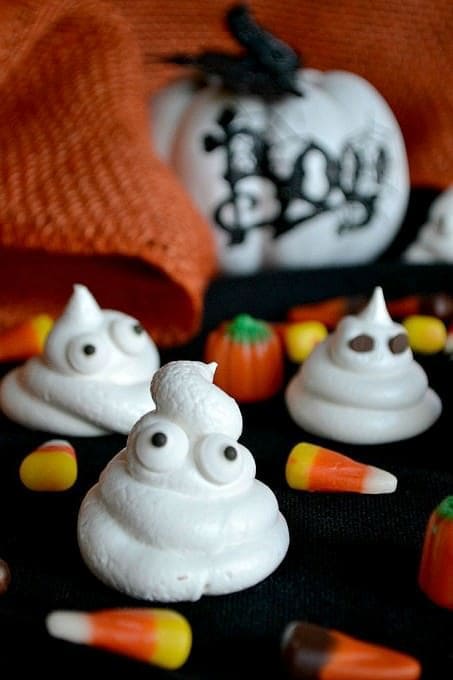
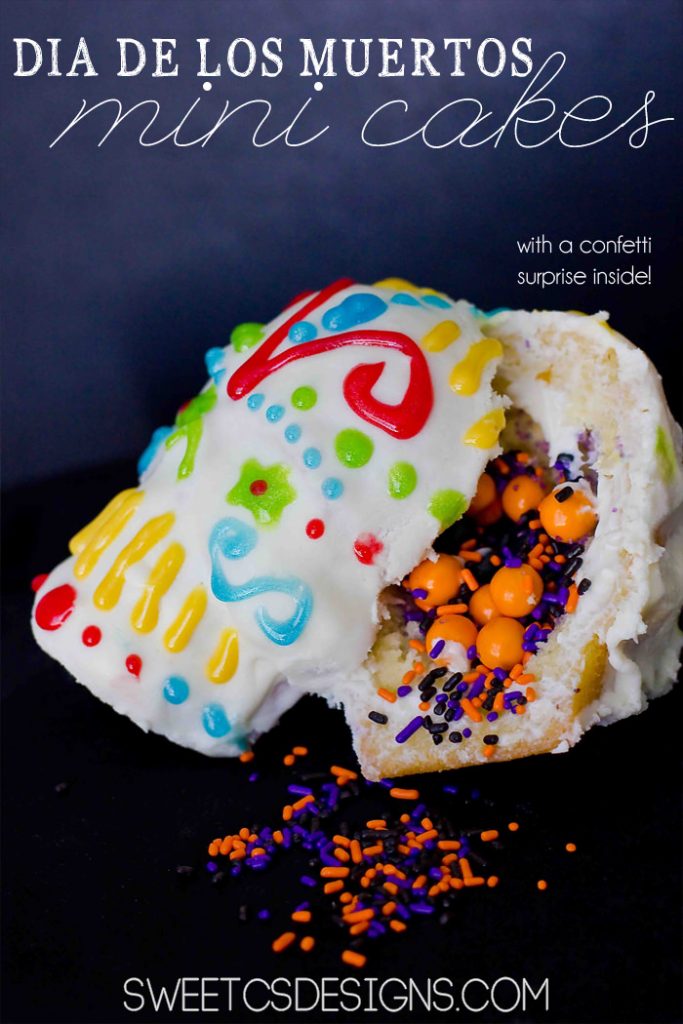
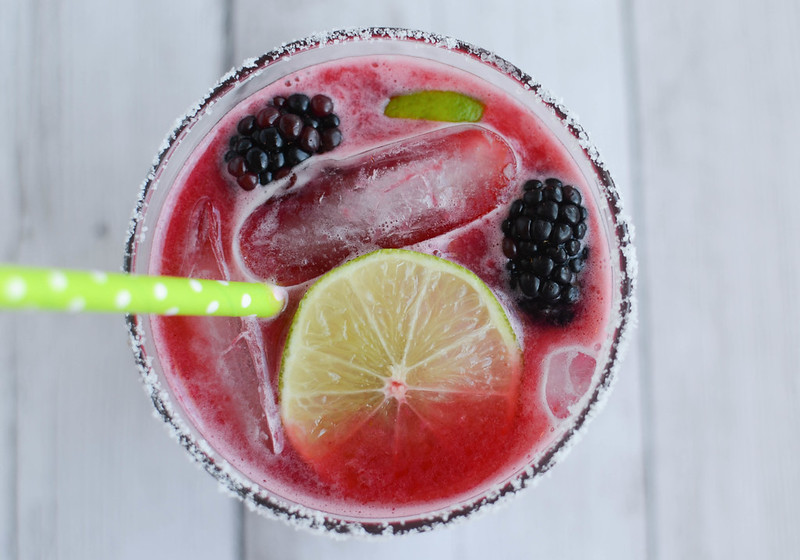
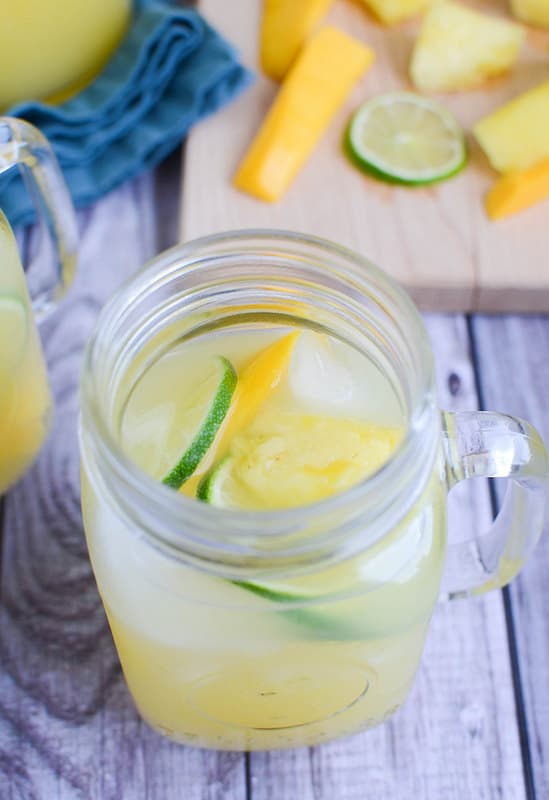
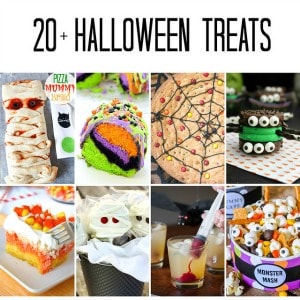
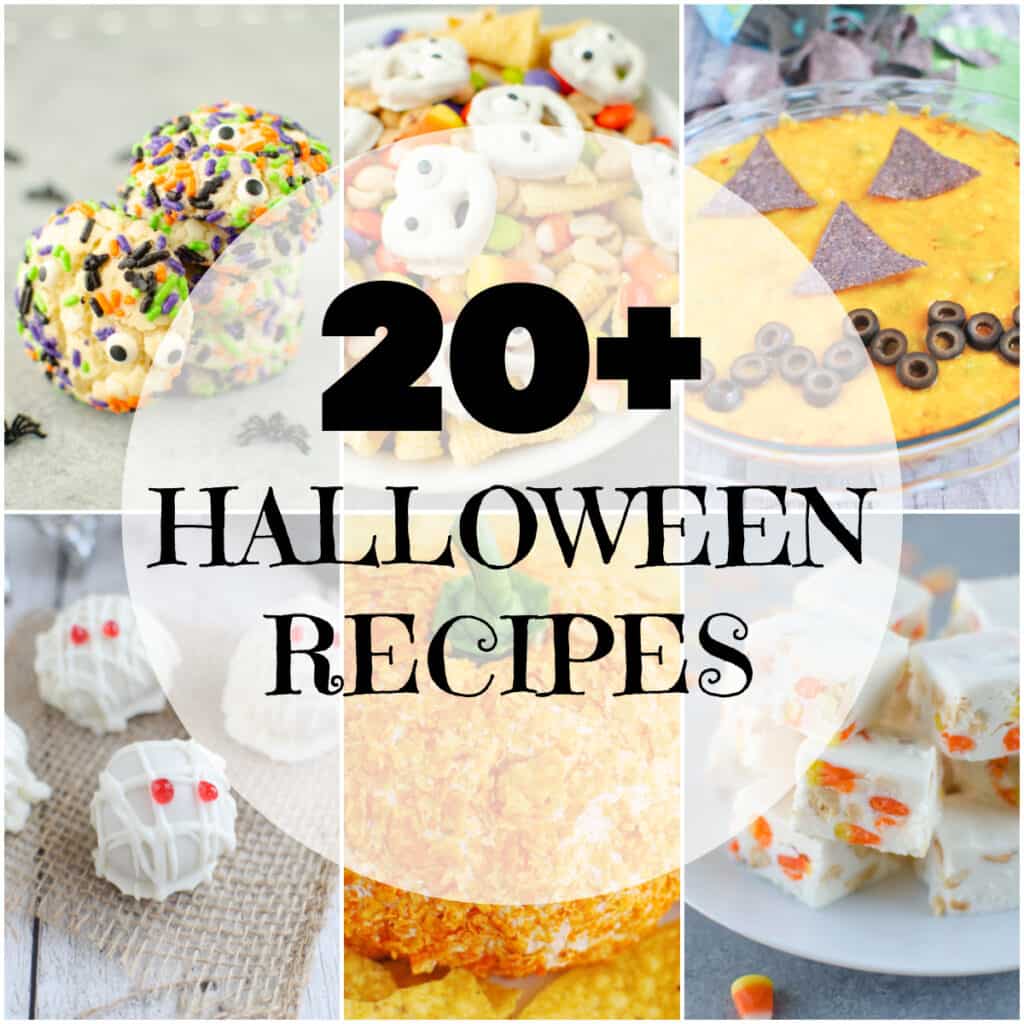
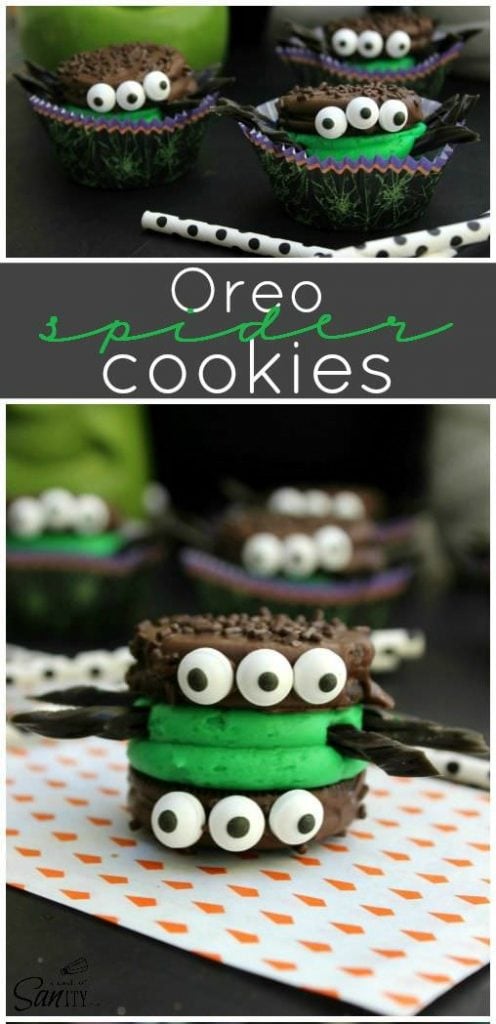
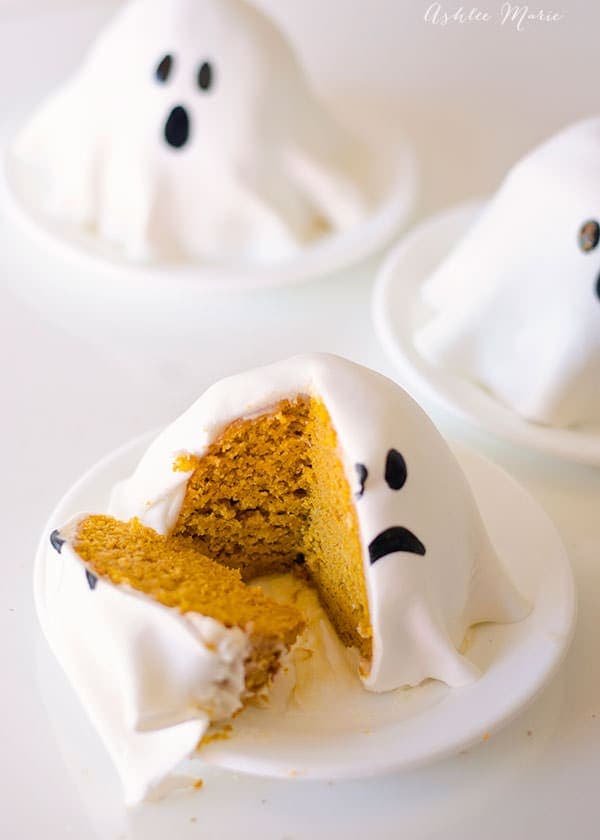
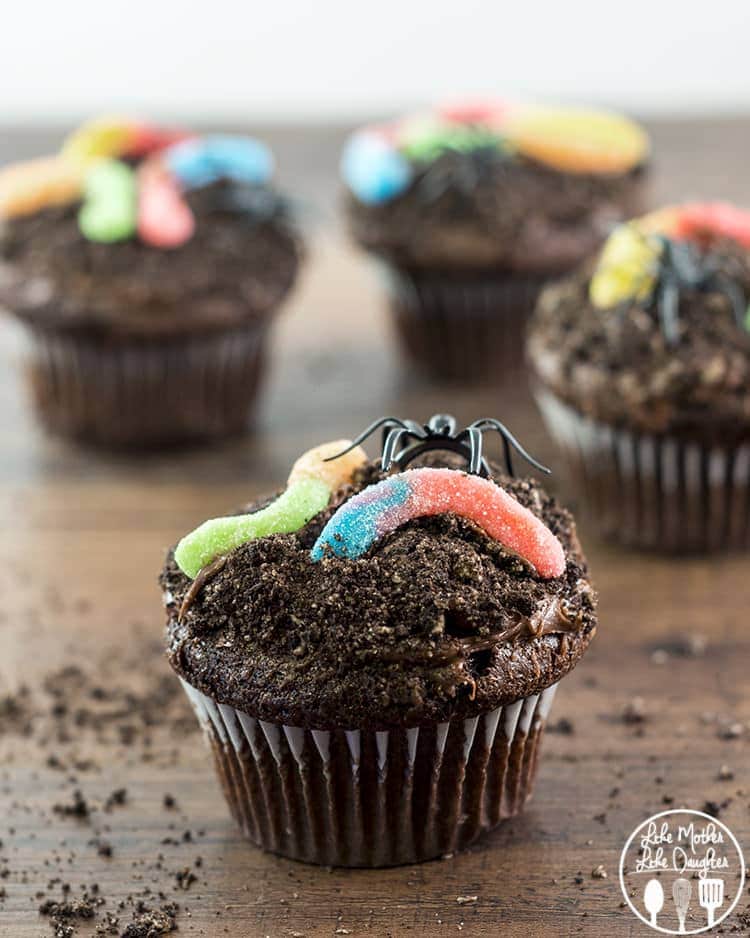
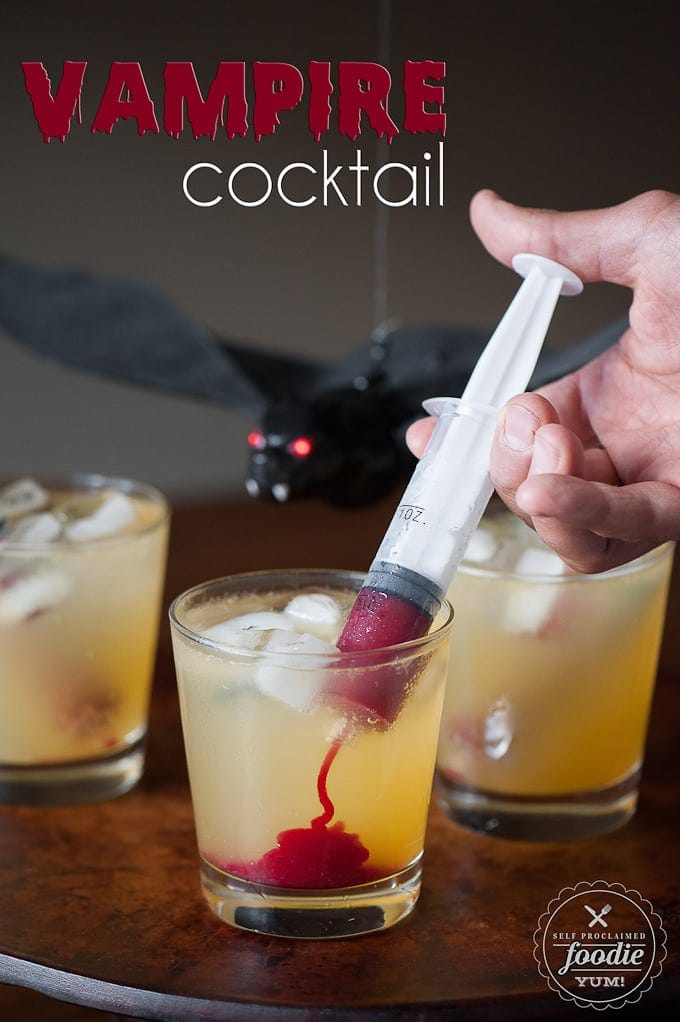
    Guys. I am ready. Lots of fun Halloween ideas here. We’ve got sweets, cocktails, and even some dinner ideas!

    Make sure you subscribe to my email list to get all my new recipes delivered right to your inbox!

    You can also follow me on Instagram, Facebook, or Pinterest for even more! 

    Ghostly Snack Mix

    Candy Corn Fudge

    Halloween Confetti Cookies

    Pumpkin Cheese Ball

    Mummy Oreo Truffles

    Jack O Lantern Layer Dip

    Spooky Spider Brownies

    Spooky-Spider-Brownies-2

    Halloween Bundt Cake

    15601704035_f4c9f86351_c

    Mummy Pops

    Mummy-Pops

    Candy Corn Sugar Cookie Bars

    Candy+Corn+Sugar+Cookie+Bars

    Spiderweb Cookie Cake

    Spiderweb-Cookie-Cake

    Frankenberry Krispies

    Frankenberry-Krispies-3

    Oreo Spider Cookie Sandwiches

    spider-cookies

    Mini Pumpkin Ghost cakes

    19422514134_6c53b87473_o

    Dirt Cupcakes

    dirt-cupcakes2

    Vampire Cocktail

    vampire-cocktail

    Monster Cupcakes

    Monster Cupcakes

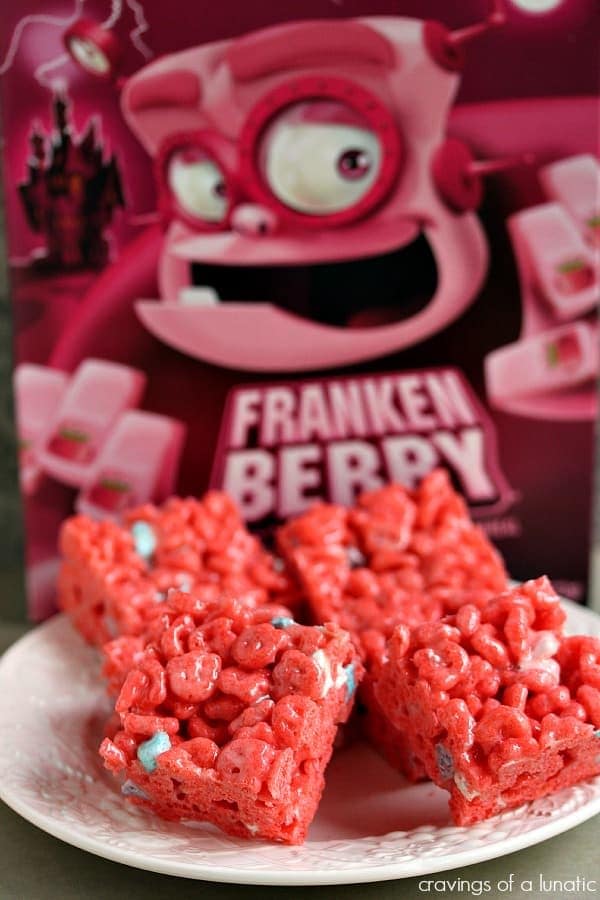
    Frankenstein Rice Krispie Treats

    Untitled

    Pizza Mummy Braid

    PizzaMummyBraid1

    Candy Corn Poke Cake

    halloween_desserts5

    Halloween Meringues

    Halloween Meringues

    Skull Confetti Cakes

    Skull Confetti Cakes

    Cheesy Ham and Tortellini Bake

    Sep 09, 2015

    Cheesy Ham and Tortellini Bake – cheese-filled pasta with ham and peas in a creamy, cheesy sauce with a Ritz cracker topping! An easy 30 minute meal the whole family will love!

    Cheesy Ham and Tortellini Bake - cheese-filled pasta with ham and peas in a creamy, cheesy sauce with a Ritz cracker topping! An easy 30 minute meal the whole family will love!

    Happy Wednesday!

    I’ve got a delicious and easy Cheesy Ham and Tortellini Bake for you today! Because I love a 30 minute meal!

    Especially one that the kids eat without complaint!

    Those are my favorite.

    Don’t you just love tortellini? I am obsessed. They literally cook in 2 minutes and they make a meal so much more fun than regular pasta. Why have plain pasta when you can have cheese-filled pasta?

    That’s my life motto.

    …

    Read More

    Pumpkin Peanut Butter Dog Treats

    Sep 08, 2015

    Easy homemade treats your pup is going to love! Pumpkin Peanut Butter Dog Treats have only 5 simple ingredients.

    Hey guys! How as the long weekend? I hope it was long and fabulous!  And I hope you’re as excited as I am for a short week!

    First up: I have to admit that I’ve had 5 Pumpkin Spice Lattes since Friday.

    Five.

    It’s a problem.

    I’m keeping a tally on the whiteboard in my office so I’ll be sure to keep you updated.

    Second: I am having the worst pumpkin baking luck.

    I’ve made 3 different things and all 3 failed. Well, to be fair, the first was only a fail because I tried to photograph it in July and it’s so flippin’ hot here that the whipped cream melted literally seconds after I put it on the plate.

    So I just ate it all instead of blogging about it.

    The other two were total fails.

    My first successful pumpkin goodie this year is this Pumpkin Peanut Butter Dog Treats recipe.

    Hey, the pups are just as excited as I am about pumpkin season!

    I was almost tempted to give these a try because they smelled so good when baking. I mean, pumpkin, peanut butter, cinnamon! What’s not to love? My dogs loved them and I’m sure yours will too!

    Ingredients

    • Pumpkin puree
    • Peanut butter
    • Egg
    • Cinnamon
    • All-purpose flour
    • Water

    Instructions

    • Preheat oven to 350F. Line a baking sheet with parchment paper
    • Beat together pumpkin puree, peanut butter, egg, and cinnamon until smooth
    • Slowly beat in flour and water, alternating between each, until combined
    • Turn the dough onto a well floured surface and roll to about ¼-inch thick
    • Cut into desired cookie cutters and transfer to the prepared baking sheet
    • Bake for 20 minutes
    • Cool completely before serving to your pup

    How Long Are Homemade Dog Treats Good For?

    These treats will be good for 3 or 4 days if left at room temperature and up to a week in the fridge.

    Is Peanut Butter Safe For Dogs?

    Yes, peanut butter is safe for dogs – and they LOVE it!

    Make sure to read the labels of your peanut butter and avoid any that contain xylitol. That is very, very dangerous for dogs.

    I tend to buy peanut butter with only peanuts listed in the ingredients. I feel like it’s better for everyone in the house.

    More Dog Treats Recipes

    • Peanut Butter Pupcakes
    • Peanut Butter and Oats Doggy Treats
    • Peanut Butter Doggy Ice Cream
    • Carrot, Peanut Butter, and Oats Dog Treats

    Make sure you subscribe to my email list to get all my new recipes delivered right to your inbox!

    You can also follow me on Instagram, Facebook, or Pinterest for even more! 

    📖 Recipe

    Yield: about 15 servings

    Pumpkin Peanut Butter Dog Treats

    Pumpkin Peanut Butter Dog Treats

    Easy homemade treats your pup is going to love! Pumpkin Peanut Butter Dog Treats have only 5 simple ingredients.

    Prep Time 20 minutes
    Cook Time 20 minutes
    Total Time 40 minutes

    Ingredients

    • ½ cup pumpkin puree, NOT pumpkin pie filling!
    • 2 heaping tablespoons peanut butter
    • 1 egg
    • ¼ teaspoon cinnamon
    • 1 ¼ cups flour, plus more for rolling
    • ¼ cup water

    Instructions

    1. Preheat oven to 350F. Line a baking sheet with parchment paper.
    2. In a large mixing bowl, whisk together pumpkin puree, peanut butter, egg, and cinnamon until smooth. Slowly beat in flour and water, alternating between each, until everything is combined.
    3. Turn the dough out onto a well floured surface and roll to about ¼-inch thick. Cut with desired cookie cutters and transfer to the prepared baking sheet.
    4. Bake for 20 minutes. Cool completely before treating your pup!

    Recommended Products

    As an Amazon Associate and member of other affiliate programs, I earn from qualifying purchases.

    • Parchment Paper
      Parchment Paper
    • Bone Cookie Cutters
      Bone Cookie Cutters
    • Rolling Pin
      Rolling Pin

    Nutrition Information:

    Yield:

    15

    Serving Size:

    1

    Amount Per Serving: Calories: 77Total Fat: 2gSaturated Fat: 0gTrans Fat: 0gUnsaturated Fat: 1gCholesterol: 12mgSodium: 53mgCarbohydrates: 14gFiber: 2gSugar: 0gProtein: 2g

    Did you make this recipe?

    Tag me in your Instagram photo - @fakeginger

    © Amanda Livesay
    Category: dog-friendly

    Apple Cider Doughnuts

    Sep 02, 2015

    Homemade Apple Cider Doughnuts will have you wishing for fall! These cake doughnuts are full of apple cider flavor and coated in cinnamon sugar. 

    If you love apple cider, try Caramel Apple Cider!

    Good morning guys! (Or afternoon! Or evening!) I made doughnuts!

    Last year I was super excited because I realized we had an apple farm, like, 15 minutes from our house. Yes, it took me 4 years to realize it.

    The website advertised apple cider doughnuts and I was sold. Sure, picking apples and pumpkins sounds like fun but doughnuts? I will go pretty much anywhere if doughnuts are promised.

    I’m very motivated by food.

    Just like my dogs.

    Anyway, we got there and the doughnuts were baked.

    I know.

    The kids took one bite and said, “Nope.”

    And I have been thinking about real apple cider doughnuts ever since. I finally got around to making them and they are just as good as I imagined. And we got to enjoy them warm since they came right out of my kitchen.

    Ingredients

    • Apple cider – use your favorite brand.
    • All-purpose flour
    • Brown sugar
    • Baking powder
    • Baking soda
    • Cardamom – you can leave it out if you don’t have it.
    • Cinnamon – this is going in the doughnuts and then in the cinnamon sugar mixture the hot doughnuts are rolled in.
    • Nutmeg
    • Eggs
    • Butter
    • Vegetable oil – this is for frying so you want a neutral oil that won’t burn at high heat. Vegetable oil, canola oil, or peanut oil is best for frying.
    • Granulated sugar – this is for coating the doughnuts after they are fried.

    How To Make Apple Cider Doughnuts

    • Reduce cider. Bring cider to a boil and boil until reduced by about half. Cool completely.
    • Dry ingredients. Whisk together flour, brown sugar, baking powder, salt, baking soda, cardamom, cinnamon, and nutmeg.
    • Wet ingredients. Whisk together eggs, butter, and cider.
    • Combine. Stir into the dry ingredients.
    • Chill. Cover and refrigerate for 1 hour.
    • Make cinnamon sugar. Stir together sugar and cinnamon.
    • Shape doughnuts. Divide dough in half on a well floured surface. Roll each portion to ½″ thickness and cut with doughnut cutter.
    • Prepare oil. Heat oil to 365F.
    • Fry. Fry doughnuts, a few at a time, for 1 – 1 ½ minutes on each side. Drain on paper towels.
    • Cinnamon sugar. Toss hot doughnuts with cinnamon sugar mixture.

    More Apple Recipes

    • Apple Galette
    • Apple Cranberry Crisp
    • Apple Cinnamon Monkey Bread
    • Apple Pie Squares
    • Caramel Apple Nachos
    • Pumpkin Apple Muffins

    Make sure you subscribe to my email list to get all my new recipes delivered right to your inbox!

    You can also follow me on Instagram, Facebook, or Pinterest for even more! 

    📖 Recipe

    Yield: 12 doughnuts

    Apple Cider Doughnuts

    Apple Cider Doughnuts

    Homemade Apple Cider Doughnuts will have you wishing for fall! These cake doughnuts are full of apple cider flavor and coated in cinnamon sugar. 

    Prep Time 20 minutes
    Cook Time 5 minutes
    Additional Time 1 hour
    Total Time 1 hour 25 minutes

    Ingredients

    • 2 cups apple cider
    • 3 cups flour
    • ⅔ cup packed brown sugar
    • 2 teaspoons baking powder
    • ¾ teaspoon salt
    • ½ teaspoon baking soda
    • ¼ teaspoon cardamom
    • ¼ teaspoon cinnamon
    • ¼ teaspoon nutmeg
    • 2 large eggs
    • 6 tablespoons butter, melted and cooled
    • vegetable oil for frying

    For the cinnamon sugar:

    • ¾ cup sugar
    • 2 tablespoons cinnamon

    Instructions

    1. In a small saucepan, bring cider to a boil and cook until reduced by about half. Remove from heat and cool completely.
    2. Whisk together flour, brown sugar, baking powder, salt, baking soda, cardamom, cinnamon, and nutmeg.
    3. In a separate bowl, whisk together eggs, butter, and cider. Stir into the dry ingredients. It will be sticky. Cover and refrigerate for 1 hour.
    4. Make the cinnamon sugar: stir together sugar and cinnamon.
    5. Divide dough in half on a well floured surface. Roll each portion to ½" thickness and cut with doughnut cutter.
    6. Heat oil to 365F. Fry doughnuts, a few at a time, for 1 - 1 ½ minutes on each side. Drain on paper towels. Toss hot doughnuts with cinnamon sugar mixture.

    Recommended Products

    As an Amazon Associate and member of other affiliate programs, I earn from qualifying purchases.

    • Dutch Oven
      Dutch Oven
    • Doughnut Cutter
      Doughnut Cutter

    Nutrition Information:

    Yield:

    12

    Serving Size:

    1

    Amount Per Serving: Calories: 297Total Fat: 8gSaturated Fat: 4gTrans Fat: 0gUnsaturated Fat: 3gCholesterol: 46mgSodium: 329mgCarbohydrates: 52gFiber: 2gSugar: 26gProtein: 4g

    Did you make this recipe?

    Tag me in your Instagram photo - @fakeginger

    © Amanda Livesay
    Cuisine: American / Category: breakfast

    Cheesy Ranch Chex Mix

    Sep 01, 2015

    Cheesy Ranch Chex Mix is an easy and delicious party snack made with Chex cereal, crackers, pretzels, and a Parmesan ranch seasoning.

    I love making chex mix for parties or just for every day snacking. Some of our other favorites are Dill Pickle Chex Mix, Cheesy Taco Chex Mix, and Cranberry Nut Chex Mix!

    Cheesy Ranch Chex Mix - Chex cereal, crackers, and pretzels coated in a delicious parmesan and ranch seasoning. Seriously addictive!

    Heeeeey guys!

    Today’s a good day. September 1st means so many great things! I mean, the Dairy Queen Pumpkin Blizzard is back. The Pumpkin Spice Latte is right around the corner. Bath & Body Works is releasing even more pumpkin candles next week. I am SO EXCITED for September.

    And you know what else September means? Lots of football! And what’s the best part about football season?

    The food, of course. This Chex mix is one if my go to football snacks. Whether I’m hosting or attending a party, this is almost always on the list of things to make. It’s quick and easy, delicious, and easy to serve at home or pack up and take with you.

    Everyone will be asking for the recipe!

    Cheesy Ranch Chex Mix - Chex cereal, crackers, and pretzels coated in a delicious parmesan and ranch seasoning. Seriously addictive!

    Ingredients

    • Chex cereal – you can use corn, rice, wheat, or a mixture of a couple!
    • Mini pretzels – you can use any shape of pretzel that you like but I love the mini twisty ones.
    • Cheez-It crackers – you can also use any flavor of cheez-it that you like. I used the original.
    • Butter
    • Ranch seasoning mix – the powdered mix, not the liquid salad dressing. You should be able to find it with the dressings in the grocery store.
    • Grated Parmesan cheese – the stuff in the green can works perfectly for this! You want the grated kind and not anything shredded.

    Instructions

    • Prepare. Preheat oven to 250F. Line a large rimmed baking sheet with parchment paper.
    • Mix dry ingredients. Combine cereal, pretzels, and crackers in a very large mixing bowl.
    • Melt butter. In small microwavable bowl, microwave butter uncovered on High about 30 seconds or until melted. Pour over cereal mixture; stir until evenly coated.
    • Add seasonings. Stir in dressing mix and cheese until evenly coated.
    • Bake. Bake for 1 hour, stirring every 15 minutes. Cool completely before serving.

    How Long Is It Good For?

    Homemade chex mix is good for several weeks at room temperature. Make sure to store it in an airtight container or big ziploc bag.

    Can You Freeze Chex Mix?

    I don’t recommend freezing homemade chex mix. The crunchy parts won’t stay crunchy once frozen and defrosted.

    Variations

    There are so many ways you can make this Chex mix. Try some of these ideas:

    • Pretzels are my least favorite part of Chex mix so sometimes I’ll leave them out and do bagel chips instead.
    • Or use a different shape of pretzel! The sticks, circles, or squares would all work great in this recipe.
    • Try Goldfish crackers instead of Cheez-Its! You could do any flavor but the cheddar Goldfish is the most obvious answer.
    • Want to add a little spice? Use the spicy Cheez-Its!
    • Another spice option is to use the spicy ranch seasoning mix!

    Cheesy Ranch Chex Mix - Chex cereal, crackers, and pretzels coated in a delicious parmesan and ranch seasoning. Seriously addictive!

    More Chex Mix Recipes

    • White Chocolate Peppermint Chex
    • Dirt and Worms Chex Mix
    • Chex Party Mix
    • Chocolate Chex Mix

    Make sure you subscribe to my email list to get all my new recipes delivered right to your inbox!

    You can also follow me on Instagram, Facebook, or Pinterest for even more! 

    📖 Recipe

    Yield: 20 servings

    Cheesy Ranch Chex Mix

    Cheesy Ranch Chex Mix

    Cheesy Ranch Chex Mix is an easy and delicious party snack made with Chex cereal, crackers, pretzels, and a Parmesan ranch seasoning.

    Prep Time 10 minutes
    Cook Time 1 hour
    Total Time 1 hour 10 minutes

    Ingredients

    • 8 cups Chex cereal, rice, wheat, or corn
    • 2 cups mini pretzels
    • 2 cups Cheez-It crackers
    • 3 tablespoons butter
    • 1 1 ounce package ranch seasoning mix
    • ½ cup grated Parmesan cheese

    Instructions

    1. Preheat oven to 250F. Line a large rimmed baking sheet with parchment paper.
    2. Combine cereal, pretzels, and crackers in a very large mixing bowl.
    3. In small microwavable bowl, microwave butter uncovered on High about 30 seconds or until melted. Pour over cereal mixture; stir until evenly coated. Stir in dressing mix and cheese until evenly coated.
    4. Bake for 1 hour, stirring every 15 minutes.
    5. Cool completely before serving.

    Recommended Products

    As an Amazon Associate and member of other affiliate programs, I earn from qualifying purchases.

    • Rubber Spatulas
      Rubber Spatulas
    • Mixing Bowls with Lids
      Mixing Bowls with Lids
    • Ranch Dressing Mix
      Ranch Dressing Mix

    Nutrition Information:

    Yield:

    20

    Serving Size:

    1

    Amount Per Serving: Calories: 257Total Fat: 9gSaturated Fat: 3gTrans Fat: 0gUnsaturated Fat: 6gCholesterol: 7mgSodium: 491mgCarbohydrates: 39gFiber: 3gSugar: 2gProtein: 7g

    Did you make this recipe?

    Tag me in your Instagram photo - @fakeginger

    © Amanda Livesay
    Cuisine: American / Category: snack

    Apple and Brie Quesadillas

    Aug 31, 2015

    Apple and Brie Quesadillas are an easy and delicious meatless meal! Crisp apples with melty brie and peppery arugula. 

    Apple and Brie Quesadillas - easy and delicious meatless meal! Crisp apples with melty brie and peppery arugula.

    Is it really Monday again? How did that happen so fast?

    Well how was the weekend? I hope it was fantastic!

    Ours was good. It is still so stupid hot here in Texas that I kind of didn’t want to do anything. Like even running to Walmart (as I’m doing every other day right now to look for new pumpkin goodies) seemed too difficult.

    I keep reminding myself of our Christmas roadtrip last year and how we had to drive through snow in Dallas.

    C’mon cold weather! C’mon ⅛″ of snow!

    These Apple and Brie Quesadillas taste like fall so at least we have that! They’re full of a (super simple) apple cider mustard, brie, apple slices, and fresh arugula. All that between crispy flour tortillas! So good and so easy! You can have dinner ready in about 15 minutes! 

    Apple and Brie Quesadillas - easy and delicious meatless meal! Crisp apples with melty brie and peppery arugula.

    Ingredients

    • Dijon mustard – use your favorite brand of dijon mustard.
    • Apple cider – this is getting mixed with the mustard to make a really flavorful mustard.
    • Flour tortillas – I recommend burrito-size flour tortillas for quesadillas.
    • Brie cheese – I suggest cutting the rind off the brie pieces you plan on using so that everything melts smoothly.
    • Apple – you can use whatever variety of apple you like but I think a granny smith works really well in this recipe.
    • Arugula – this adds a nice peppery taste but if you aren’t an arugula fan, spinach would be a great replacement.

    How To Make Apple and Brie Quesadillas

    • Make mustard. Whisk together mustard and apple cider in a small bowl. Spread each tortilla with the mustard mixture.
    • Assemble. Place one tortilla in a hot skillet over medium heat, mustard side up. Arrange ⅓ of the brie on half of the tortilla and top with apple slices, arugula, and black pepper
    • Fold. Fold tortilla in half and press with a spatula to stick the sides together.
    • Cook. Cook about 2 minutes, until golden brown, flip and cook another 2 minutes on the other side
    • Serve. Cut into 4 wedges
    Apple and Brie Quesadillas - easy and delicious meatless meal! Crisp apples with melty brie and peppery arugula.

    Can You Make Quesadillas Ahead?

    I don’t recommend making quesadillas ahead of time because you want the tortillas to have a crispness and the cheese to be gooey and delicious.

    The good news is that these take about 10 minutes to prepare so you won’t have to spend a ton of time on them!

    Tips and Tricks

    • I like to do quesadillas on my electric griddle because I can do multiple quesadillas at a time which is important when you have several kids.
    • If you don’t love brie, a really good white cheddar would be delicious in this! 

    More Quesadilla Recipes

    • Cheeseburger Quesadillas
    • BBQ Chicken Quesadillas
    • Pizza Quesadillas

    Make sure you subscribe to my email list to get all my new recipes delivered right to your inbox!

    You can also follow me on Instagram, Facebook, or Pinterest for even more! 

    📖 Recipe

    Yield: 6 servings

    Apple and Brie Quesadillas

    Apple and Brie Quesadillas
    Prep Time 10 minutes
    Cook Time 10 minutes
    Total Time 20 minutes

    Ingredients

    • 1 tablespoon Dijon mustard
    • 2 teaspoons apple cider
    • 3 10-inch flour tortillas
    • 6 ounces Brie cheese, rind removed and cut into ¼-inch-thick slices, divided
    • 1 apple, cored and cut into ¼-inch-thick slices (about ½ pound), divided
    • 3 cups arugula, divided
    • ¾ teaspoon freshly ground black pepper, divided

    Instructions

    1. Whisk together mustard and apple cider in a small bowl.
    2. Heat a nonstick skillet over medium heat. Spread each tortilla with ⅓ of the mustard mixture and place in the hot skillet, mustard side up. Arrange ⅓ of the brie slices on half the tortilla. Once the cheese starts to melt, arrange ⅓ of the apple slices on the cheese and top with 1 cup arugula. Sprinkle with ¼ teaspoon black pepper. Fold tortilla in half and press with a spatula to stick the sides together. Cook about 2 minutes or until golden brown, flip, and cook another 2 minutes on the other side. Cut into 4 wedges. Repeat with remaining ingredients.

    Recommended Products

    As an Amazon Associate and member of other affiliate programs, I earn from qualifying purchases.

    • Apple Slicer
      Apple Slicer
    • Cuisinart Griddle
      Cuisinart Griddle

    Nutrition Information:

    Yield:

    6

    Serving Size:

    1

    Amount Per Serving: Calories: 189Total Fat: 10gSaturated Fat: 5gTrans Fat: 0gUnsaturated Fat: 4gCholesterol: 28mgSodium: 366mgCarbohydrates: 17gFiber: 2gSugar: 2gProtein: 8g

    Did you make this recipe?

    Tag me in your Instagram photo - @fakeginger

    © Amanda Livesay

    Sour Cream Banana Nut Muffins

    Aug 27, 2015

    Sour Cream Banana Nut Muffins are moist and fluffy banana muffins with nuts. These are just as good as the ones as your favorite coffee shop!

    3 banana nut muffins on a white plate; coffee mug, bunch of bananas, and more muffins on a cooling rack in the background

    I made these Sour Cream Banana Nut Muffins while the kids were at school and most of them were gone by the time they went to bed. They were a hit with everyone in the house!

    They are really yummy and really easy! The sour cream keeps them moist and the nuts give them a nice crunch.

    I highly recommend making them if you ever have a bunch of super ripe bananas hanging out on your counter!

    I also have a Banana Muffins with Nutella Swirl recipe that is always popular when I make it!

    3 banana nut muffins on a white plate; coffee mug, bunch of bananas, and more muffins on a cooling rack in the background

    Ingredients

    • All-purpose flour
    • Baking soda – this is going to make sure your puffy rise and get nice and fluffy.
    • Cinnamon – if you don’t like cinnamon, you can leave it out but it’s really nice in these muffins.
    • Unsalted butter – bring it to room temperature before beginning.
    • Sugar
    • Eggs
    • Bananas – make sure you use the super ripe ones that have been sitting on your counter for awhile.
    • Sour cream – using sour cream makes the muffins really moist. You can substitute plain yogurt if you prefer that.
    • Vanilla
    • Chopped nuts – pecans, walnuts, whatever you like!

    Instructions

    • Dry ingredients. Whisk together flour, baking soda, cinnamon, and salt.
    • Wet ingredients. Beat together butter, sugar, and eggs. Add bananas, sour cream, and vanilla; beat until thoroughly combined.
    • Combine. Beat flour mixture into butter mixture until just combined.
    • Add nuts. Fold in chopped nuts.
    • Transfer. Fill muffin cups lined with paper liners ¾ full.
    • Bake. Bake at 350F 20 – 22 minutes or until a toothpick inserted into the center comes out clean.
    3 banana nut muffins on a white plate; coffee mug, bunch of bananas, and more muffins on a cooling rack in the background

    How Long Are They Good For?

    These muffins will be good for up to 4 – 5 days if stored in an airtight container at room temperature. I usually store our muffins in a big ziploc bag.

    You can get another day or 2 out of them if you store them in the fridge (also in an airtight container) but they will probably lose some of their moistness.

    Can You Freeze Banana Muffins

    Yes, you can definitely freeze banana muffins! They are fine in the freezer for up to 3 months.

    If you think you will eat them within a month, they should be fine in a freezer ziploc bag, just make sure to squeeze out as much air as possible.

    If you need them to be frozen the full 3 months, I would wrap them first in plastic wrap or aluminum foil and then place them in a freezer ziploc bag. Just to protect them from freezer burn.

    When you are ready to serve the muffins, just let them defrost on the counter overnight.

    More Muffin Recipes

    • Pumpkin Walnut Muffins
    • Pineapple Upside Down Muffins
    • Chocolate Chip Oatmeal Muffins
    • Zucchini Cinnamon Chip Muffins

    Make sure you subscribe to my email list to get all my new recipes delivered right to your inbox!

    You can also follow me on Instagram, Facebook, or Pinterest for even more! 

    📖 Recipe

    Yield: 18 muffins

    Sour Cream Banana Nut Muffins

    Sour Cream Banana Nut Muffins

    Sour Cream Banana Nut Muffins are moist and fluffy banana muffins with nuts. These are just as good as the ones as your favorite coffee shop!

    Prep Time 10 minutes
    Cook Time 22 minutes
    Total Time 32 minutes

    Ingredients

    • 1 ⅔ cups flour
    • 1 teaspoon baking soda
    • ¼ teaspoon cinnamon
    • ½ teaspoon salt
    • ½ cup unsalted butter, room temperature
    • 1 cup sugar
    • 2 eggs
    • 3 ½ very ripe bananas (mashed)
    • 2 tablespoons sour cream
    • 1 teaspoon vanilla
    • ⅔ cup chopped nuts

    Instructions

    1. Preheat oven to 350F. Line 18 muffin cups with muffin papers.
    2. Whisk together flour, baking soda, cinnamon, and salt; set aside.
    3. In the bowl of a stand mixer fitted with a paddle attachment, beat butter, sugar and eggs together until fluffy. Add bananas, sour cream, and vanilla and beat until thoroughly mixed.
    4. Beat in flour mixture until just combined. Fold in chopped nuts.
    5. Fill each muffin cup about ¾ full.
    6. Bake 20 - 22 minutes or until a toothpick inserted into the center comes out clean.

    Recommended Products

    As an Amazon Associate and member of other affiliate programs, I earn from qualifying purchases.

    • Parchment Muffin Liners
      Parchment Muffin Liners
    • My Favorite Muffin Tin
      My Favorite Muffin Tin

    Did you make this recipe?

    Tag me in your Instagram photo - @fakeginger

    © Amanda Livesay
    Cuisine: American / Category: breakfast

    Nutella Brownies

    Aug 24, 2015

    Nutella Brownies are fudgy brownies with hazelnuts and a rich Nutella frosting! A chocolate lovers dream! 

    Brownie with hazelnuts on top on a white place with cups of milk in the background

    I needed major comfort food over the weekend and ended up whipping these up.

    I love a thick, fudgy brownie with nuts in them and since I’m having this thing with hazelnuts recently, I went with those.

    And nutella frosting, of course. Because why have brownies without frosting when you can have brownies with frosting?

    They taste like my favorite Ferrero Rocher candies! So good.

    I could easily eat the entire pan of these. I’m not going to because I’m hoping for froyo tonight to celebrate a successful first day of school buuuuut know that I totally would.

    Overhead shot of a frosted brownie with hazelnuts on top on a white plate

    Ingredients

    • Butter – you need butter in both the brownies and the frosting that goes on top.
    • Semisweet chocolate – I just used chocolate chips but you can use a bar of baking chocolate if you prefer.
    • Sugar
    • Eggs
    • Flour
    • Cocoa powder
    • Hazelnuts – hazelnuts are going in the brownies themselves and will be sprinkled on top of the finished product.
    • Nutella – most large grocery chains have their own version of Nutella that will also work perfectly.
    • Milk – dairy or nondairy, whatever you have in your fridge.

    How To Make Nutella Brownies

    • Melt. Melt the butter and semisweet chocolate together in a small saucepan, stirring until smooth. Remove from heat and let cool slightly.
    • Wet ingredients. Whisk in sugar and eggs.
    • Combine. Add flour, cocoa powder, and salt and whisk until just combined.
    • Add hazelnuts. Stir in chopped hazelnuts.
    • Transfer. Pour into a parchment lined pan.
    • Bake. Bake at 350F 30 – 35 minutes or until a toothpick inserted into the center comes out clean. Let cool completely before frosting.
    • Make frosting. Beat together softened butter, Nutella, and milk. Spread over cooled brownies. Sprinkle with chopped hazelnuts.

    How Long Are They Good For?

    These brownies will be good for up to 4 – 5 days if stored in an airtight container at room temperature.

    Can You Freeze Them?

    You can freeze them for up to 3 months. I would freeze them on a baking sheet until the frosting is frozen (probably about an hour or so) and then you can wrap them in plastic wrap and put them in a freezer ziploc bag.

    More Brownies Recipes

    • Classic Brownies
    • Triple Chocolate Brownies
    • Cosmic Brownies
    • Caramel Filled Brownies
    • Red Velvet Brownies with Cream Cheese Frosting

    Make sure you subscribe to my email list to get all my new recipes delivered right to your inbox!

    You can also follow me on Instagram, Facebook, or Pinterest for even more! 

    📖 Recipe

    Yield: about 16 servings

    Nutella Brownies

    Nutella Brownies

    Nutella Brownies are fudgy brownies with hazelnuts and a rich Nutella frosting! A chocolate lovers dream! 

    Ingredients

    For the brownies:

    • 1 cup 2 sticks butter
    • 4 ounces semisweet chocolate (chopped)
    • 2 cups sugar
    • 4 eggs
    • 1 ½ cups flour
    • ⅓ cup cocoa powder
    • ½ teaspoon salt
    • ¾ cup chopped hazelnuts

    For the frosting:

    • ¼ cup ½ stick butter, softened
    • 1 cup Nutella
    • 2 tablespoons milk
    • ¼ cup chopped hazelnuts

    Instructions

    1. Preheat oven to 350F. Line an 8x8-inch pan with parchment paper or spray with nonstick spray.
    2. Melt the butter and semisweet chocolate together in a small saucepan, stirring until smooth. Remove from heat and let cool slightly. Whisk in sugar and eggs. Add flour, cocoa powder, and salt and whisk until just combined. Stir in chopped hazelnuts.
    3. Pour into the prepared pan. Bake 30 - 35 minutes or until a toothpick inserted into the center comes out clean. Let cool completely before frosting.
    4. To make the frosting, beat together softened butter, nutella, and milk. Spread over cooled brownies. Sprinkle with chopped hazelnuts.

    Recommended Products

    As an Amazon Associate and member of other affiliate programs, I earn from qualifying purchases.

    • 8-inch Cake Pan
      8-inch Cake Pan
    • Nutella
      Nutella

    Nutrition Information:

    Yield:

    16

    Serving Size:

    1

    Amount Per Serving: Calories: 449Total Fat: 27gSaturated Fat: 15gTrans Fat: 1gUnsaturated Fat: 10gCholesterol: 85mgSodium: 205mgCarbohydrates: 50gFiber: 3gSugar: 37gProtein: 5g

    Did you make this recipe?

    Tag me in your Instagram photo - @fakeginger

    © Amanda Livesay
    Cuisine: American / Category: brownies

    S’mores Fluff

    Aug 13, 2015

    S’mores Fluff is a creamy dessert dip made with marshmallow creme and chocolate pudding. Plus, chocolate and marshmallow folded in! Serve with graham crackers or fresh fruit! 

    S'mores Fluff - creamy dessert dip made with marshmallow creme and chocolate pudding. Plus, chocolate and marshmallow folded in! Serve with graham crackers or fresh fruit!

    Don’t hate me.

    Buuuuut.

    I bought so much Halloween stuff the other day.

    I just couldn’t control myself.

    I walked into Petsmart to look for the dang peanut butter treats that I don’t remember where I bought and they had ALL THE HALLOWEEN stuff out.

    I cannot resist a new Martha Stewart for Petsmart collection. I just can’t.

    I know, I’m sorry.

    School hasn’t even started here and I’m already in Halloween mode. Story of my life.

    …

    Read More

    Raspberry White Chocolate S’mores

    Aug 12, 2015

    Raspberry White Chocolate S’mores is a twist on the classic! Fresh raspberry and white chocolate with toasted marshmallows and graham crackers!

    Try Reese’s Campfire Cones if you love s’mores as much as I do!

    Raspberry White Chocolate S'mores - a new twist on the classic! Fresh raspberry and white chocolate with toasted marshmallows and graham crackers!

    I’m just going to get this out of the way and then we’re never speaking of it again.

    Uggghhhhhh. Pretty Little Liars. The worst.

    I thought I’d never have a TV disappointment on the LOST level again. But last night… was so bad. Not only was it just a disappointing “end” but it was so messy and felt like they’d decided who A is last month.

    So disappointed. I give up on TV.

    Raspberry White Chocolate S'mores - a new twist on the classic! Fresh raspberry and white chocolate with toasted marshmallows and graham crackers!

    Raspberry White Chocolate S’mores!

    In related news, I ate 5 Raspberry White Chocolate S’mores last night.

    I am obsessed with these right now. I’ve made them several times over the past week and I’m going out for more white chocolate today because I ran out after eating ALL MY TV FEELINGS last night.

    This is the perfect combination of sweeteness and a tiny bit of tartness. You definitely need to try it before summer ends!

    More S’mores Recipes

    • S’mores Cheesecake Bars
    •  Peanut Butter S’mores Dip
    • S’mores Frozen Hot Chocolate

    Make sure you subscribe to my email list to get all my new recipes delivered right to your inbox!

    You can also follow me on Instagram, Facebook, or Pinterest for even more! 

    📖 Recipe

    Yield: 4 servings

    Raspberry White Chocolate S’mores

    Raspberry White Chocolate S’mores

    Raspberry White Chocolate S'mores is a twist on the classic! Fresh raspberry and white chocolate with toasted marshmallows and graham crackers!

    Prep Time 10 minutes
    Total Time 10 minutes

    Ingredients

    • 4 graham crackers, split in half
    • 4 squares white chocolate
    • 4 large marshmallows
    • 12 raspberries

    Instructions

    1. Lay 4 halves of graham cracker on a serving platter. Place a square of white chocolate on each one.
    2. Heat the marshmallows over a flame until toasted. Put a marshmallow on each chocolate and place 3 raspberries on the melty marshmallows. Top with another graham cracker.
    3. Enjoy immediately.

    Nutrition Information:

    Yield:

    4

    Serving Size:

    1

    Amount Per Serving: Calories: 549Total Fat: 29gSaturated Fat: 17gTrans Fat: 0gUnsaturated Fat: 10gCholesterol: 18mgSodium: 151mgCarbohydrates: 69gFiber: 1gSugar: 58gProtein: 6g

    Did you make this recipe?

    Tag me in your Instagram photo - @fakeginger

    © Amanda Livesay
    Cuisine: American / Category: snack


    Lemon-Lime Pound Cake

    Aug 06, 2015

    Lemon-Lime Pound Cake is a moist citrus pound cake with a lemon-lime glaze and candied lemon slices. The perfect spring and summer cake!

    Lemon-Lime Pound Cake - moist citrus pound cake with a lemon-lime glaze and candied lemon slices. The perfect spring cake!

    Things that happened this week.

    • Fat baby (who isn’t a baby) took all the post-its off recipes I want to make in several cookbooks and put them on recipes that he wants me to make.
    • Husband made me mad and came home with bacon guacamole as an apology. Because you can buy my love with bacon guacamole.
    • I became addicted to Pretty Little Liars podcasts. (Extra weird because I was kind of over the show.)
    • Fake Ginger hit 10,000 Facebook likes! Woooo!
    • HEB suckered me into buying Home because they had coupons for $5 off the movie and then you got Swedish Fish and popcorn free. You know I love Swedish Fish. Anyway, I cried multiple times during the movie. Because Disney movies have that effect on me.
    • I bought a new bundt pan! Hooray!

    I broke my new bundt pan in with this Lemon-Lime Pound Cake!

    It’s a lot like that classic 7Up cake that we all grew up on but even better!

    I think pound cakes are my ultimate favorite cake. That or angel food cake. I just love a plain cake. They make the perfect base for fruit or whipped cream or like this one, lemon-lime glaze and candied lemons.

    Lemon-Lime Pound Cake - moist citrus pound cake with a lemon-lime glaze and candied lemon slices. The perfect spring cake!

    Ingredients

    • Butter – make sure to soften it before beginnning.
    • Sugar – you need sugar for both the cake and for the candied lemons.
    • Eggs
    • Lemons – you are going to use both the zest and juice. You’re also going to use whole lemons (not zested) for the candied lemons that go on top of the finished cake.
    • Vanilla
    • Flour
    • Lemon-lime soft drink – like Sprite or 7Up
    • Powdered sugar – powdered sugar is used in the glaze because it dissolves a lot better than granulated sugar to create a very smooth glaze.
    • Fresh lime juice

    How To Make Lemon-Lime Pound Cake

    1. Wet ingredients. Beat butter until creamy. Add sugar and beat until light and fluffy. Add eggs.. Beat in lemon zest and vanilla.
    2. Combine. Add flour to butter mixture, alternating with the lemon-lime soft drink, beginning and ending with the flour. Beat until just combined.
    3. Bake. Pour into the prepared bundt pan and bake at 350F 60 – 65 minutes or until a toothpick inserted into the center comes out clean.
    4. Cool. Cool in bundt pan for 10 minutes before removing to wire rack. Cool completely before glazing.

    To make the glaze:

    1. Make glaze. Whisk together powdered sugar, lemon zest, lemon juice, and lime juice until no lumps remain. Pour over cooled bundt cake.

    To make the candied lemons:

    1. Prep lemons. Slice the lemons thinly and discard seeds.
    2. Simmer. Bring water and sugar to a boil, stirring to dissolve sugar. Add lemons and reduce to a simmer. Simmer for 45 minutes or until rinds are very soft and the lemons are translucent.
    3. Dry. Remove with a slotted spoon and let dry on a wire rack.
    4. Top. Top glazed cake once cooled.

    How Long Is It Good For?

    This pound cake will be good for up to 4 – 5 days. Make sure to store it at room temperature in an airtight container, such as a cake container.

    You can probably get an extra day or 2 out of it if you store it in the fridge but it will lose it’s moistness quicker. I would also let it warm to room temperature before serving.

    Lemon-Lime Pound Cake - moist citrus pound cake with a lemon-lime glaze and candied lemon slices. The perfect spring cake!

    More Citrus Treats

    • Lemon Bars
    • Mini Lemon Cheesecakes
    • Key Lime Cheesecake Bars
    • Homemade Orange Sherbet
    • Blueberry Orange Coffee Cake

    Make sure you subscribe to my email list to get all my new recipes delivered right to your inbox!

    You can also follow me on Instagram, Facebook, or Pinterest for even more! 

    📖 Recipe

    Yield: 12 servings

    Lemon-Lime Pound Cake

    Lemon-Lime Pound Cake

    Lemon-Lime Pound Cake is a moist citrus pound cake with a lemon-lime glaze and candied lemon slices. The perfect spring and summer cake!

    Prep Time 30 minutes
    Cook Time 1 hour 5 minutes
    Total Time 1 hour 35 minutes

    Ingredients

    • 1 ½ cups 3 sticks butter, softened
    • 3 cups sugar
    • 5 large eggs
    • 2 tablespoons lemon zest
    • 1 teaspoon vanilla
    • 3 cups flour
    • 1 cup lemon-lime soft drink, like 7Up

    For the glaze:

    • 2 cups powdered sugar
    • 2 teaspoons lemon zest
    • 1 ½ tablespoons fresh lemon juice
    • 1 tablespoon fresh lime juice

    For the candied lemons:

    • 2 medium lemons
    • 4 cups water
    • 2 cups granulated sugar

    Instructions

    1. Preheat oven to 350F. Spray and flour a bundt pan.
    2. In the bowl of a stand mixer fitted with a paddle attachment, beat butter until creamy. Add sugar and beat on medium speed for about 3 minutes, or until light and fluffy. Add eggs, one at a time, beating after each one. Beat in lemon zest and vanilla.
    3. Add butter to flour mixture, alternating with the lemon-lime soft drink, beginning and ending with the flour. Beat until just combined.
    4. Pour into the prepared bundt pan and bake 60 - 65 minutes or until a toothpick inserted into the center comes out clean. Cover with aluminum foil after 40 minutes if it looks like it's browning too much.
    5. Cool in bundt pan for 10 minutes before removing to wire rack. Cool completely before glazing.

    To make the glaze:

    1. Whisk together powdered sugar, lemon zest, lemon juice, and lime juice until no lumps remain. Pour over cooled bundt cake.

    To make the candied lemons:

    1. Slice the lemons thinly and discard seeds.
    2. Bring water and sugar to a boil, stirring to dissolve sugar. Add lemons and reduce to a simmer. Simmmer for 45 minutes or until rinds are very soft and the lemons are translucent. Remove with a slotted spoon and let dry on a wire rack. Top glazed cake once cooled.

    Recommended Products

    As an Amazon Associate and member of other affiliate programs, I earn from qualifying purchases.

    • Cake Container
      Cake Container
    • Electric Mixer
      Electric Mixer
    • Bundt Pan
      Bundt Pan
    • Slotted Spoon
      Slotted Spoon

    Nutrition Information:

    Yield:

    12

    Serving Size:

    1

    Amount Per Serving: Calories: 779Total Fat: 25gSaturated Fat: 15gTrans Fat: 1gUnsaturated Fat: 8gCholesterol: 138mgSodium: 221mgCarbohydrates: 136gFiber: 2gSugar: 109gProtein: 7g

    Did you make this recipe?

    Tag me in your Instagram photo - @fakeginger

    © Amanda Livesay
    Cuisine: American / Category: cake


    Easy Apple Butter

    Aug 03, 2015

    Easy homemade Apple Butter made with just 5 ingredients. Spread it on toast, stir it into oatmeal, there are so many uses for this delicious treat!

    Happy Monday!

    I also decided that it’s too hot in Texas. I’d really like to go anywhere with snow right about now. Seriously, 95 degrees at 7 pm is stupid.

    Despite the heat, I’m all in on fall foods. I had apples and pumpkin going in the kitchen this weekend and it was amazing.

    First up was this Easy Apple Butter!

    And it is seriously so easy! Only 5 ingredients and it takes less than an hour from start to finish. The hardest part is peeling the apples!

    Ingredients

    • Crisp apples – I suggest Honeycrisp, Gala, or Braeburn. You don’t want to use anything too tart.
    • Apple cider – use your favorite brand or a homemade one!
    • Sugar
    • Cinnamon
    • Cloves

    How To Make Apple Butter

    • Prep apples. Peel apples and cut into 1-inch chunks.
    • Boil. Bring apples, cider, and ½ cup sugar to a rolling boil in a large pot over high heat. Cover, leaving lid slightly ajar and boil 20 minutes until apples are tender; stir every 5 minutes.
    • Blend. Transfer apples and any remaining liquid to a blender and blend until smooth.
    • Simmer. Return to the pot; stir in cinnamon, clover, and remaining ½ cup sugar. Bring to a boil over high heat; reduce to low and simmer for about 15 minutes, stirring often.
    • Cool. Cool for about 45 minutes.

    How Long Is It Good For?

    You can keep homemade apple butter in the fridge for up to 2 weeks. Make sure you store it in an airtight container (mason jars work great for this) to keep it as fresh as possible.

    Can You Freeze It?

    You can freeze apple butter for up to 2 months. I like to use freezer jam containers for this.

    When you are ready to use it, just let it defrost in the fridge overnight. And then store it in the fridge for up to 2 weeks.

    More Apple Recipes

    • Slow Cooker Caramel Apple Crumble
    • Candied Apple Chips
    • Apple Upside Down Cake
    • Apple Cinnamon Monkey Bread
    • Apple Fritters
    • Deep Dish Apple Pie

    Make sure you subscribe to my email list to get all my new recipes delivered right to your inbox!

    You can also follow me on Instagram, Facebook, or Pinterest for even more! 

    📖 Recipe

    Easy Apple Butter

    Easy Apple Butter

    Easy homemade Apple Butter made with just 5 ingredients. Spread it on toast, stir it into oatmeal, there are so many uses for this delicious treat!

    Prep Time 10 minutes
    Cook Time 1 hour 5 minutes
    Total Time 1 hour 15 minutes

    Ingredients

    • 3 pounds crisp apples, like Honeycrisp, Gala, or Braeburn
    • 1 cup apple cider
    • 1 cup sugar, divided
    • ¾ teaspoon cinnamon
    • ¼ teaspoon cloves

    Instructions

    1. Peel apples and cut into 1-inch chunks. Bring apples, cider, and ½ cup sugar to a rolling boil in a large pot over high heat. Cover, leaving lid slightly ajar and boil 20 minutes until apples are tender; stir every 5 minutes.
    2. Transfer apples and any remaining liquid to a blender (blend in batches if needed) and blend until smooth. Return to the pot; stir in cinnamon, clover, and remaining ½ cup sugar. Bring to a boil over high heat; reduce to low and simmer for about 15 minutes, stirring often. It should thicken. Cool for about 45 minutes before spooning into airtight containers. Keep in fridge for up to 2 months or freeze for up to 6 months.

    Recommended Products

    As an Amazon Associate and member of other affiliate programs, I earn from qualifying purchases.

    • Dutch Oven
      Dutch Oven
    • My Favorite Blender
      My Favorite Blender

    Did you make this recipe?

    Tag me in your Instagram photo - @fakeginger

    © Amanda Livesay
    Cuisine: American / Category: Sides

    Blackberry Margaritas

    Jul 30, 2015

    Blackberry Margaritas are going to be your official summer drink! Delicious and easy recipe for margaritas with fresh blackberries, lime juice, tequila, and orange liqueur.

    Blackberry Margaritas - delicious and easy recipe for homemade margaritas using fresh blackberries!

    Happy almost Friday!

    Guys, I registered the kids for school yesterday. Didn’t school just let out?

    I’m not ready for it! I need another 3 months of sleeping in and not packing lunches and not avoiding phone calls from teachers.

    Don’t judge me.

    Yesterday I also ordered a bunch of pumpkin and other fall Wallflowers from Bath & Body Works.

    So um.

    I’d really like if we could just have fall without all the not fun stuff that comes along with fall.

    Blackberry Margaritas - delicious and easy recipe for homemade margaritas using fresh blackberries!

    Blackberry Margaritas!

    Last weekend I came across Nicole’s Blackberry Margaritas on Pinterest and couldn’t stop thinking about them, despite the fact that it was 9 am.

    I don’t even like blackberries.

    But whatever, I needed those margaritas in my life. So I loaded all the kids up (because the husband was in the field = why I needed margaritas at 9 am) and went to the store for blackberries.

    Just blackberries.

    I didn’t even wander around HEB, gathering samples and looking for new products. And you know that’s one of my favorite hobbies. I was wasting no time.

    These were everything I’d hoped for and more. So delicious, so pretty! I already want to make them again!

    You can either buy a bottle of simple syrup or make your own by heating 1 cup of sugar and 1 cup of water, stirring until all the sugar is dissolved.

    Blackberry Margaritas - delicious and easy recipe for homemade margaritas using fresh blackberries!

    More Margarita Recipes

    • Watermelon Mint Margaritas
    • Tequila Sunrise Margaritas
    • Kiwi Margaritas
    • Frozen Prickly Pear Margaritas
    • Cantaloupe Coconut Margaritas
    • Blue Margaritas

    Make sure you subscribe to my email list to get all my new recipes delivered right to your inbox!

    You can also follow me on Instagram, Facebook, or Pinterest for even more! 

    📖 Recipe

    Yield: 4 margaritas

    Blackberry Margaritas

    Blackberry Margaritas

    Blackberry Margaritas are going to be your official summer drink! Delicious and easy recipe for margaritas with fresh blackberries, lime juice, tequila, and orange liqueur.

    Prep Time 15 minutes
    Total Time 15 minutes

    Ingredients

    For the blackberry puree:

    • 6 ounces blackberries
    • 1 tablespoon water

    For the margaritas:

    • the blackberry puree
    • 8 ounces lime juice
    • 8 ounces simple syrup
    • 4 ounces orange liqueur, such as triple sec
    • 6 ounces tequila
    • ice
    • salt to rim the glasses
    • lime wedges and blackberries, for garnish

    Instructions

    1. To make the puree, blend the blackberries and water in a blender until smooth. Strain through a fine mesh strainer to remove seeds.
    2. To make the margaritas, combine the puree, lime juice, simple syrup, orange liqueur, and tequila in a pitcher.
    3. To rim the glasses, run a lime wedge around the rim of each glass and dip in salt. Add ice to each glass and pour margaritas over. Garnish with blackberries and limes.

    Recommended Products

    As an Amazon Associate and member of other affiliate programs, I earn from qualifying purchases.

    • Simple Syrup
      Simple Syrup
    • Margarita Salt
      Margarita Salt
    • Fine Mesh Strainer
      Fine Mesh Strainer
    • My Favorite Blender
      My Favorite Blender

    Nutrition Information:

    Yield:

    4

    Serving Size:

    1

    Amount Per Serving: Calories: 350Total Fat: 0gSaturated Fat: 0gTrans Fat: 0gUnsaturated Fat: 0gCholesterol: 0mgSodium: 25382mgCarbohydrates: 47gFiber: 3gSugar: 39gProtein: 1g

    Did you make this recipe?

    Tag me in your Instagram photo - @fakeginger

    © Amanda Livesay
    Cuisine: Mexican / Category: drink


    Tropical Sangria

    Jul 17, 2015

    Happy Friday! Ready for the weekend?!

    This morning I’m headed out on a 10 hour roadtrip with 3 kids and 2 dogs. And I’m pretty excited about it.

    I love a roadtrip. I always thought everyone loved roadtrips because my parents always seemed chipper at 5 am on Christmas morning when we’d get up to make the drive to New Orleans but I’ve learned in recent years that not everyone loves them.

    My husband hates them which is really a shame because he’s so good at keeping me entertained on a roadtrip. I’m sure he’s grateful that he has to stay behind for work this time around.

    As much as I love a roadtrip, a drink is always required at the end. Because stopping to pee every hour is only fun for the first… well, it’s really not fun at all.

    I’ve made SO many sangrias this summer and I think this Tropical Sangria may be my favorite. It’s fresh squeezed orange juice and white wine with fresh pineapple, mango, and limes thrown in. And then right before you serve it, you add in some sparkling water. This is going to sound crazy but something happens to the mango once you add the sparking water – it’s almost like it becomes bubbly. It’s so yummy.

    You have to make this before summer ends! I promise you won’t regret it!

    Make sure you subscribe to my email list to get all my new recipes delivered right to your inbox!

    You can also follow me on Instagram, Facebook, or Pinterest for even more! 

    📖 Recipe

    Yield: about 8 servings

    Tropical Sangria

    Tropical Sangria
    Prep Time 15 minutes
    Additional Time 2 hours
    Total Time 2 hours 15 minutes

    Ingredients

    • 1 750 mL bottle white wine
    • 2 cups fresh orange juice
    • 1 ½ cups mango, diced
    • 1 ½ cups pineapple, diced
    • 1 lime, sliced
    • 1 ½ cups sparkling water

    Instructions

    1. Combine white wine and orange juice in a pitcher. Stir in fruit; let sit in fridge for 2 hours.
    2. Before serving, stir in sparkling water.

    Nutrition Information:

    Yield:

    8

    Serving Size:

    1

    Amount Per Serving: Calories: 141Total Fat: 0gSaturated Fat: 0gTrans Fat: 0gUnsaturated Fat: 0gCholesterol: 0mgSodium: 7mgCarbohydrates: 18gFiber: 1gSugar: 14gProtein: 1g

    Did you make this recipe?

    Tag me in your Instagram photo - @fakeginger

    © Amanda Livesay


    Classic Brownies

    Jul 15, 2015

    Classic Brownies – rich and fudgy classic brownies with pecans! These will fix all of your chocolate cravings!

    Classic Brownies - rich and fudgy classic brownies with pecans! These will fix all of your chocolate cravings!

    Pin this recipe for later!

    In typical me form, I’ve allowed Big Brother to take over my life.

    I am watching the feeds for hours every day (although I’m currently marathoning the Heroes vs Villains season of Survivor – random, much?), I listen to Big Brother podcasts while I cook, I watch and rewatch the episodes.

    In other words, I have a problem.

    I didn’t think it was a big deal until the other day. Clementine woke me up in the middle of the night to go outside and as we’re going down the stairs, I say to her, “See Clem! This is why no one wants to be in an alliance with you! You wake everyone up 30 minutes after they fall asleep!”

    I mean. What? Where did that even come from?

    So if I’m not cooking or blogging much this summer, it’s because I’m too busy yelling at my dogs that I’m not taking them to the final 2 with me and even if I do, no one’s going to vote for them.

    It’s probably time to back away from the Big Brother, huh?

    Classic Brownies - rich and fudgy classic brownies with pecans! These will fix all of your chocolate cravings!

    How To Make Classic Brownies recipe

    These Classic Brownies are DANGEROUS. So rich and fudgy with just the right amount of crunch from the pecans. I knew if I didn’t get rid of them fast, I’d eat the entire pan.

    • Melt butter and chocolate together; cool slightly
    • To the chocolate, add sugar, eggs, vanilla, and salt; beat until combined
    • Add flour; stir until combined
    • Fold in pecans
    • Bake about 30 minutes, until the top is cracked and the center is set
    • Cool completely before serving

    If you love brownies, check out my Nutella Brownies recipe, too!

    How Long Are Brownies Good For?

    These Classic Brownies will be good for up to 4 days. Keep them in an airtight container at room temperature. 

    Can You Freeze Brownies?

    Yes, you can freeze brownies! I like to wrap them individually in plastic wrap and then place them all in a ziploc freezer bag before freezing. That way you can pull the brownies out one at a time if you need to. 

    They will be good in the freezer for up to 3 months. 

    Classic Brownies - rich and fudgy classic brownies with pecans! These will fix all of your chocolate cravings!

    More Brownies

    • Peanut Butter Pretzel Brownies
    • Slow Cooker Chocolate Chip Brownie Cake
    • Mississippi Mud Brownies
    • Peppermint Chip Brownies
    • Cosmic Brownies
    • White Chocolate Brownies
    • Nutella Brownies

    Make sure you subscribe to my email list to get all my new recipes delivered right to your inbox!

    You can also follow me on Instagram, Facebook, or Pinterest for even more! 

    📖 Recipe

    Yield: 16 brownies

    Classic Brownies

    Classic Brownies

    Prep Time 15 minutes
    Cook Time 30 minutes
    Total Time 45 minutes

    Ingredients

    • 5 tablespoons unsalted butter, cut into 5 pieces
    • 6 ounces semisweet chocolate, coarsely chopped
    • ¾ cup sugar
    • 2 eggs
    • 1 teaspoon vanilla
    • ¼ teaspoons salt
    • ⅓ cup flour
    • 1 cup pecans, coarsely chopped

    Instructions

    1. Preheat oven to 325F. Line an 8x8-inch pan with parchment paper.
    2. In a microwave-safe bowl, microwave butter and chocolate for 30 seconds, stir, and return to microwave for another 30 seconds. Stir again and if everything is still not melted, microwave for another 20 seconds. Stir until smooth. Transfer to your mixing bowl and add sugar, eggs, vanilla, and salt. Beat until combined. Beat in flour. Fold in the pecans.
    3. Pour the batter into the prepared pan and smooth out the top. Bake 30 - 33 minutes or until the top is cracked and a toothpick inserted into the center comes out clean.
    4. Cool before cutting into 16 squares.

    Nutrition Information:

    Yield:

    16

    Serving Size:

    1

    Amount Per Serving: Calories: 183Total Fat: 12gSaturated Fat: 5gTrans Fat: 0gUnsaturated Fat: 7gCholesterol: 33mgSodium: 44mgCarbohydrates: 19gFiber: 1gSugar: 15gProtein: 2g

    Did you make this recipe?

    Tag me in your Instagram photo - @fakeginger

    © Amanda Livesay
    « Previous Page
    Next Page »

    Primary Sidebar

    Amanda Livesay
    Hi, I'm Amanda! DFW food blogger, mom of boys, and crazy dog lady.
    Read more
    Privacy Policy
    Privacy Policy

    Footer

    ↑ back to top

    About

    • Privacy Policy
    • About Fake Ginger

    Newsletter

    • Sign Up for weekly emails featuring new recipes!

    As an Amazon Associate I earn from qualifying purchases.

    Copyright © 2024 FakeGinger.com