• Skip to primary navigation
  • Skip to main content
  • Skip to primary sidebar
  • Home
  • About
  • Recipes

Fake Ginger

menu icon
go to homepage
  • Recipe Index
  • About
  • Subscribe
    • Facebook
    • Instagram
    • Pinterest
  • subscribe
    search icon
    Homepage link
    • Recipe Index
    • About
    • Subscribe
    • Facebook
    • Instagram
    • Pinterest
  • ×
    Home » Page 6

    Cream Cheese Mints

    Cream Cheese Mints

    Dec 14, 2023

    Cream Cheese Mints are the classic melt in your mouth mints that only need 5 ingredients and about 20 minutes. It’s such an easy candy recipe and you can change the colors depending on the holiday or occasion.

    Cream Cheese Mints are the classic melt in your mouth mints that only need 5 ingredients and about 20 minutes. It's such an easy candy recipe and you can change the colors depending on the holiday or occasion.

    How fun are these mints?! I’ve been trying to think of easier holiday treats to include in cookie tins this year because, honestly, I have a lot of kids, a lot of dogs, and a lot of chickens. Which means I don’t have a lot of time for baking.

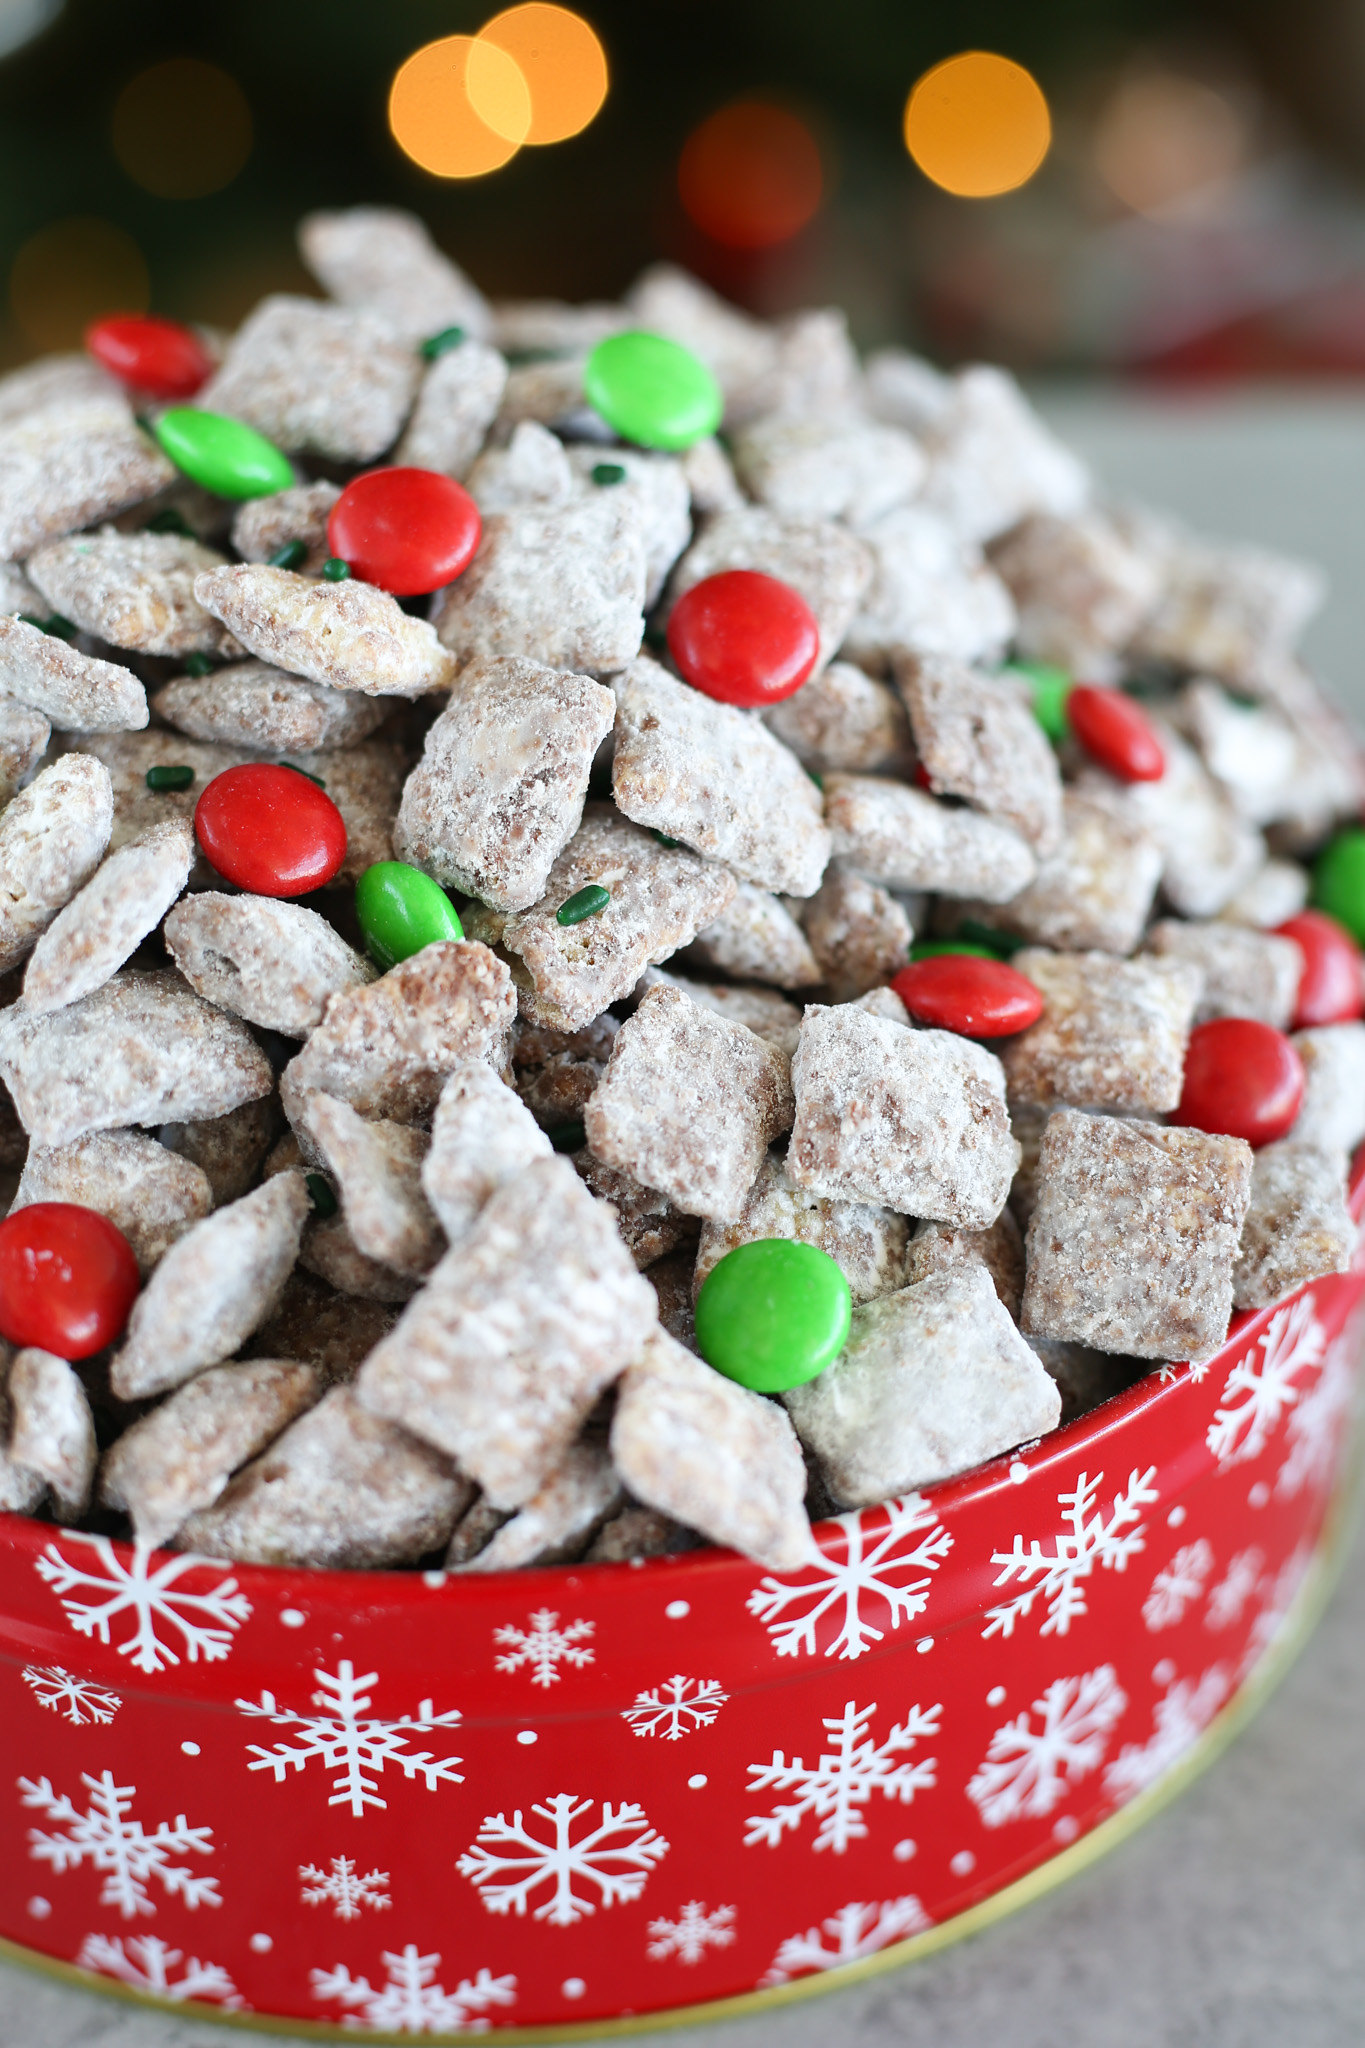
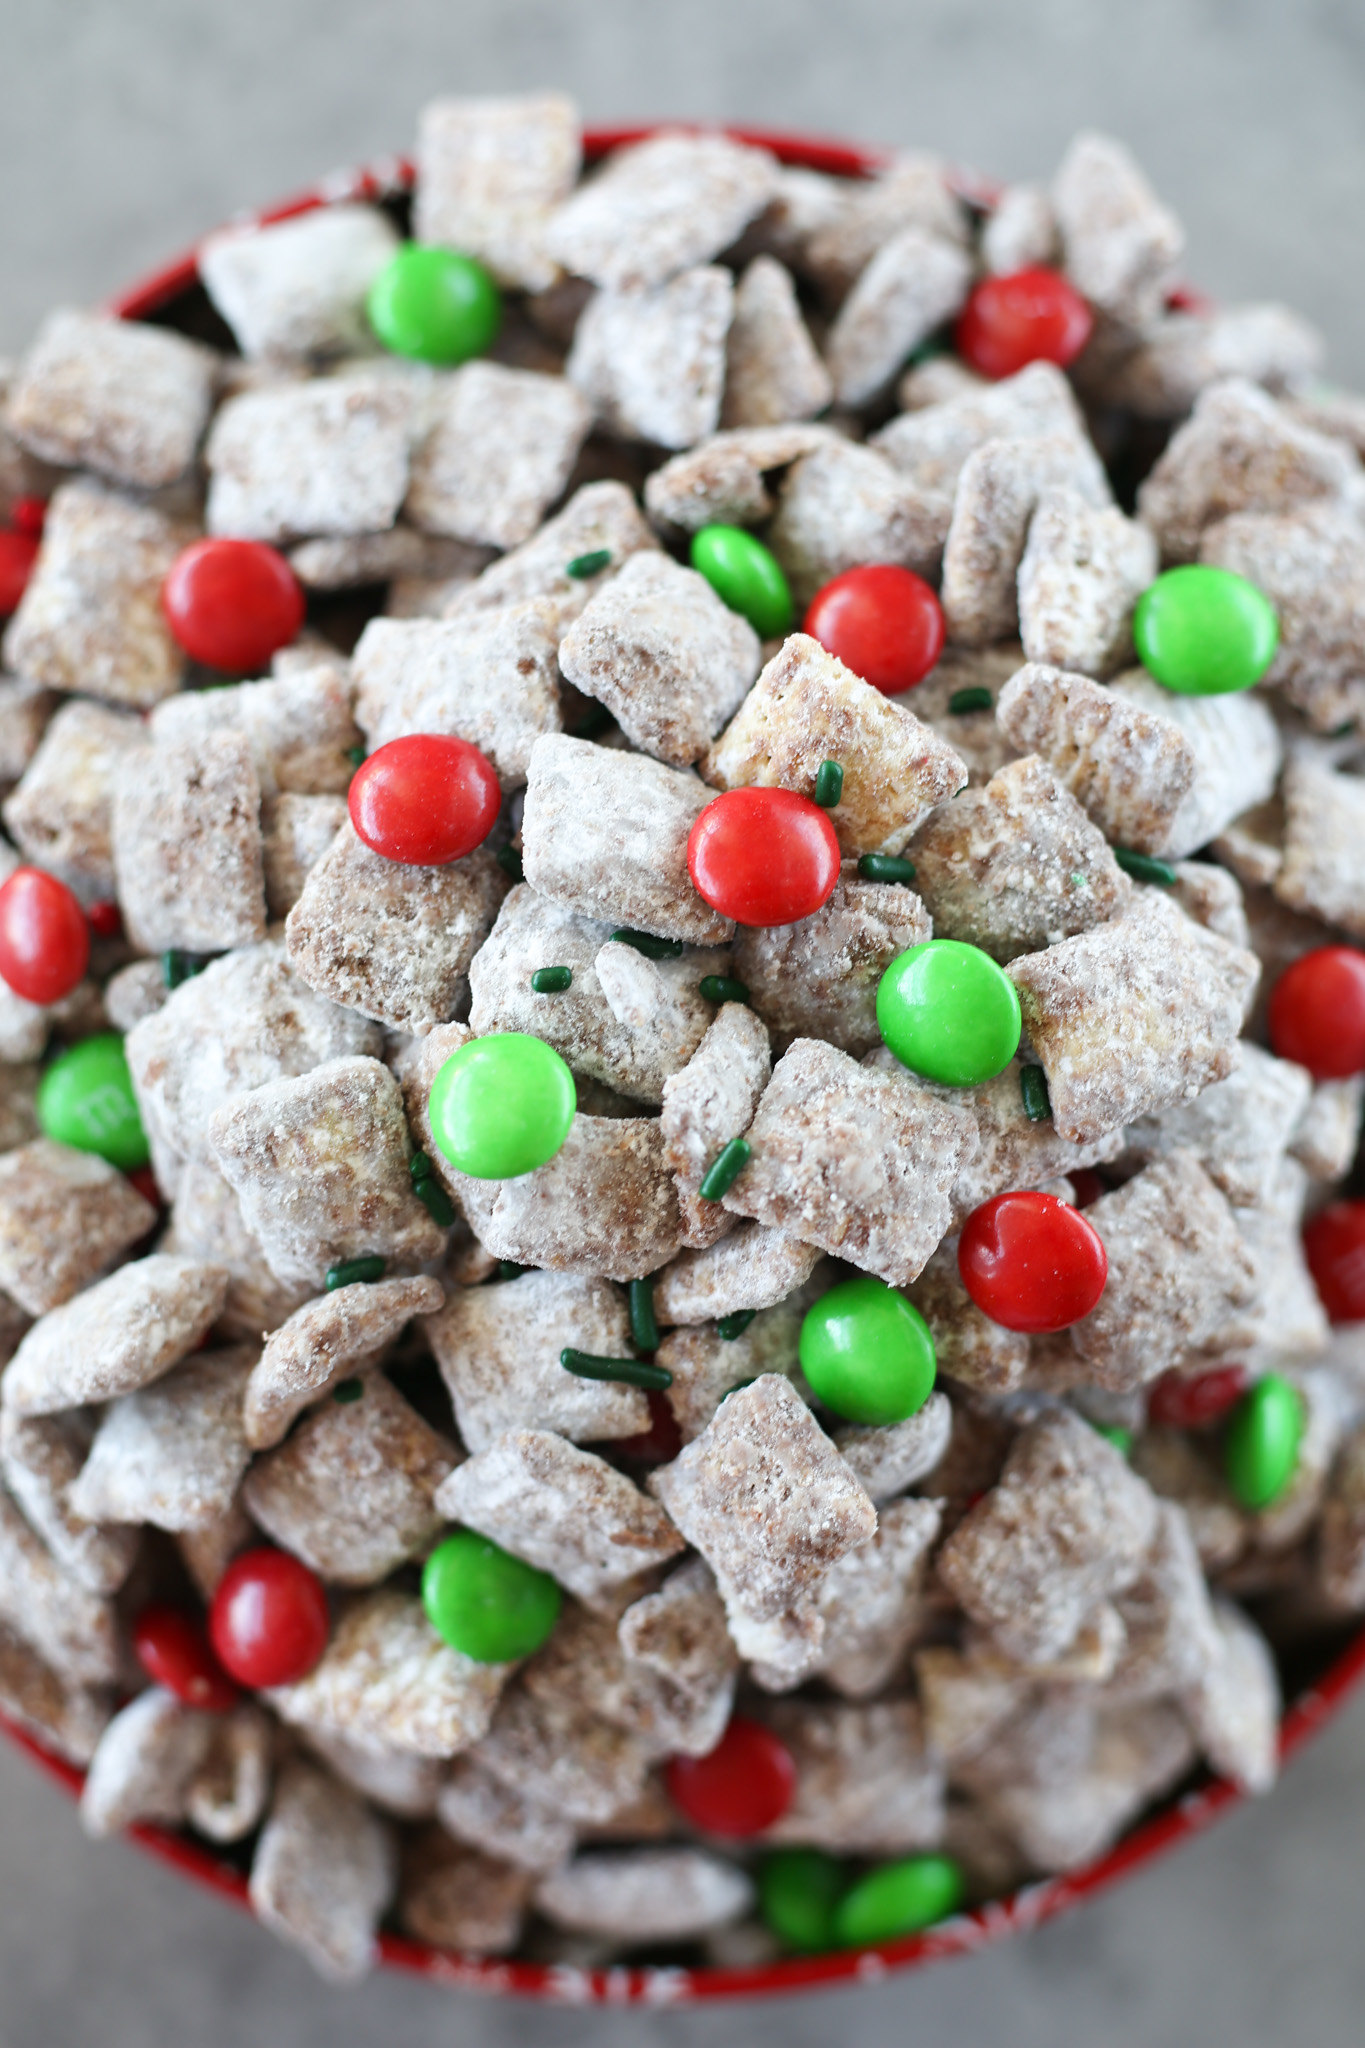
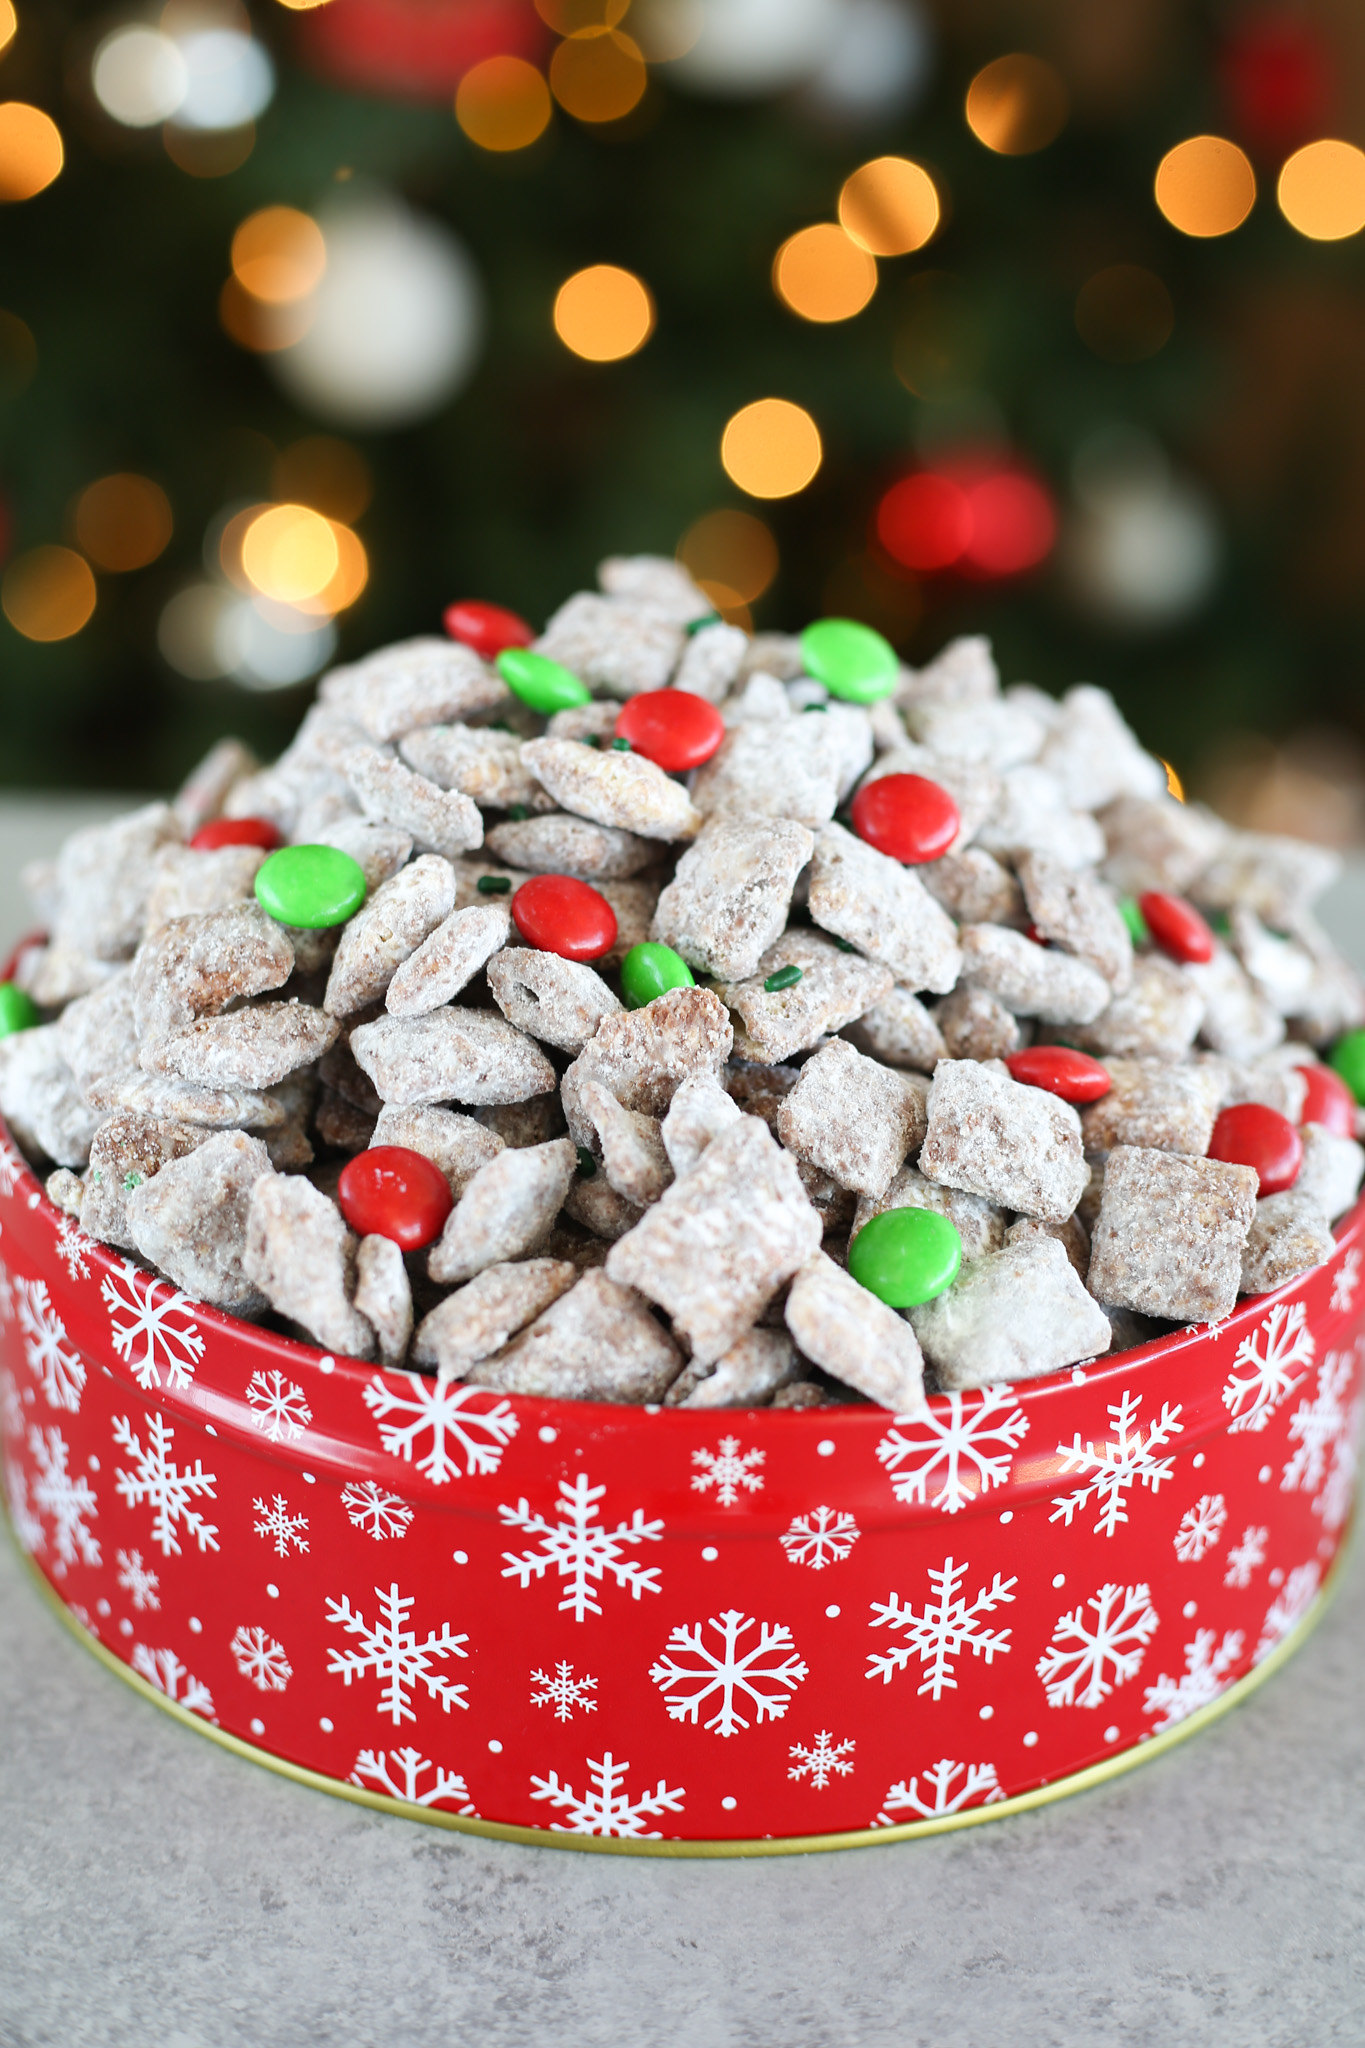
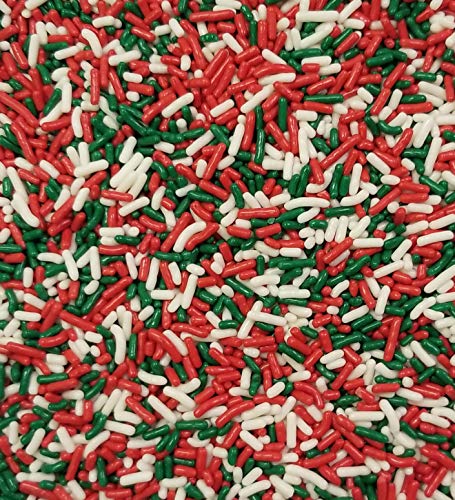
    These Cream Cheese Mints are a no bake, no heat candy that takes less than 30 minutes. You can make them any color but I used red and green for the Christmas season.

    They are so delicious and just melt in your mouth.
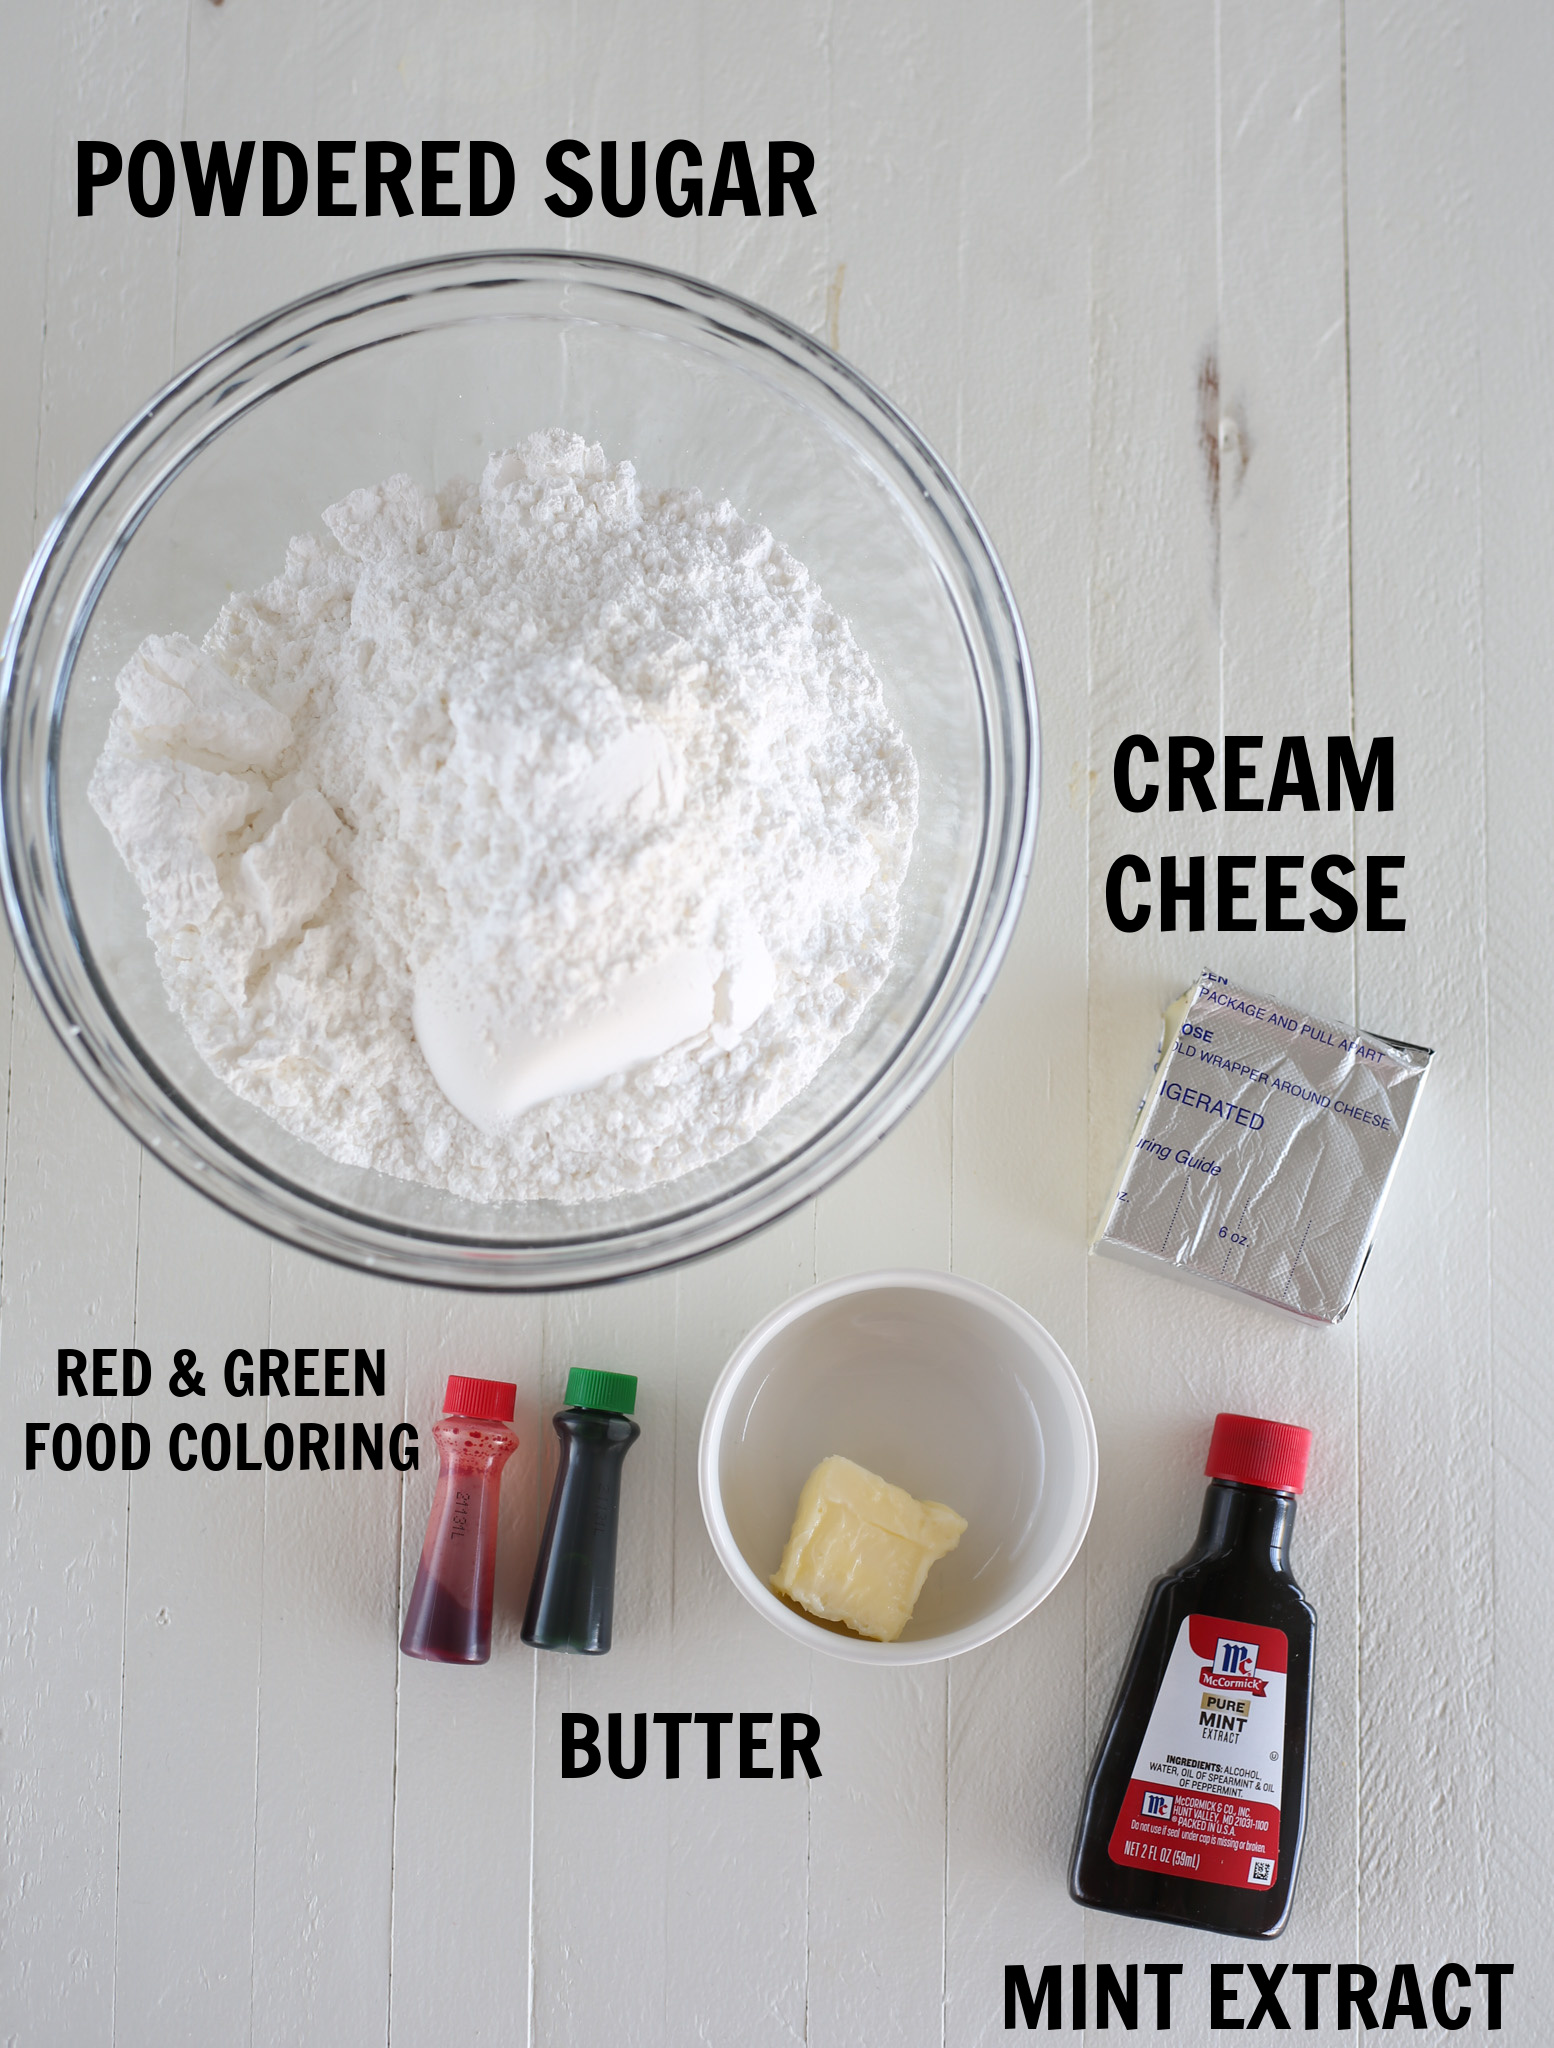
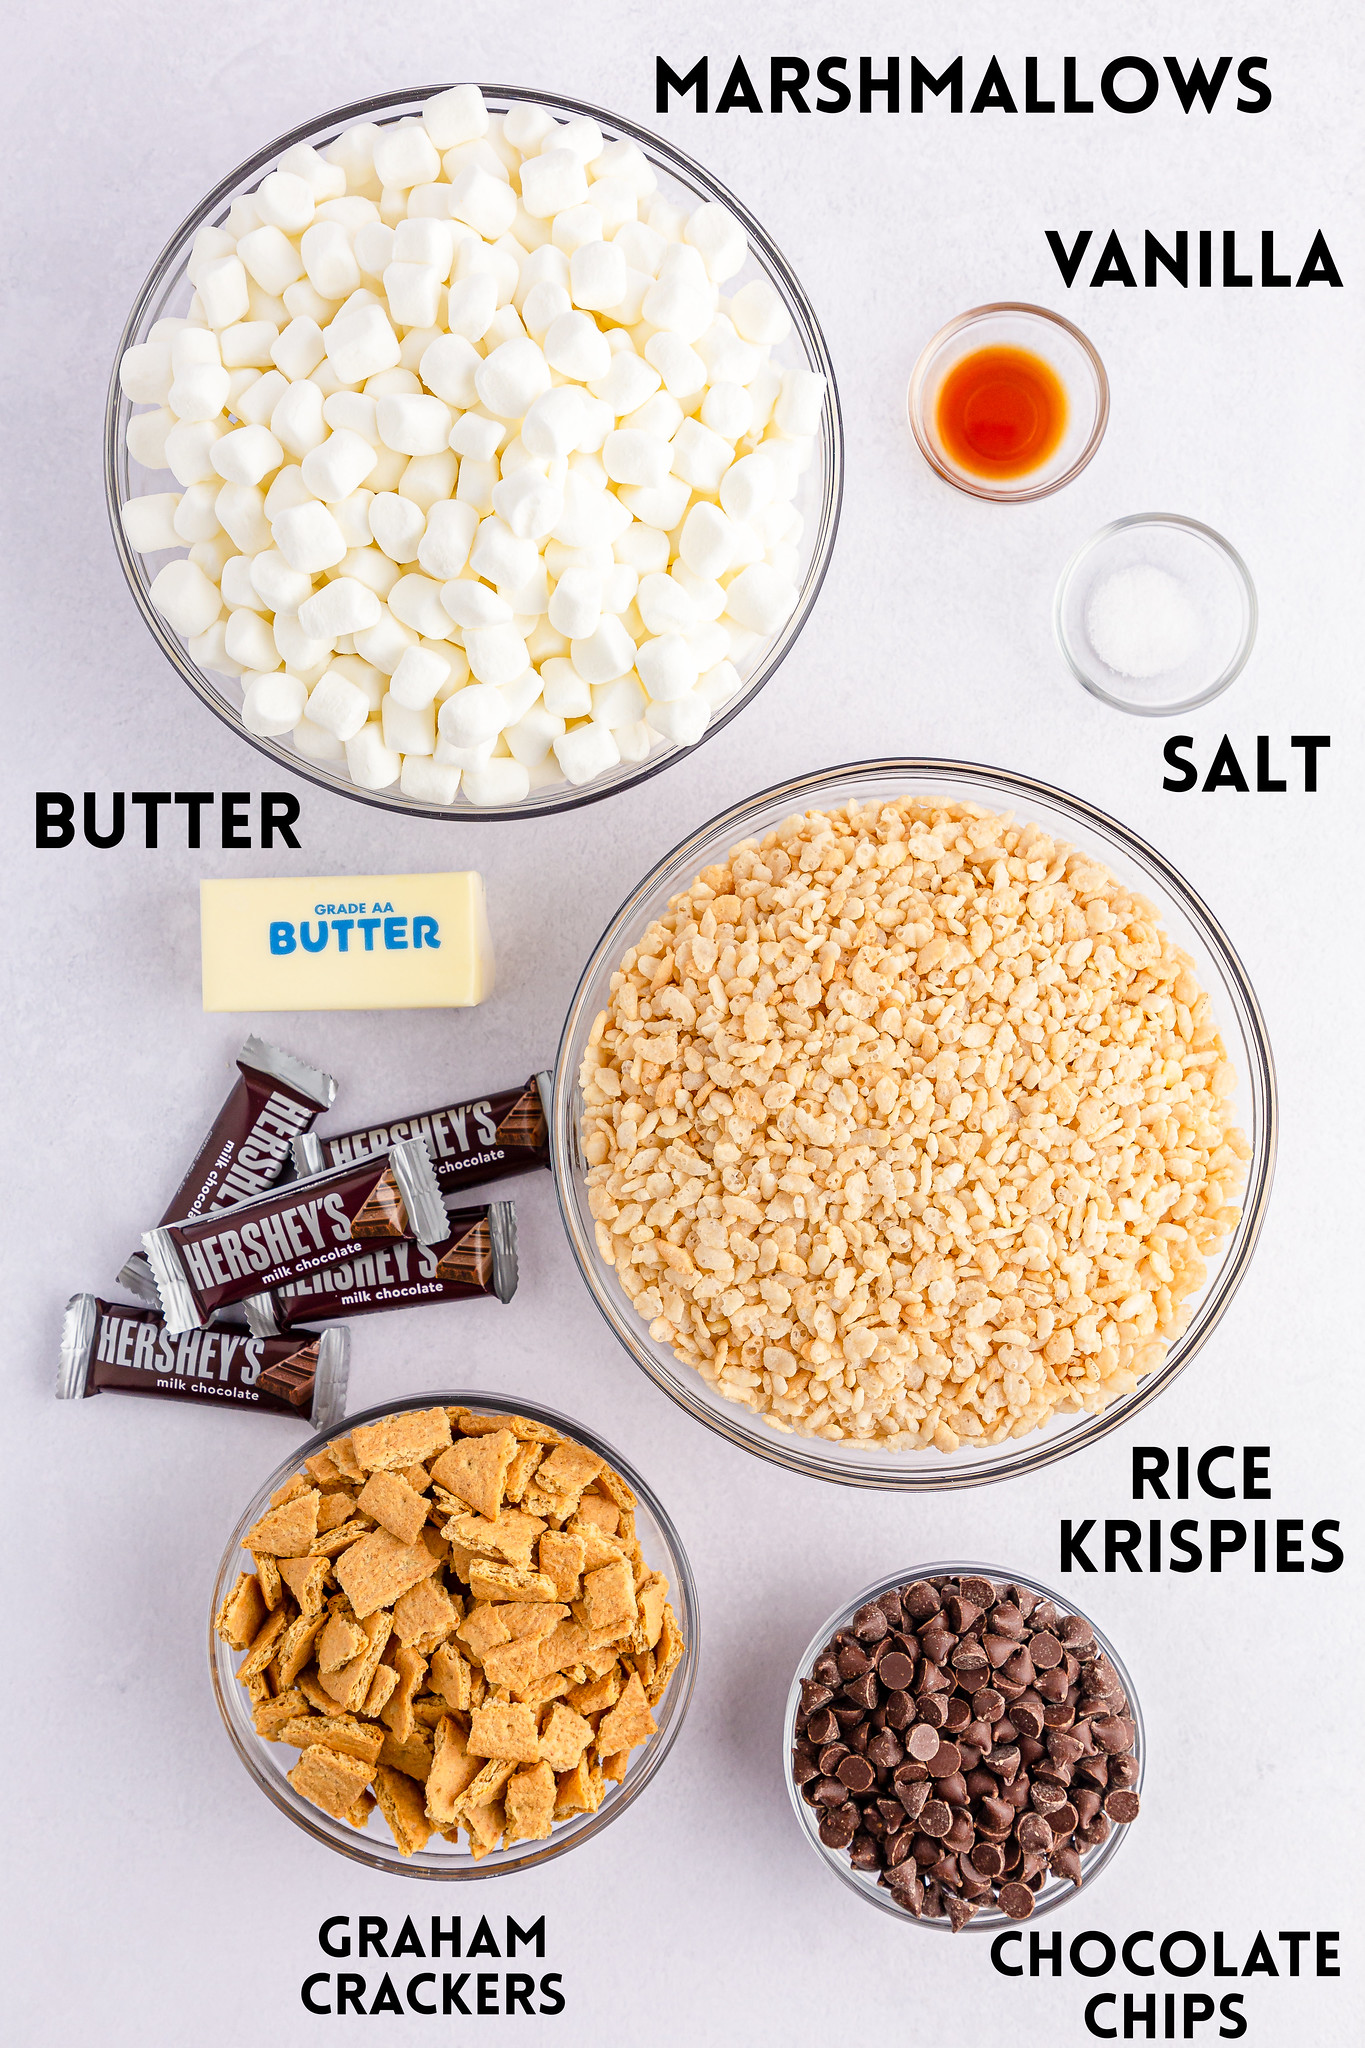
    Ingredients for cream cheese mints

    Ingredients

    • Cream cheese – you want it to be very soft before you start the recipe. I left mine on the counter for over an hour before beginning.
    • Butter – just 1 tablespoon so it won’t take long for the butter to soften.
    • Powdered sugar – the powdered sugar makes a much smoother mint than granulated would.
    • Mint extract – if you prefer peppermint, you can use peppermint extract. I like the taste of mint extract better so I went with that one. Mint extract is more of a spearmint flavor and peppermint is a straightforward peppermint.
    • Red and green food coloring – of course you can leave your mints white if you want but for the holidays, I thought red and green was fun and festive.

    How To Make Cream Cheese Mints

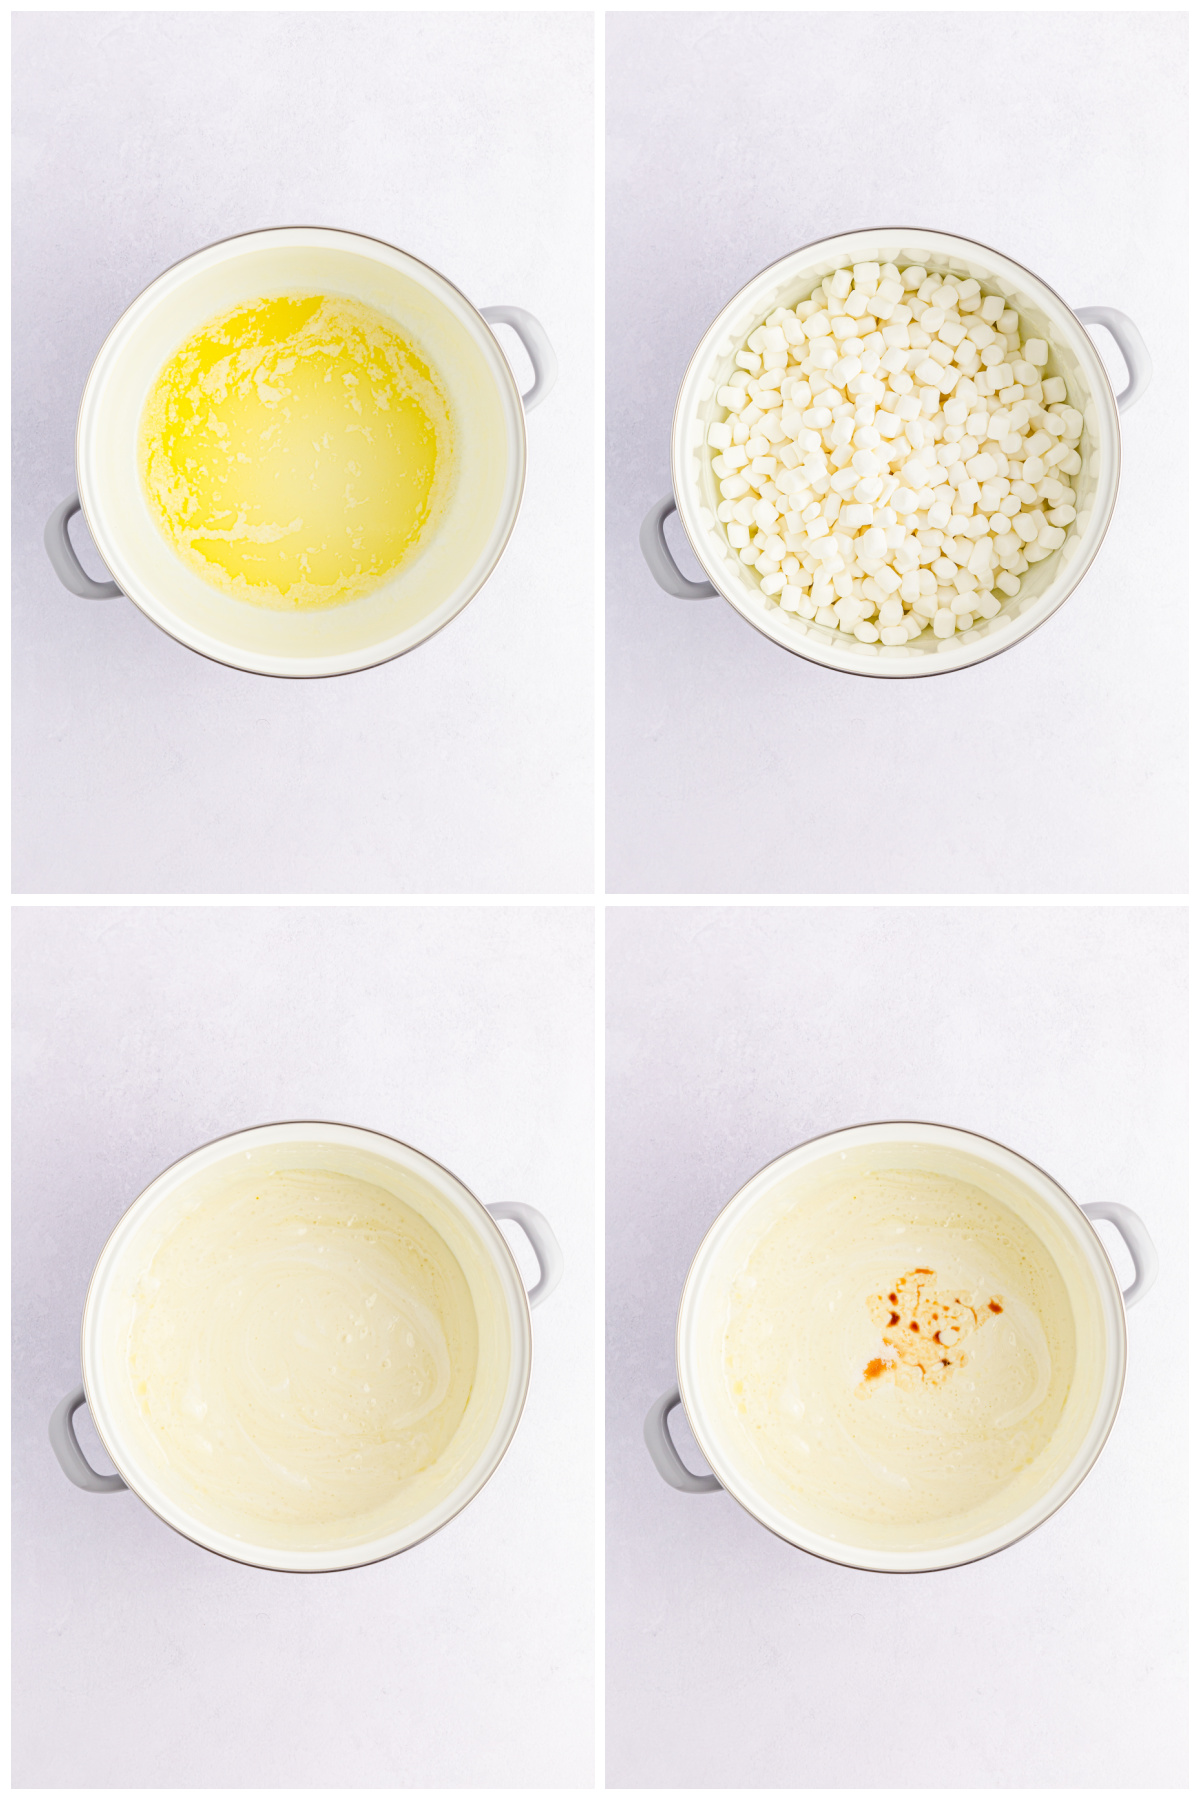
    • Beat. Beat together cream cheese and butter until very smooth.
    • Add remaining ingredients. Add half the powdered sugar and the mint extract. Beat until combined. Add reminaing powdered sugar and beat until fully incorporated.
    • Add food coloring. Divide dough into 2 bowls. Add a couple drops of food coloring to each bowl and beat to combine.
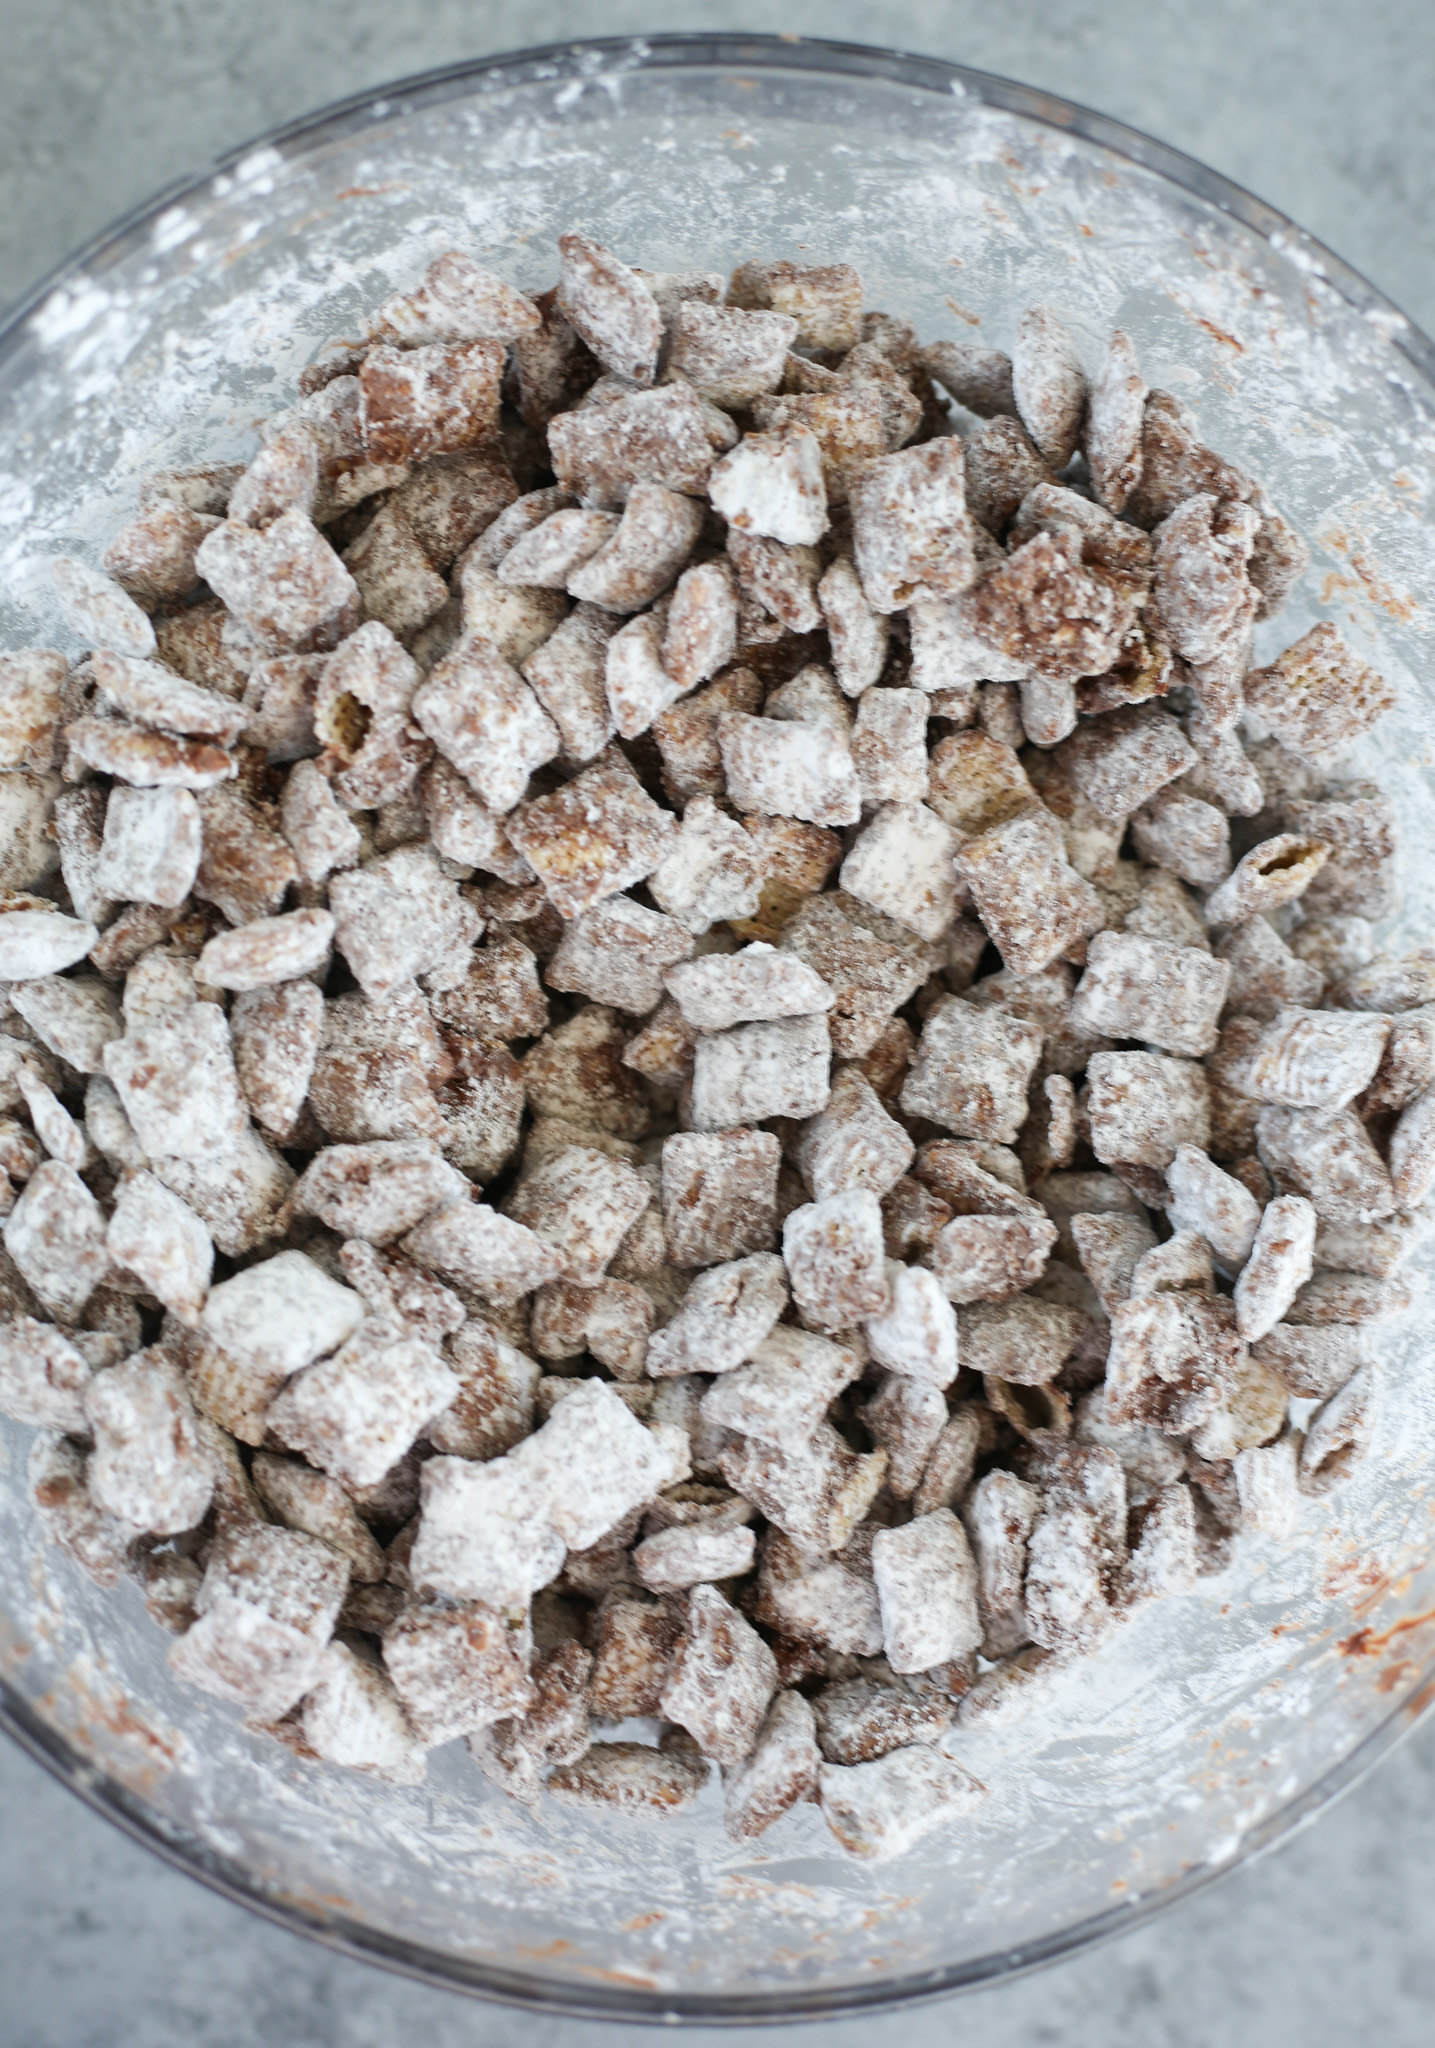
    • Shape. Roll teaspoon size balls of mint dough and place on parchment paper.
    • Add lines. Use a fork to gently press down the mints.
    • Dry. Let dry at room temperature for several hours before transferring to an airtight container and storing in the fridge.
    Overhead shot of pink and green homemade mints on a white plate. The minths have fork tine marks in them.

    How Long Are They Good For?

    Cream cheese mints are good for up to 2 weeks in airtight container in the refrigerator.

    Can You Freeze Them?

    You can freeze these mints for up to 2 months in a freezer ziploc bag. Let sit at room temperature for several hours before serving.

    Mint vs Peppermint Extract

    I used mint extract in this recipe because I prefer a more spearmint flavor but if you want a classic peppermint flavor, use the peppermint extract. It’s all personal preference.

    Homemade melt in your mouth mints in green and pink

    More Candy Recipes

    • Crockpot Candy
    • White Chocolate Peanut Butter Ritz Crackers
    • Sugar Cookie Truffles
    • Almond Bark Drop Cookies
    • Holly Crackles

    Make sure you subscribe to my email list to get all my new recipes delivered right to your inbox!

    You can also follow me on Instagram, Facebook, or Pinterest for even more! 

    📖 Recipe

    Yield: 50 mints

    Cream Cheese Mints

    Cream Cheese Mints

    Cream Cheese Mints are the classic melt in your mouth mints that only need 5 ingredients and about 20 minutes. It’s such an easy candy recipe and you can change the colors depending on the holiday or occasion.

    Prep Time 20 minutes
    Additional Time 3 hours
    Total Time 3 hours 20 minutes

    Ingredients

    • 4 ounces cream cheese, softened
    • 1 tablespoon butter, softened
    • ½ teaspoon mint extract (or peppermint extract)
    • 4 cups powdered sugar
    • heavy cream or milk, as needed
    • red and green food coloring

    Instructions

    1. In a large mixing bowl, beat cream cheese and butter with an elecric mixer until very well combined.
    2. Add 2 cups of powdered sugar and the mint extract. Use the electric mixer on very low speed to incorporate the powdered sugar. Once that is combined, add the remaining 2 cups of powdered sugar and beat until combined.
    3. The mixture is going to be very thick and it will take several minutes to combine. If after 3 or 4 minutes of beating, it hasn't come together, drizzle in a tiny bit of milk or heavy cream and keep beating. Eventually it will come together with a playdoh type consistency.
    4. If using 2 colors, divide into 2 bowls. Add a couple drops of the colors to each bowl and beat to combine. Again, this will take several minutes.
    5. Roll the dough into teaspoon size balls and place on parchment or wax paper. Repeat with all dough.
    6. Using a fork, gently press down each mint to create the lines. If your fork is sticking, dip the fork into powdered sugar before pressing the candy.
    7. Let set for several hours before putting in an airtight container in the refrigerator.

    Notes

    • These mints will be fine in an airtight container in the fridge for up to 2 weeks.
    • You can freeze them in a ziploc bag for up to 2 months. Make sure to squeeze any excess air out of the bag before freezing.

    Recommended Products

    As an Amazon Associate and member of other affiliate programs, I earn from qualifying purchases.

    • Gel Food Colors
      Gel Food Colors
    • Electric Mixer
      Electric Mixer

    Nutrition Information:

    Yield:

    50

    Serving Size:

    1

    Amount Per Serving: Calories: 49Total Fat: 1gSaturated Fat: 1gTrans Fat: 0gUnsaturated Fat: 0gCholesterol: 4mgSodium: 12mgCarbohydrates: 9gFiber: 0gSugar: 9gProtein: 0g

    Did you make this recipe?

    Tag me in your Instagram photo - @fakeginger

    © Amanda Livesay
    Cuisine: American / Category: candy

    Christmas Muddy Buddies

    Dec 06, 2023

    Christmas Muddy Buddies is just like the classic muddy buddies all dressed up in holiday cheer! Crunchy Chex cereal coated in a peanut butter chocolate mixture and tossed in powdered sugar. Holiday M&Ms and sprinkles make this mix so fun and festive!

    Muddy buddies with red and green M&Ms and green sprinkles in a red snowflake cookie tin

    Do you call these muddy buddies or puppy chow? I asked my boyfriend as I was working on this post and he said puppy chow but I’ve always known them as muddy buddies. And then he threw out that some people call them reindeer chow!

    I had no idea.

    No matter what you call them, they are so delicious and you can turn them into a fun holiday treat with just a couple additions.

    It’s Chex cereal coated in chocolate and peanut butter and tossed in powdered sugar! And the melting of the chocolate is done in the microwave so it’s quick and easy. And something the kiddos can help with!

    I added Christmas M&Ms and sprinkles to make them more festive but you can add whatever holiday candies you like.

    Overhead shot of christmas muddy buddies in a red tin

    Ingredients

    • Chex cereal – you can use either Rice or Corn Chex, whichever you prefer. You can even use Chocolate Chex if you love chocolate!
    • Semisweet chocolate chips – these are getting melted and turned into the delicious chocolate coating.
    • Creamy peanut butter – this gets melted with the chocolate to create the peanut butter chocolate coating.
    • Butter – butter makes everything better, including muddy buddies! I used unsalted but salted or unsalted will work.
    • Powdered sugar – once the Chex is coated in the chocolate mixture, they get tossed in powdered sugar.
    • Christmas M&Ms – there are so many different varieties of festive M&Ms nowadays so pick your favorite. I just used the classic M&Ms.
    • Sprinkles – use whatever kind and shape of sprinkles you like. I prefer jimmies in recipes like this.
    how to make muddy buddies

    How To Make Christmas Muddy Buddies

    • Make coating. Melt together chocolate chips, peanut butter, and butter in the microwave until smooth.
    • Add cereal. Add cereal and toss to combine.
    • Coat in powdered sugar. Add powdered sugar and toss until all the cereal is coated. You can also do this in a large ziploc bag.
    • Add festive toppings. Stir in M&Ms and sprinkles.
    Overhead shot of puppy chow being made

    How Long Are Muddy Buddies Good For?

    Store muddy buddies in an airtight container at room temperature for up to a week. If you need them to last longer, they will be fine in the fridge for up to 2 weeks.

    Can You Freeze It?

    You can freeze muddy buddies for up to 2 months. Make sure to store them in a super airtight container.

    When you are ready to enjoy them, let them sit at room temperature for a couple hours.

    A red tin with snowflakes on it filled with muddy buddies, holiday M&Ms, and sprinkles

    More Christmas Treats

    • Crockpot Candy
    • No Bake Avalanche Cookies
    • Italian Sugar Cookies
    • Hot Cocoa Dip
    • Sugar Cookie Truffles

    Make sure you subscribe to my email list to get all my new recipes delivered right to your inbox!

    You can also follow me on Instagram, Facebook, or Pinterest for even more! 

    📖 Recipe

    Yield: about 18 servings

    Christmas Muddy Buddies

    Christmas Muddy Buddies
    Prep Time 15 minutes
    Total Time 15 minutes

    Ingredients

    • 9 cups Rice or Corn Chex cereal
    • 1 cup semisweet chocolate chips
    • ½ cup creamy peanut butter
    • ¼ cup butter
    • 1 ½ cups powdered sugar
    • ½ cup Christmas M&Ms
    • 2 tablespoons Christmas sprinkles

    Instructions

    1. Place Chex cereal in a large mixing bowl. Set aside.
    2. In a separate microwave-safe bowl, microwave chocolate chips, peanut butter, and butter in 30 second increments. Stir after each 30 seconds until the mixture is smooth.
    3. Pour over cereal and toss to coat.
    4. Add powdered sugar and continuing tossing until coated. Alternately, you can add the chocolate coated Chex to a large ziploc bag, add the powdered sugar, and shake until combined.
    5. Stir in M&Ms and sprinkles.
    6. Enjoy!

    Notes

    Store muddy buddies in an airtight container at room temperature for up to a week. They will last up to 2 weeks if stored in the fridge.

    Recommended Products

    As an Amazon Associate and member of other affiliate programs, I earn from qualifying purchases.

    • Christmas M&Ms
      Christmas M&Ms
    • Christmas Jimmies
      Christmas Jimmies

    Nutrition Information:

    Yield:

    18

    Serving Size:

    1

    Amount Per Serving: Calories: 296Total Fat: 11gSaturated Fat: 5gTrans Fat: 0gUnsaturated Fat: 5gCholesterol: 8mgSodium: 68mgCarbohydrates: 47gFiber: 2gSugar: 19gProtein: 5g

    Did you make this recipe?

    Tag me in your Instagram photo - @fakeginger

    © Amanda Livesay
    Cuisine: American / Category: candy

    Gingerbread Cake Balls

    Nov 29, 2023

    Gingerbread Cake Balls are a delicious, fun, festive treat for the holidays! Gingerbread cake covered in white chocolate and holiday sprinkles. They are so easy and so cute!

    We also have Peppermint Oreo Balls that are perfect for Christmas!

    I love gingerbread flavor this time a year but I’m not a huge fan of the standard crunchy gingerbread cookies. I will choose pretty much any cookie over a gingerbread man.

    So I love recipes like this where you get the gingerbread flavor in a totally different form.

    These Gingerbread Cake Balls are just like the classic cake balls that all impulse buy at Starbucks but the inside is gingerbread cake. So the cake is mixed with cream cheese, rolled into balls, and then coated in white chocolate and sprinkles.

    Why You’re Going To Love This Recipe

    • The spicy gingerbread with the sweet white chocolate coating is so delicious together! Plus, you have all the different textures of the cake, the chocolate, and the crunchy sprinkles.
    • It starts with a cake mix so it’s really quick and easy! Once the cake is baked and cooled, it’s perfect for little helpers who want to help dip and decorated the cake balls.

    Ingredients

    • Gingerbread Cake Mix – I used the Betty Crocker one but I’m sure there are many other options. Make sure you pick up all the ingredients that the box requires as well. Mine needed 1 egg and a cup of water or milk.
    • Cream cheese – this is getting mixed into the crumbled cake after it’s baked. It binds the cake together and gives it such a great texture.
    • White melting wafers – you can get these at any grocery store in the aisle with the chocolate chips. You can also use white almond bark.
    • Sprinkles – you can use whatever sprinkles you like but I think a gingerbread sprinkle mix is perfect for these.

    How To Make Gingerbread Cake Balls

    • Bake cake. Mix the gingerbread cake mix with the required ingredients and bake as instructed on the box.
    • Cool slightly. Let cool until you can handle it without burning your hands.
    • Crumble. Crumble the cake into a mixing bowl.
    • Blend. In a separate bowl, use an electric mixer to blend cream cheese until smooth and creamy.
    • Add cake. Add the crumbled cake and use the electric mixer to combine. Make sure to scrape down the sides.
    • Roll. Roll the mixture into balls and place on parchment paper.
    • Melt. Melt the melting wafers by 30 second increments in the microwave until smooth.
    • Dip. Dip cake balls, one at a time, in the melted chocolate and tap the fork on the side of the bowl to remove any excess chocolate.
    • Sprinkle. Place back on the parchment paper and top with sprinkles while the chocolate is still wet.

    How Long Are They Good For?

    These gingerbread cake balls will be fine in the fridge for up to 5 days. Make sure to store them in an airtight container.

    You can either serve them straight from the fridge or, I like to let them sit out for 10 minutes or so just to talk the chill off.

    Can You Freeze Them?

    You can freeze the cake balls before or after dipping for up to 3 months. Make sure you wait until they are fully set before freezing.

    I like to put them in the freezer unwrapped for 30 minutes or so to make sure they don’t stick to either other. Then wrap them in plastic wrap and finally place them in a plastic bag.

    When you are ready to serve them, let them sit in the fridge for several hours.

    More Gingerbread Treats

    • Soft Gingerbread Cookies
    • Chewy Chocolate Gingerbread Cookies
    • Gingerbread Hot Chocolate
    • Gingerbread Waffles

    Make sure you subscribe to my email list to get all my new recipes delivered right to your inbox!

    You can also follow me on Instagram, Facebook, or Pinterest for even more! 

    📖 Recipe

    Yield: 24 cake balls

    Gingerbread Cake Balls

    Gingerbread Cake Balls

    Gingerbread Cake Balls are a delicious, fun, festive treat for the holidays! Gingerbread cake covered in white chocolate and holiday sprinkles. They are so easy and so cute!

    Prep Time 1 hour
    Total Time 1 hour

    Ingredients

    • 14.5 ounce Betty Crocker Gingerbread Cake Mix (plus ingredients on box needed to make it)
    • 8 ounce block cream cheese, softened to room temperature
    • 10 oz bag white melting wafers or almond bark
    • Gingerbread sprinkles mix

    Instructions

    1. Prepare gingerbread cake mix according to package instructions.
    2. When cake is done baking, let cool until you can handle it and then crumble into a large mixing bowl. Cool completely.
    3. In a separate mixing bowl, beat cream cheee until smooth and creamy.
    4. Add the crumbled cake into the cream cheese and beat until well combined. Use a rubber spatula to scrape down the sides of the bowl to make sure you combined everything.
    5. Roll the mixture into even sized balls and set on parchment-lined baking sheets.
    6. Refrigerate 1 - 2 hours. This wll help the cake balls keep their shape when dipped.
    7. In another mixing bow, melt the white melting wafers in the microwave in 30 second increments until melted and smooth.
    8. Use a fork to dip each cake ball, one at a time, into the melted chocolate. Tap the fork on the edge of the bowl to remove any excess chocolate. Place the cake ball back on the parchment and add sprinkles.
    9. Refrigerate until ready to serve. The refrigerator should help the chocolate harder faster.

    Notes

    Store leftover cake balls in the fridge for up to 5 days.

    Recommended Products

    As an Amazon Associate and member of other affiliate programs, I earn from qualifying purchases.

    • Gingerbread Sprinkle Mix
      Gingerbread Sprinkle Mix
    • Ghirardelli White Vanilla Flavored Melting Wafers
      Ghirardelli White Vanilla Flavored Melting Wafers
    • Electric Mixer
      Electric Mixer

    Nutrition Information:

    Yield:

    24

    Serving Size:

    1

    Amount Per Serving: Calories: 249Total Fat: 10gSaturated Fat: 5gTrans Fat: 0gUnsaturated Fat: 4gCholesterol: 17mgSodium: 266mgCarbohydrates: 37gFiber: 0gSugar: 23gProtein: 3g

    Did you make this recipe?

    Tag me in your Instagram photo - @fakeginger

    © Amanda Livesay
    Cuisine: American / Category: cake

    Apple Galette

    Sep 25, 2023

    Apple Galette is a rustic French tart that tastes just like an apple pie with a lot less work! Flaky, buttery crust filled with brown sugar cinnamon apples and baked until browned and delicious.

    Does everyone else’s kids ask for pie every single time you ask them for dessert ideas?

    It never fails with my kids.

    And you know what I don’t want to do? Fit a pie crust to a pan. Especially a double pie crust. I also don’t want to cut strips to make a lattice.

    But you know what I can do?

    Make a super delicious, rustic Apple Galette that tastes just like an apple pie but with a whole lot less work.

    Flaky buttery pastry crust filled with sliced apples and topped with brown sugar, cinnamon, and butter. It gets baked until the crust is browned and the applies have softened.

    Why You’re Going To Love This Recipe

    • This apple galette recipe is so easy and you really can’t mess it up. You want the crust to be a little uneven to give it that rustic look. The filling is just layered apples, brown sugar, and butter. It’s so simple!
    • It’s going to taste just like an apple pie with so much less work.
    • An apple galette is such an impressive dessert to show up with at Thanksgiving or any dinner party. It looks like it took you hours even though the whole thing takes about an hour (plus 45 minutes chilling in the fridge).

    Ingredients

    • Butter – this is going in the crust and on the galette itself. The butter for the crust needs to be COLD, like pop it in the freezer for a few minutes before using it. That’s how you get those little buttery pockets in your pastry dough.
    • Salt
    • Sour cream – this is going into the pastry dough so it needs to be cold. Keep it in the fridge until right before you add it to the dough.
    • All-purpose flour – this is what makes up the pastry dough.
    • White sugar – just a tiny bit to give the pastry a little sweet.
    • Apples – use whatever apples you have on hand but I love a honeycrisp or gala in this recipe. I prefer the look of a red apple but you can use green if you are fine with that look.
    • Lemon – the lemon is going to prevent browning of the apples. I used about ½ a lemon but if your lemon is large or super juicy, you may need less.
    • Cornstarch – this is going to thicken up any of the juices that the apples let out so that you don’t end up with a soggy bottom on your galettes.
    • Brown sugar – this is getting sprinkles all over the sliced apples and crust to give it the perfect molasses-y sweetened.
    • Cinnamon – you have to add cinnamon to all your apple desserts!
    • Egg yolk – you are going to brush this onto your pastry crust so that it ends up perfectly golden brown and crispy.

    How To Make Apple Galette

    • Make pastry. Combine flour, sugar, and salt. Cut cold butter into the mixture until crumbly. Cut in sour cream.
    • Chill the dough. Divide dough into 2 and roll into balls. Wrap tightly in plastic wrap and chill in the fridge for 45 minutes.
    • Prepare apples. Slice the apples and drizzle with lemon juice.
    • Assemble galettes. Roll the dough out in a circle, about 10 inches wide on parchment paper. Transfer to baking sheet. Sprinkle cornstarch all over the center part of the galette. Arrange apple slices in the middle of the galette. Dust the apples with cinnamon. Top with cold butter cubes.
    • Fold in edges. Fold in the edges and brush with egg yolk. Sprinkle brown sugar all across the galette.
    • Bake. Bake at 350F for 40-50 minutes until golden brown.
    • Cool and serve. Remove from the oven, let cool before slicing. Top with powdered sugar, caramel sauce, or ice cream if desired.

    How Long Is It Good For?

    This apple galette is good for up to 2 days after baking. Make sure to store it in an airtight container in the refrigerator.

    I like to reheat mine in the oven or a toaster oven to get the pastry a little crisp again. Or it’s perfectly find it enjoy it right out of the fridge!

    Can You Make It Ahead?

    The dough will be fine in the fridge for up to 4 days. Wrap the balls of dough in plastic wrap tightly and keep refrigerated until you are ready to use it.

    I wouldn’t recommend trying to bake the galette more than a few hours ahead of time because you want the pastry to be crispy when you serve it.

    Can You Freeze It?

    You can freeze the dough for up to 3 months. Wrap it tightly in plastic wrap and then place it in a ziploc freezer bag.

    Let it sit overnight in the fridge before using.

    More Apple Recipes

    • Pumpkin Apple Muffins
    • Apple Cranberry Crisp
    • Apple Upside Down Cake
    • Apple Pie Cheesecake
    • Caramel Apple Nachos

    Make sure you subscribe to my email list to get all my new recipes delivered right to your inbox!

    You can also follow me on Instagram, Facebook, or Pinterest for even more! 

    📖 Recipe

    Yield: 2 (7-inch) galettes

    Apple Galette

    Apple Galette
    Prep Time 20 minutes
    Cook Time 40 minutes
    Total Time 1 hour

    Ingredients

    For the dough:

    • ½ cup unsalted butter (very cold, cut into cubes)
    • 1 teaspoon salt
    • 1 cup sour cream
    • 2 cup all purpose flour
    • 1 tablespoon white sugar

    For the filling:

    • 4 medium apples, sliced into thin wedges
    • juice of ½ lemon
    • 2 teaspoon cornstarch
    • ¼ cup brown sugar
    • 2 tablespoon unsalted butter, cold
    • 2 teaspoon cinnamon ground
    • 1 egg yolk, beaten

    For serving:

    • powdered sugar, caramel sauce, ice cream (optional)

    Instructions

      1. In a large bowl combine flour, sugar, and salt.
      2. Add in very cold butter, small cubes and use a pastry blender to cut the butter in until it looks and feels crumbly.
      3. Follow with cold sour cream, and stir to combine until the batter comes together. You have to work fast or use a food processor. 
      4. Shape into a large ball and divide into 2. Roll each into 2 smaller balls and tightly wrap with plastic wrap. Transfer to the fridge for 45 minutes. 
      5. Once you are ready to take out the dough, prepare the next step first. 
      6. Slice the apples (about ⅛ inches thick ), drizzle them with lemon juice to prevent too much browning (they will still brown a little, which is fine too). Cover with wet kitchen towel on top.
      7. You’ll need 1 large baking sheet per each galette. If the oven is smaller, just work with one ball at a time, keeping the other one in the fridge for longer.
      8. Preheat the oven to 350 F (180C). Remove the dough from the fridge, discard the plastic wrap. Place each ball onto parchment paper. 
      9. Roll the dough out in a flat circle, about 10 inches wide. Sprinkle a little flour for easier handling.  It's okay if the edges aren't even, galettes are supposed to be rustic!
      10. Once ready, transfer the dough with the parchment paper onto the baking sheet. Sprinkle cornstarch all over the center part of the galette (where you’re going to layer the apples), 1 tablespoon per 1 galette. 
      11. Arrange apple slices in the middle of the galette leaving about 1 ½ to 2 inches on the outer edges that we are going to fold in very soon.
      12. Dust the apples with cinnamon, about 1 teaspoon per galette. 
      13. Top with cold butter cubes, 1 tablespoon per galette.
      14. Fold in the edges and generously brush with beaten egg yolk.
      15. Sprinkle brown sugar all across the galette.
      16. Bake for 40-50 minutes until the edges become beautifully golden brown. 
      17. Remove from the oven, let cool before slicing.
      18. Top with powdered sugar, caramel sauce, or ice cream if desired.

    Notes

    1. The pastry dough will be fine in the refrigerator for up to 4 days. Wrap it tightly in plastic wrap.
    2. You can freeze the pastry dough for up to 3 months. Wrap it in plastic wrap and then place in a freezer ziploc bag.

    Recommended Products

    As an Amazon Associate and member of other affiliate programs, I earn from qualifying purchases.

    • Pastry Blender
      Pastry Blender
    • Parchment Paper
      Parchment Paper
    • Rimmed Baking Sheet
      Rimmed Baking Sheet

    Did you make this recipe?

    Tag me in your Instagram photo - @fakeginger

    © Amanda Livesay
    Cuisine: French / Category: pie

    Funfetti Cake

    Jul 17, 2023

    Funfetti Cake is the perfect birthday cake! Layers of moist vanilla cake filled with rainbow sprinkles. It gets filled and frosted with a delicious vanilla buttercream and topped with more sprinkles.

    If you love funfetti as much as I do, try Funfetti Gooey Butter Cake and Funfetti Muddy Buddies!

    Funfetti Cake is the perfect birthday cake! Layers of moist vanilla cake filled with rainbow sprinkles. It gets filled and frosted with a delicious vanilla buttercream and topped with more sprinkles.

    This is my most favorite cake ever! I make it every year for my birthday and this year I made something else and instantly regretted that decision. So, of course, I had to make it a few weeks after my birthday and share it with y’all.

    This is a homemade version of Funfetti Cake so this is 4 layers of vanilla cake with rainbow sprinkles, filled and frosted with homemade vanilla buttercream. And then you put sprinkles all over the cake!

    It’s so fun and so delicious. I’m definitely going back to using this as my birthday cake!

    A slice of funfetti cake lying down on a white plate. It has vanilla buttercream and lots of sprinkles on top.

    Why You’re Going To Love This Recipe

    • Funfetti is the most fun cake you can have! I’ve never met anyone who isn’t immediately happy when they see a slice of cake full of rainbow sprinkles.
    • The ingredients are all very simple. It’s all pantry and fridge staples outside of the rainbow sprinkles.
    Ingredients for homemade confetti cake

    Ingredients for Funfetti Cake

    • All-purpose flour
    • Baking powder
    • Salt
    • Unsalted butter – butter is going in the cake and the buttercream. Make sure your butter is at room temperature before beginning the recipe.
    • Vegetable oil
    • Granulated sugar
    • Eggs
    • Vanilla extract – this is going in the cake and the frosting. You can use a clear vanilla if you don’t want to tint the frosting but it’s not necessary.
    • Milk
    • Rainbow sprinkles – you have to have rainbow sprinkles in funfetti cake! Some are going in the cake and then you’ll need more if you want to decorate with them.
    • Powdered sugar – for the frosting.
    How to make homemade funfetti cake

    How To Make Funfetti Cake

    • Prepare. Prepare 4 8-inch round cake pans by lining with parchment or buttering.
    • Combine dry ingredients. Whisk together the flour, baking powder, and salt.
    • Combine wet ingredients. Beat the butter, oil, and sugar until smooth and fluffy. Add the eggs and vanilla extract, mix until combined.
    • Combine. Add the dry mixture, alternating with the milk until completely combined.
    • Add sprinkles. Fold in the rainbow sprinkles.
    • Transfer to pans. Divide the batter evenly into the 4 cake pans.
    • Bake. Bake at 350F for 20-25 minutes.
    • Cool. Cool the cakes completely before frosting.
    How to make vanilla buttercream frosting
    Bak

    How To Make Vanilla Buttercream

    • Cream butter. Beat the softened butter and vanilla until smooth and creamy.
    • Add powdered sugar. Gradually add the powdered sugar until completely combined.

    Assemble the Funfetti Layer Cake

    • Level the cakes. Level the cakes using a large serrated knife to create a flat surface.
    • Stack cakes. Stack the cakes with a layer of buttercream between each cake layer.
    • Crumb coat. Spread a thin even layer of buttercream on top of and around the cake to create a crumb coat.
    • Chill. Place in the freezer for at least 15 minutes to set the crumb coat.
    • Finish frosting. Frost the entire cake with the remaining buttercream and garnish with extra sprinkles.
    inside shot of a confetti layer cake

    How Long Is It Good For?

    Funfetti cake is good for up to 3 – 4 days at room temperature. Make sure to cover it well or store it in an airtight container.

    You can prolong the life of the cake to up to 6 – 7 days if you store it in the fridge but the fridge will cause it to dry out. Store it in an airtight container.

    Can You Freeze It?

    You can freeze the unfrosted layers of the cake for up to 3 months. I suggest wrapping them tightly in plastic wrap and then placing them in freezer ziploc bags or another airtight container.

    When you are ready to frost them, let them sit at room temperature for several hours.

    If you want to freeze the already frosted cake, I recommend doing it in slices. Freeze them on a sheet pan until the frosting is frozen and then you can wrap the individual slices in plastic wrap and place them in a freezer ziploc bag.

    Let the slices sit at room temperature for a couple hours before serving.

    A slice of funfetti cake topped with vanilla buttercream and rainbow sprinkles

    More Cake Recipes

    • Margarita Bundt Cake
    • Strawberry Cheesecake Poke Cake
    • Pumpkin Crunch Cake
    • Chocolate Loaf Cake
    • German Chocolate Cake

    Make sure you subscribe to my email list to get all my new recipes delivered right to your inbox!

    You can also follow me on Instagram, Facebook, or Pinterest for even more! 

    📖 Recipe

    Yield: about 15 servings

    Funfetti Cake

    Funfetti Cake

    Funfetti Cake is the perfect birthday cake! Layers of moist vanilla cake filled with rainbow sprinkles. It gets filled and frosted with a delicious vanilla buttercream and topped with more sprinkles.

    Prep Time 25 minutes
    Cook Time 25 minutes
    Total Time 50 minutes

    Ingredients

    For the cake

    • 3 cups all-purpose flour
    • 1 tablespoon baking powder
    • ½ teaspoon salt
    • ½ cup unsalted butter, at room temperature
    • ½ cup vegetable oil
    • 1 ½ cups granulated sugar
    • 4 large eggs
    • 1 tablespoon vanilla extract
    • 1 ¼ cups milk
    • ⅔ cup rainbow sprinkles

    For the Vanilla Buttercream

    • 2 cups unsalted butter, softened
    • 2 teaspoons vanilla extract
    • 4 cups powdered sugar
    • Additional rainbow sprinkles for garnish

    Instructions

      1. To make the cake: Preheat the oven to 350° F. Prepare 4, 8-inch round cake pans with parchment paper circles, grease the cake pans and parchment paper.
      2. In a medium mixing bowl, whisk together the flour, baking powder, and salt. Set aside.
      3. In a separate large mixing bowl, beat the butter, oil, and sugar until smooth and fluffy.
      4. Add the eggs and vanilla extract, mix until combined.
      5. Add the dry mixture, alternating with the milk until completely combined.
      6. Fold in the rainbow sprinkles.
      7. Divide the batter evenly into the 4 cake pans. Bake for 20-25 minutes or until a toothpick can be inserted and come out clean.
      8. Allow the cakes to completely cool while making the buttercream.
      9. For the buttercream: In a large mixing bowl, beat the softened butter and vanilla until smooth and creamy.
      10. Gradually add the powdered sugar until completely combined.
      11. To assemble, level the cakes using a large serrated knife to create a flat surface.
      12. Stack the cakes with a layer of buttercream between each cake layer. With a large icing spatula, spread a thin even layer of buttercream on top of and around the cake to create a crumb coat. Place in the freezer for at least 15 minutes to set the crumb coat.
      13. Frost the entire cake with the remaining buttercream and garnish with extra sprinkles.
      14. Slice, and enjoy!

    Recommended Products

    As an Amazon Associate and member of other affiliate programs, I earn from qualifying purchases.

    • Electric Mixer
      Electric Mixer
    • Rainbow Sprinkles
      Rainbow Sprinkles
    • 8-inch Round Cake Pan
      8-inch Round Cake Pan

    Nutrition Information:

    Yield:

    15

    Serving Size:

    1

    Amount Per Serving: Calories: 695Total Fat: 42gSaturated Fat: 21gTrans Fat: 0gUnsaturated Fat: 19gCholesterol: 133mgSodium: 202mgCarbohydrates: 76gFiber: 1gSugar: 54gProtein: 5g

    Did you make this recipe?

    Tag me in your Instagram photo - @fakeginger

    © Amanda Livesay
    Cuisine: American / Category: cake

    Cherry Fluff

    Jul 15, 2023

    Cherry Fluff is a fluffy fruit salad made with cherry pie filling, marshmallows, coconut, and nuts. The perfect no bake summer dessert!

    If you love marshmallow salads like this, try Banana Split Fluff and Pineapple Fluff Salad.

    Cherry Fluff is a fluffy fruit salad made with cherry pie filling, marshmallows, coconut, and nuts. The perfect no bake summer dessert!

    This summer has officially been the summer of fruit salads for me. I think this is the 4th fruit salad recipe I’ve posted because we just can’t get enough.

    I think they are so fun and, of course, my kids are always excited about a fruit salad full of different textures and flavors.

    This one is especially fun and I think it would be great all summer long or even served as a side dish at a holiday meal. How pretty would these colors be at Christmas?!

    Overhead shot of 2 glasses full of cherry fluff fruit salad with cherries, nuts, and mint leaves on top.

    Why You’re Going To Love This REcipe

    • Everyone loves a no bake dessert in the summer! And it’s the perfect cool treat to enjoy on a hot day.
    • This Cherry Fluff takes about 10 minutes to put together and then you just need to let it chill for a couple hours, which means it’s perfect to make ahead of a party or get together.
    • It is so delicious! It has cherries, marshmallows, coconut, and nuts – of course it tastes amazing.
    ingredients for cherry fluff fruit salad

    Ingredients

    • Instant vanilla pudding – you can use the sugar free/fat free instant pudding if you want.
    • Crushed pineapple – you’ll be using the pineapple and the juice so make sure you don’t drain the juice from the can.
    • Cool Whip – this is what gives the fruit salad the “fluff” that you want. You fold it into the fruit so that it keeps a lot of it’s airiness. You can use the lite or fat free kind if you want.
    • Cherry pie filling – this is in the baking aisle of your grocery store.
    • Mini marshmallows – the best part of a fluff fruit salad!
    • Shredded coconut – if you aren’t into the texture of coconut, you can leave this out.
    • Nuts – you can use either walnuts or pecans.
    how to make cherry fluff

    How To Make Cherry Fluff

    • Make the dressing. Stir together the instant vanilla pudding powder and crushed pineapple with the juice.
    • Add Cool Whip. Using a rubber spatula, fold the Cool Whip into the pineapple mixture.
    • Add mixins. Fold in the cherry pie filling,marshmallows, coconut, and nuts.
    • Chill. Chill in the refrigerator for 2-4.
    • Garnish and serve. When ready to serve, top with additional nuts and cherries if desired. Enjoy!

    How Long Is It Good For?

    Cherry Fluff is good for up to 3 – 4 days in the refrigerator. Make sure to store it in an airtight container to keep it fresh for as long as possible.

    It may become less fluffy as it sits but just give it a good stir and it should be good to go.

    A glass full of cherry fluff with a cherry and mint leaf on top; the serving bowl in the background is also full of cherry fluff.

    Can You Make It Ahead?

    Cherry Fluff needs to be made at least a couple hours ahead of time so it’s perfect for prepping ahead for a party.

    It can also be made the night before but make sure you give it a good stir before garnishing and serving.

    More Fruit Salad Recipes

    • Grape Salad
    • Pistachio Marshmallow Salad
    • Tropical Marshmallow Fruit Salad
    • Marshmallow Fruit Salad
    • Poppy Seed Fruit Salad

    Make sure you subscribe to my email list to get all my new recipes delivered right to your inbox!

    You can also follow me on Instagram, Facebook, or Pinterest for even more! 

    📖 Recipe

    Yield: 8 servings

    Cherry Fluff

    Cherry Fluff

    Cherry Fluff is a fluffy fruit salad made with cherry pie filling, marshmallows, coconut, and nuts. The perfect no bake summer dessert!

    Prep Time 10 minutes
    Total Time 10 minutes

    Ingredients

    • 1 (3.4 ounce) box instant vanilla pudding mix
    • 1 (20 ounce) can crushed pineapple, undrained
    • 1 (8 ounce) tub Cool Whip
    • 1 (21 ounce) can cherry pie filling
    • 4 cups mini marshmallows
    • 1 ½ cups shredded coconut
    • ¾ cup chopped walnuts or pecans

    Instructions

    1. In a large mixing bowl, stir together the instant vanilla pudding powder and crushed pineapple with the juice. Stir until fully incorporated and the mixture has thickened.
    2. Using a rubber spatula, fold the Cool Whip into the pineapple mixture.
    3. Fold in the cherry pie filling,marshmallows, coconut, and nuts.
    4. Chill in the refrigerator for 2-4.
    5. When ready to serve, top with additional nuts and cherries if desired. Enjoy!

    Recommended Products

    As an Amazon Associate and member of other affiliate programs, I earn from qualifying purchases.

    • Rubber Spatulas
      Rubber Spatulas
    • Mixing Bowls
      Mixing Bowls

    Nutrition Information:

    Yield:

    8

    Serving Size:

    1

    Amount Per Serving: Calories: 306Total Fat: 12gSaturated Fat: 5gTrans Fat: 0gUnsaturated Fat: 7gCholesterol: 0mgSodium: 246mgCarbohydrates: 49gFiber: 3gSugar: 37gProtein: 3g

    Did you make this recipe?

    Tag me in your Instagram photo - @fakeginger

    © Amanda Livesay
    Cuisine: American / Category: pie

    Honey Mustard Pork Chops

    Jul 06, 2023

    Honey Mustard Pork Chops are an easy 30 minute meal the whole family is going to love. Thick cut pork chops with a delicious honey mustard sauce.

    Honey Mustard Pork Chops are an easy 30 minute meal the whole family is going to love. Thick cut pork chops with a delicious honey mustard sauce.

    Pork chops are one thing I don’t make enough of. They have a reputation of being a little bland and not as versatile as something like chicken breasts.

    But everyone in my house always loves them when I do make them. Especially when they’ve got a delicious sauce drizzled over top!

    If you find yourself walking right past the pork chop section of your grocery store every week because you don’t know what to do with them, give these Honey Mustard Pork Chops a try!

    Pork chop with honey mustard sauce cut to show the perfectly cooked inside of the pork. Served over mashed potatoes.

    Why You’re Going To Love This Recipe

    • If your kids are like mine, they are obsessed with honey mustard. They honey mustard is such a fun way to jazz up pork chops which can be kind of bland and boring.
    • These honey mustard pork chops are ready in about 30 minutes, depending on how thick your chops are!
    • This recipe is super budget friendly! Pork chops are one of the cheaper options at my grocery store and I already had the rest of the ingredients on hand.
    Ingredients for honey mustard pork chops

    Ingredients for Honey Mustard Pork Chops

    • Thick cut boneless pork chops – these are my preferred chops for this recipe but you can use thin cut (they may not need to go in the oven) or bone-in pork chops (which may require longer in the oven).
    • Garlic and herb seasoning – I used Mrs Dash brand of seasoning for this recipe but there are many different kinds out there. If you don’t want to buy another bottle of seasoning, make your own mixture of dried onion, dried garlic, and whatever dried herbs you already have.
    • Salt – the garlic and herb seasoning blend I used has no added salt so I included salt in the recipe list. If the seasoning you use has salt, go ahead and leave this out.
    • Oil – I recommend avocado oil for this recipe because it has a high smoke point but you can use vegetable oil or canola oil. Just don’t use a low smoke point oil like olive oil or butter.
    • Stone ground mustard – you want a grainy mustard for this recipe. It will be the main part of the sauce that is going on the pork chops.
    • Honey – you can’t have honey mustard pork chops without honey! This is going in the sauce.
    How to make pork chops with honey mustard sauce

    How To Make Honey Mustard Pork Chops

    • Prepare pork. Pat the pork chops dry with a paper towel and then season with 1 ½ teaspoons of the garlic and herb seasoning and the salt.
    • Brown pork chops. Sear the pork chops in hot oil on each side until just golden brown.
    • Make honey mustard. Mix together the stone ground mustard, honey, and the remaining garlic and herb seasoning in a medium mixing bowl.  
    • Remove pork. Remove the seared pork from the skillet and set aside.
    • Add sauce. Put the honey mustard mixture into the hot skillet and stir until everything comes off the bottom of the skillet. 
    • Add pork back. Place the pork chops back into the skillet and spoon sauce over the top of each one.
    • Finish cooking. Bake at 350F for 10-20 minutes, depending on the thickness of your pork chops, or until the pork reaches 145F internally.
    • Serve. Top with chopped parsley and serve.
    Pork chops in a skillet with honey mustard sauce and fresh parsley on top

    How Long Are They Good For?

    These pork chops are good for up to 3 days. Make sure to store them in an airtight container in the fridge.

    When you are ready to reheat them, you can pop them in the oven or the microwave. Just keep a close eye on them because pork does tend to dry out when it’s overcooked.

    Can You Freeze Them?

    You can freeze these pork chops for up to 3 months. I would wrap each pork chop in aluminum foil and then place them in a freezer ziploc bag.

    Let them defrost overnight in the refrigerator before you plan to serve them.

    What To Serve with Pork Chops

    I like to serve Roasted Garlic Mashed Potatoes with these pork chops so the potatoes can soak up all that delicious sauce.

    A green vegetable like Roasted Broccolini or a simple side salad is also great alongside these pork chops.

    3 thick cut pork chops on top with mashed potatoes with a honey mustard sauce and fresh parsley on top

    More Pork Recipes

    • Sweet and Sour Pork
    • Sweet Pork Tacos with Cilantro Ranch Dressing
    • Spicy Basil Pork
    • Hawaiian Pork Chops

    Make sure you subscribe to my email list to get all my new recipes delivered right to your inbox!

    You can also follow me on Instagram, Facebook, or Pinterest for even more! 

    📖 Recipe

    Yield: 4 servings

    Honey Mustard Pork Chops

    Honey Mustard Pork Chops

    Honey Mustard Pork Chops are an easy 30 minute meal the whole family is going to love. Thick cut pork chops with a delicious honey mustard sauce.

    Prep Time 10 minutes
    Cook Time 20 minutes
    Total Time 30 minutes

    Ingredients

    • 4 thick, boneless pork chops
    • 3 teaspoons garlic and herb seasoning, divided
    • 1 teaspoon salt (omit if seasoning has salt)
    • 1 Tablespoon avocado oil (or vegetable oil)
    • ¼ cup stone ground mustard
    • ¼ cup honey
    • Fresh chopped parsley, optional, for serving

    Instructions

    1. Preheat the oven to 350F.
    2. Pat the pork chops dry with a paper towel and then season with 1 ½ teaspoons of the garlic and herb seasoning and the sea salt (if using).
    3. Heat the avocado oil over medium high heat in a large skillet until it shimmers. 
    4. Sear the pork chops in the hot oil for about 1-3 minutes on each side or until just golden brown. The meat should not be cooked through at this point. It will continue to cook in the oven. 
    5. While the pork is cooking, mix together the stone ground mustard, honey, and the remaining garlic and herb seasoning in a medium mixing bowl.  
    6. Remove the seared pork from the skillet and set aside. If your skillet is not oven safe, place pork chops into an oven-safe casserole dish. 
    7. Put the honey mustard mixture into the hot skillet and stir until everything comes off the bottom of the skillet. 
    8. Place the pork chops back into the skillet and spoon sauce over the top of each one. If using a casserole dish, pour the sauce over the pork chops.
    9. Bake for 10-20 minutes, depending on the thickness of your pork chops, or until the pork reaches 145 degrees Fahrenheit internally. Do not overbake. 
    10. Serve hot with a parsley garnish

    Recommended Products

    As an Amazon Associate and member of other affiliate programs, I earn from qualifying purchases.

    • Meat Thermometer
      Meat Thermometer
    • Garlic and Herb Seasoning
      Garlic and Herb Seasoning
    • Oven Safe Skillet
      Oven Safe Skillet

    Did you make this recipe?

    Tag me in your Instagram photo - @fakeginger

    © Amanda Livesay
    Cuisine: American / Category: pork

    S’mores Rice Krispies Treats

    Jun 27, 2023

    S’mores Rice Krispies Treats are just like the classic treats but with extra marshmallows, graham crackers, and chocolate! No bake and so delicious!

    S'mores Rice Krispies Treats are just like the classic treats but with extra marshmallows, graham crackers, and chocolate! No bake and so delicious!

    These S’mores Rice Krispies Treats are officially my new favorite dessert in the world. It combines my top 2 desserts: rice krispies treats and s’mores!

    They have all the elements of rice krispies treats but with graham crackers and chocolate added in.

    These are a must make for all s’mores lovers!

    Overhead shot of a ric krispies treat topped with a mini chocolate bar, marshmallows, and chopped graham crackers

    Why You’re Going To Love This Recipe

    • Is there anything more delicious than s’mores in the summer?! These are s’mores without having to stand over a campfire.
    • These rice krispies treats are no bake and take about 30 minutes to put together. You just have to let them cool for about an hour and they are ready to cut and serve.
    Ingredients for s'mores rice krispies treats

    Ingredients

    • Unsalted butter – if you have salted butter, leave the salt out of the recipe.
    • Vanilla extract – classic Rice Krispies Treats recipes don’t call for vanilla but I love the added vanilla flavor. You can skip if it you want.
    • Salt – again, the classic recipe doesn’t call for salt but it does help bring out all the flavors.
    • Mini marshmallows – some of the marshmallows will be melted into the butter and the rest will be mixed into the cereal mixture.
    • Rice Krispies cereal
    • Graham crackers – these are getting mixed into the Rice Krispies treats and you’ll need more to put on top.
    • Semisweet chocolate chips – you can use milk chocolate if you want but I think the semisweet is plenty sweet for this recipe.
    • Hershey’s bars – optional, just for the top.
    How to make rice krispiest treats

    How To Make S’mores Rice Krispies Treats

    • Melt butter. Melt the butter completely.
    • Melt marshmallows. Add marshmallows to the pot with the melted butter and continue to melt on low heat, stirring slowly until smooth and just melted.
    • Add salt and vanilla. Remove the pot from the heat and stir in the vanilla extract and salt.
    How to make s'mores rice krispies treats
    • Add mix ins. Fold in the Rice Krispies cereal, graham crackers, semisweet chocolate chips, and the rest of the marshmallows.
    • Combine. Fold together until evenly everything is coated with the marshmallow mixture.
    • Transfer to pan. Spread the mixture into the prepared pan.
    • Add toppings. Top with additional marshmallows, graham crackers, and Hershey’s bars if desired.
    • Cool. Allow it to cool on the counter for 30 minutes to 1 hour before cutting into squares.
    Overhead shot of s'mores rice krispies treats cut into 12 squares

    How Long Are They Good For?

    S’mores Rice Krispies Treats are good for up to 3 days. Make sure to store them in an airtight container at room temperature to keep them fresh for as long as possible.

    I don’t recommend refrigerating them as they will harden.

    Can You Freeze Them?

    I don’t recommend trying to freeze rice krispies treats.

    S'mores Rice Krispies Treat topped with chocolate bars, marshmallows, and graham crackers on a white plate

    More S’mores Dessert Recipes

    • S’mores Campfire Cones
    • Doughnut S’mores
    • Chocolate Covered S’mores
    • S’mores Frozen Hot Chocolate
    • Peanut Butter S’mores Dip
    • S’mores Fudge Bars

    Make sure you subscribe to my email list to get all my new recipes delivered right to your inbox!

    You can also follow me on Instagram, Facebook, or Pinterest for even more! 

    📖 Recipe

    Yield: 12 bars

    S'mores Rice Krispies Treats

    S'mores Rice Krispies Treats

    S'mores Rice Krispies Treats are just like the classic treats but with extra marshmallows, graham crackers, and chocolate! No bake and so delicious!

    Prep Time 15 minutes
    Total Time 15 minutes

    Ingredients

    • ½ cup (1 stick) unsalted butter
    • 1 teaspoon vanilla extract
    • ¼ teaspoon salt
    • 16 ounces mini marshmallows, divided
    • 6 cups Rice Krispies cereal
    • 1 ½ cups graham crackers, broken up into large pieces
    • 1 cup semisweet chocolate chips

    Toppings:

    • Mini marshmallows
    • Graham crackers, broken up
    • Fun size Hershey’s bars, broken up

    Instructions

    1. Line a 9x13-inch baking pan with parchment paper and set it aside.
    2. In a large pot over low heat, melt the butter completely.
    3. Set aside 2 cups of marshmallows to mix in later with the cereal.
    4. Add the rest of the marshmallows to the pot with the melted butter and continue to melt on low heat, stirring slowly until smooth and just melted.
    5. Remove the pot from the heat and stir in the vanilla extract and salt.
    6. Fold in the Rice Krispies cereal, graham crackers, semisweet chocolate chips, and the mini marshmallows that were set aside earlier. Fold together until evenly everything is coated with the marshmallow mixture.
    7. Spread the mixture into the prepared pan. Do not overly pack it in too tight otherwise they will result in hard treats.
    8. Top with additional marshmallows, graham crackers, and Hershey’s bars if desired.
    9. Allow it to cool on the counter for 30 minutes to 1 hour before cutting into squares.

    Recommended Products

    As an Amazon Associate and member of other affiliate programs, I earn from qualifying purchases.

    • Parchment Paper
      Parchment Paper
    • 9x13-inch pan
      9x13-inch pan

    Nutrition Information:

    Yield:

    12

    Serving Size:

    1

    Amount Per Serving: Calories: 300Total Fat: 6gSaturated Fat: 3gTrans Fat: 0gUnsaturated Fat: 3gCholesterol: 1mgSodium: 207mgCarbohydrates: 61gFiber: 1gSugar: 34gProtein: 3g

    Did you make this recipe?

    Tag me in your Instagram photo - @fakeginger

    © Amanda Livesay
    Cuisine: American / Category: bars

    Reese’s Campfire Cones

    Jun 25, 2023

    Reese’s Campfire Cones are the most delicious summer dessert! Waffle cones filled with marshmallows, chocolate, mini peanut butter cups, and Reese’s Pieces, wrapped in foil, and heated over a campfire until the filling is melted and the cone is extra crispy.

    I also have a regular S’mores Campfire Cones recipe if you prefer the classic!

    Reese's Campfire Cones are the most delicious summer dessert! Waffle cones filled with marshmallows, chocolate mini peanut butter cups, and Reese's Pieces, wrapped in foil, and heated over a campfire until the filling is melted and the cone is extra crispy.

    It’s officially that time in Texas when you can’t walk outside for 2 ½ minutes without being a sweaty mess.

    But that’s not stopping us from grilling campfire cones several nights a week! These Reese’s Campfire Cones are a current favorite in my house because everyone loves chocolate and peanut butter together.

    If you aren’t familiar with campfire cones, they are waffle cones filled with your choice of s’mores fillings (this one has marshmallows, chocolate, mini peanut butter cups, and Reese’s Pieces), and then you can either warm them on the grill, over a campfire, or even in the oven.

    Waffle cone with melted chocolate, marshmallow, reese's pieces, and mini peanut butter cups.

    Why You’re Going To Love This Recipe

    • S’mores are the most delicious summer dessert! Is there anything that screams summer more than s’mores over the campfire?!
    • These Reese’s Campfire Cones can be grilled or baked! So you can make them at home without stepping foot outside or over your backyard bonfire OR on a camping trip with your family.
    • These are super customizable. Each person can assemble their own and add as much of each ingredient as they want.
    • Campfire cones are also so easy to make! So easy that the kiddos in your life can assemble their own – just don’t let them near the fire without close supervision.
    Ingredients for peanut butter campfire cones

    Ingredients for Reese’s Campfire Cones

    • Waffle cones – you will need as many cones as you plan to make. You can make one or make a bunch all at once. And make sure it’s waffle cones because they are sturdier and will hold up better than cake or sugar cones.
    • Mini marshmallows – these melt and hold everything together inside the cone. Probably the most important part of the s’mores.
    • Chocolate – use any kind of chocolate you want, I used semisweet chocolate chips in this.
    • Mini Peanut Butter Cups – you can find these in pretty much any candy aisle of a big grocery store. I’m a big fan of the Trader Joe’s ones if you have a TJ’s near you.
    • Reese’s Pieces – arguably the most underrated candy of all time. These add such a fun crunch to the cone.
    how to make peanut butter campfire cones

    How To Make Reese’s Campfire Cones

    • Assemble campfire cones. Fill the bottom of each cone with mini marshmallows. Layer the chocolate chips, mini peanut butter cups, Reese’s pieces, and more mini marshmallows.
    • Wrap in foil. Wrap each cone individually in aluminum foil, making sure they are tightly sealed.
    • To bake in the oven: Preheat your oven to 350°F. Place the wrapped cones on a baking sheet and bake for 10-15 minutes.
    • To cook over the fire or on the grill: Place the wrapped cones over the hot coals of your campfire or on the grill grates. Cook for 5-7 minutes.
    • Cool slightly. Remove the cones from the heat and let cool for a minute or two. 
    • Enjoy! Carefully unwrap the foil and enjoy!
    3 reese's campfire cones filled with marshmallows, chocolate, mini peanut butter cups, and reese's pieces

    Can I Prep Them Ahead?

    You can prep the cones ahead and wrap them in foil. Store them in the fridge if you plan on making them at home or in a cooler if you’re taking them camping. Just make sure not to crush them in transport!

    Can I Use a Different Cone?

    I recommend using a waffle cone in this recipe because they are sturdier than cake cones or sugar cones. I worry that the cake or sugar cones will break and be a big mess when you unwrap the foil.

    Overheads hot of 3 peanut butter campfire cones filled with marshmallows, chocolate, mini peanut butter cups, and reese's pieces

    More Chocolate Peanut Butter Recipes

    • Reese’s Pieces Milkshake
    • Peanut Butter Cupcakes with Chocolate Buttercream
    • Peanut Butter Chocolate Chunk Pudding Cookies
    • Peanut Butter Saltine Toffee
    • Peanut Butter Pretzel Brownies
    • Reese’s Marshmallow Cookie Pie

    Make sure you subscribe to my email list to get all my new recipes delivered right to your inbox!

    You can also follow me on Instagram, Facebook, or Pinterest for even more! 

    📖 Recipe

    Yield: 1 cone

    Reese's Campfire Cones

    Reese's Campfire Cones

    Reese's Campfire Cones are the most delicious summer dessert! Waffle cones filled with marshmallows, mini peanut butter cups, and Reese's Pieces, wrapped in foil, and heated over a campfire until the filling is melted and the cone is extra crispy.

    Prep Time 5 minutes
    Cook Time 10 minutes
    Total Time 15 minutes

    Ingredients

    • Waffle cones
    • Mini marshmallows
    • Chocolate chips
    • Reese’s Mini Peanut Butter Cups
    • Reese’s Pieces

    Instructions

    1. Fill the bottom of each cone (about ¼ - ⅓) with mini marshmallows.
    2. Layer the chocolate chips, Reese’s Mini Peanut Butter Cups, Reese’s Pieces, and more mini marshmallows until filled as much as possible, gently packing the layers down as you go.
    3. Wrap each cone individually in aluminum foil, making sure they are tightly sealed. The easiest way to do this is by first covering the top of the cone where the ingredients are to ensure they don’t spill out. Then fold up the bottom and wrap up the sides.
    4. To bake in the oven: Preheat your oven to 350°F. Place the wrapped cones on a baking sheet and bake for 10-15 minutes or until everything is melted and gooey.
    5. Cook over the fire or on the grill: Place the wrapped cones over the hot coals of your campfire or on the grill grates. Cook for 5-7 minutes, turning occasionally, until the fillings are melted and the cone is slightly toasted.
    6. Carefully remove the cones from the heat and let cool for a minute or two. 
    7. Unwrap the foil and enjoy!

    Recommended Products

    As an Amazon Associate and member of other affiliate programs, I earn from qualifying purchases.

    • Reese's Mini Peanut Butter Cups
      Reese's Mini Peanut Butter Cups

    Did you make this recipe?

    Tag me in your Instagram photo - @fakeginger

    © Amanda Livesay
    Cuisine: American / Category: snack

    Strawberry Crumble Bars

    Jun 24, 2023

    Strawberry Crumble Bars are the perfect way to use sweet summer strawberries. Rich, buttery crust with a strawberry filling and a crunchy topping. This is a tried and true recipe that I make every summer!

    If you love a fruit bar with a crumbly topping, you should try Creamy Lemon Crumb Bars and Blueberry Crumb Bars!

    A stack of 3 strawberry crumble bars with half a strawberry on top

    I love this time of year when strawberries are so cheap and so delicious. I’m buying strawberries any time I pass a grocery store these days.

    $1.99 for a pound?! Give me 10!

    We put them on everything, make strawberry shortcakes at least once a week, and I love putting them in recipes like these Strawberry Crumble Bars.

    Strawberry Crumble Bars are the perfect way to use sweet summer strawberries. Rich, buttery crust with a strawberry filling and a crunchy topping. This is a tried and true recipe that I make every summer!

    Why You’re Going To Love This Strawberry Crumble Bars Recipe

    • This is the perfect recipe to showcase how tasty summer strawberries are! It’s a simple recipe of pastry and strawberry filling so the berries really are the star here.
    • Strawberry crumble bars call for only simple ingredients that you probably already have! Plus, the crust and the topping are the same pastry so that’s one less dish to clean.
    • These bars are so delicious! There’s something about the buttery pastry crust, the sweet strawberry filling, and the slightly crunchy topping that is just my ideal summer dessert.
    Ingredients for strawberry crumb bars

    Ingredients

    • All-purpose flour
    • Granulated sugar – sugar is going in both the crust and the strawberry filling.
    • Baking powder
    • Unsalted butter – you want it to be cold when you work it into the dough. Cut it into cubes and then store it in the fridge while you get the rest of your ingredients together.
    • Egg
    • Vanilla extract
    • Strawberries – I highly recommend using fresh strawberries for this recipe. Frozen berries are going to have a higher water content and may lead to a thinner filling.
    • Cornstarch – this is going to thicken up the strawberry filling and make sure it’s not too liquidy.
    How to make a buttery pastry crust for bars

    How To Make Strawberry Crumble Bars

    • Mixing dry ingredients. In a large mixing bowl, combine the flour, sugar, and baking powder with a whisk.
    • Add wet ingredients. Add the cubed butter, lightly beaten egg, and vanilla extract. Mix with a pastry cutter until a crumby mixture forms.
    • Transfer to pan. Firmly press half the dough into an even layer in the bottom of a 9×13-inch pan lined with parchment. Set the remaining half of the dough aside.
    Making strawberry filling for strawbery bars
    • Make filling. Combine the chopped strawberries, sugar, and cornstarch. Toss until the strawberries are completely coated.
    • Transfer to crust. Pour the strawberry mixture over the crust in the pan and spread it out.
    • Add topping. Crumble the remaining dough over the strawberry layer.
    • Bake. Bake at 375F for 38-45 minutes or until the topping turns golden brown.
    • Cool. Remove from the oven and allow to cool completely before cutting.
    A pan of strawberry crumble bars before being cut
    How Long Are They Good For?

    Strawberry crumble bars are good for 4 – 5 days. Make sure to store them in an airtight container. I like to keep them in the fridge to keep them good longer.

    Can You Freeze Them?

    You can freeze these strawberry crumble bars for up to 3 months. I like to wrap the individual bars in plastic wrap and then place them all in a freezer ziploc bag.

    When you are ready to enjoy, pull one or all of them out of the freezer and allow them to sit at room temperature for a few hours.

    Two strawberry crumble bars stacked with a bite taken out of the top bar

    More Strawberry Recipes

    • Strawberry Pretzel Salad
    • Strawberry Lemonade Cupcakes
    • Strawberry Cheesecake Poke Cake
    • Homemade Strawberry Sherbet
    • Strawberry Upside Down Ricotta Cake
    • Strawberry Pie

    Make sure you subscribe to my email list to get all my new recipes delivered right to your inbox!

    You can also follow me on Instagram, Facebook, or Pinterest for even more! 

    📖 Recipe

    Yield: 12 bars

    Strawberry Crumble Bars

    Strawberry Crumble Bars

    Strawberry Crumble Bars are the perfect way to use sweet summer strawberries. Rich, buttery crust with a strawberry filling and a crunchy topping. This is a tried and true recipe that I make every summer!

    Prep Time 15 minutes
    Cook Time 45 minutes
    Total Time 1 hour

    Ingredients

    For the crust and crumble topping:

    • 3 cups all-purpose flour
    • 1 cup granulated sugar
    • 1 teaspoon baking powder
    • 1 cup unsalted butter, cut into cubes
    • 1 large egg, lightly beaten
    • 1 teaspoon vanilla extract

    For the strawberry filling:

    • 4 cups fresh strawberries, chopped
    • ½ cup granulated sugar
    • 3 tablespoons cornstarch

    Instructions

      1. Preheat the oven to 375 degrees F. Line a 9x13 inch baking dish with foil and grease the foil with cooking spray. Set aside.
      2. In a large mixing bowl, combine the flour, sugar, and baking powder with a whisk. Add the cubed butter, lightly beaten egg, and vanilla extract. Mix with a pastry cutter until a crumby mixture forms.
      3. Firmly press half the dough into an even layer in the bottom of the prepared baking dish. Set the remaining half of the dough aside.
      4. To make the strawberry filling, combine the chopped strawberries, sugar, and cornstarch in a large mixing bowl. Toss until the strawberries are completely coated.
      5. Pour the strawberry mixture over the crust in the pan and
        spread out evenly.
      6. Crumble the remaining half of the dough evenly over the strawberry layer.
      7. Bake for 38-45 minutes or until the crumble topping turns golden brown.
      8. Remove from the oven and allow to cool completely before cutting.
        Slice and enjoy!

    Recommended Products

    As an Amazon Associate and member of other affiliate programs, I earn from qualifying purchases.

    • Pastry Blender
      Pastry Blender
    • 9x13-inch pan
      9x13-inch pan

    Nutrition Information:

    Yield:

    12

    Serving Size:

    1

    Amount Per Serving: Calories: 379Total Fat: 16gSaturated Fat: 10gTrans Fat: 0gUnsaturated Fat: 6gCholesterol: 56mgSodium: 50mgCarbohydrates: 55gFiber: 2gSugar: 28gProtein: 4g

    Did you make this recipe?

    Tag me in your Instagram photo - @fakeginger

    © Amanda Livesay
    Cuisine: American / Category: bars

    Ice Cream Cone Cupcakes

    Jun 23, 2023

    Ice Cream Cone Cupcakes are the cutest cupcakes for summer! Funfetti cake baked into ice cream cones and topped with frosting, rainbow sprinkles, and a cherry.

    Ice Cream Cone Cupcakes are the cutest cupcakes for summer! Funfetti cake baked into ice cream cones and topped with frosting, rainbow sprinkles, and a cherry.

    Ice cream cone cupcakes may be my favorite cupcakes of all time. They are so cute and just scream summer. If you have a bbq or a birthday party coming up, these are the perfect dessert!

    They are also super customizable. I used a funfetti mix and a vanilla frosting but you can use any combination of cake mix and frosting that you want! How fun would a chocolate cake with strawberry frosting be?!

     The inside of a funfetti ice cream cone cupcake

    Why You’re Going To Love This Recipe

    • Ice cream cone cupcakes are the cutest cupcakes you can serve, especially during summer. They look like ice cream sundaes but you don’t have to worry about ice cream melting.
    • They are so easy to make! I like to use a box mix for these cupcakes but you can use your favorite homemade cake batter if you prefer. I even use a tub of storebought frosting to make my life even easier.
    Ingredients for ice cream cone cupcakes

    Ingredients

    • Funfetti cake mix – you also need all ingredients the box calls for, usually oil, water, and eggs. Or you could use your favorite homemade funfetti recipe. Or any flavor of cake mix you prefer.
    • Ice cream cones – make sure you are buying ice cream cones with a flat bottom so they will stand up in the cupcake pan.
    • Frosting – you can use a can of store-bought frosting or a homemade recipe.
    • Sprinkles – I like rainbow sprinkles so it looks like an ice cream sundae.
    • Maraschino cherries – these are optional but really make the cupcakes look like ice cream.
    how to make cupcakes in ice cream cones

    Instructions

    • Make batter. Follow the instructions on the funfetti cake mix box to prepare the cake batter.
    • Prepare cones. Scoop the batter with a spoon into each ice cream cone until about halfway full. cones into a cupcake pan.
    • Bake. Carefully transfer cupcake pan to oven. Bake at 350F for about 20 minutes.
    • Cool. Allow the cupcakes to full cool completely before frosting.
    • Frost cupcakes. Use a piping bag and medium star shaped tip to swirl frosting onto the top of the cooled cupcakes.
    • Decorate and serve.Garnish with sprinkles and a cherry. Enjoy!
    ice cream cone cupcakes with frosting and sprinkles

    How Long Are They Good For?

    Ice cream cone cupcakes will be good for 2 – 3 days after baking. Make sure to store them in an airtight container.

    And keep in mind that the cone will soften as it absorbs the moisture from the cake.

    Can You Make It Ahead?

    You can make these ice cream cone cupcakes the day before you plan on serving but the cone may soften slightly.

    Ice cream cone cupcakes with frosting, sprinkles, and cherries on top

    More Cupcakes Recipes

    • Cherry Coke Cupcakes
    • Strawberry Lemonade Cupcakes
    • Carrot Cake Cupcakes with Cream Cheese Frosting
    • Peanut Butter Cupcakes with Chocolate Buttercream
    • Cookies & Cream Cupcakes
    • Caramel Filled Chocolate Cupcakes

    Make sure you subscribe to my email list to get all my new recipes delivered right to your inbox!

    You can also follow me on Instagram, Facebook, or Pinterest for even more! 

    📖 Recipe

    Yield: 12 cupcakes

    Ice Cream Cone Cupcakes

    Ice Cream Cone Cupcakes

    Prep Time 15 minutes
    Cook Time 20 minutes
    Total Time 35 minutes

    Ingredients

    • 1 box Funfetti cake mix + all ingredients the box calls for
    • 12 flat bottom ice cream cones
    • 1 can frosting (or homemade frosting of your choice)
    • sprinkles and marschino cherries, for garnish

    Instructions

    1. Preheat your oven to 350F.
    2. Follow the instructions on the funfetti cake mix box to prepare the cake batter.
    3. Scoop the batter with a spoon into each ice cream cone until about halfway full.
    4. Place prepared ice cream cones into a cupcake pan.
    5. Carefully transfer cupcake pan to oven. Bake in the preheated oven for about 20 minutes or until a toothpick inserted into the cupcake comes out clean.
    6. Allow the cupcakes to full cool completely before frosting.
    7. Use a piping bag and medium star shaped tip to swirl frosting onto the top of the cooled cupcakes.
    8. Garnish with sprinkles and a cherry. Enjoy!

    Recommended Products

    As an Amazon Associate and member of other affiliate programs, I earn from qualifying purchases.

    • Anolon Muffin Tin
      Anolon Muffin Tin
    • Rainbow Sprinkles
      Rainbow Sprinkles

    Nutrition Information:

    Yield:

    12

    Serving Size:

    1

    Amount Per Serving: Calories: 446Total Fat: 15gSaturated Fat: 9gTrans Fat: 0gUnsaturated Fat: 5gCholesterol: 50mgSodium: 441mgCarbohydrates: 72gFiber: 2gSugar: 47gProtein: 6g

    Did you make this recipe?

    Tag me in your Instagram photo - @fakeginger

    © Amanda Livesay
    Cuisine: American / Category: cake

    S’mores Campfire Cones

    Jun 23, 2023

    S’mores Campfire Cones are the perfect summer dessert! Waffle cones filled with marshmallows, chocolate, and graham crackers, wrapped in foil, and heated over a campfire until the filling is melted and delicious.

    I also have a Reese’s Campfire Cones recipe if you want some peanut butter in your campfire cones!

    S'mores Campfire Cone filled with marshmallows, chocolate, and graham cracker pieces. On a wooden serving tray with marshmallows and chocolate scattered around.

    Have you ever had a campfire cone? They are one of my favorite summer desserts and if you haven’t tried them yet, you absolutely have to before summer is over.

    We love to have a little bonfire in our fire pit and these are always part of our bonfire plans. They are so fun and so delicious.

    What Are Campfire Cones?

    Campfire cones are fun and delicious treat to make when you’re camping or having a bonfire.

    You take a waffle cone and fill it with chocolate, marshmallows, and broken graham crackers. It gets wrapped tightly with aluminum foil and then heated over a fire (or in the oven) until the fillings melt and the cone is warm and crispy.

    A hold holding a waffle cone filled with melted marshmallows, melted chocolate, and broken graham crackers

    Why You’re Going To Love This Recipe

    • This is the easiest summer dessert! It’s so easy that even small kids will be able to assemble their own s’mores cone (just don’t let them near the fire!).
    • S’mores are delicious! And they are made extra delicous with the addition of the waffle cone. It adds a nice crunch to all the melty marshmallows and chocolate on the inside.
    • These campfire cones can be grilled or baked. They are perfect for camping or just a night at home when you are in the mood for s’mores.
    • They are easily customizable. I’m a white chocolate person so I’ve been known to toss white chocolate chips in mine instead of the traditional milk chocolate. Or you can add mini Reese’s cups instead of the chocolate chips. They are so many ways to make these campfire cones!
    Ingredients for s'mores campfire cones

    Ingredients

    • Waffle cones – you need as many as campfire cones you plan to make. You can make just one or you can make a bunch all at once!
    • Mini marshmallows – arguably the most important part of a s’mores. These melt and become the “glue” that holds everything together.
    • Chocolate – you can use any kind of chocolate you have in the house. I used baking chocolate chunks but you can use chocolate chips or a broken Hershey’s bar. You can even use white chocolate if you prefer.
    • Graham crackers – these get broken into pieces so they will fit in the cones.
    how to assemble campfire cones

    How To Make S’mores Campfire Cones

    • Assemble campfire cones. Fill the bottom of each cone with mini marshmallows. Layer the chocolate chips, broken graham crackers, and more mini marshmallows.
    • Wrap in foil. Wrap each cone individually in aluminum foil, making sure they are tightly sealed.
    • To bake in the oven: Preheat your oven to 350°F. Place the wrapped cones on a baking sheet and bake for 10-15 minutes or until everything is melted and gooey.
    • To cook over the fire or on the grill: Place the wrapped cones over the hot coals of your campfire or on the grill grates. Cook for 5-7 minutes, turning occasionally, until the fillings are melted and the cone is slightly toasted.
    • Cool slightly. Carefully remove the cones from the heat and let cool for a minute or two. 
    • Enjoy! Unwrap the foil and enjoy!

    Can You Make Them Ahead?

    You can prep the cones in advance which makes them perfect for camping! Assemble the cones and wrap them in foil. From there, store them in a cooler or refrigerator until ready to bake or cook over a campfire.

    Can You Use Cake or Sugar Cones?

    Cake or sugar cones may not be sturdy enough to hold all the ingredients and may break once put over heat. Waffle cones are thicker and hold up well.

    Campfire cones with the filling spilling out

    More S’mores Recipes

    • Doughnut S’mores
    • Chocolate Covered S’mores
    • S’mores Frozen Hot Chocolate
    • Peanut Butter S’mores Dip
    • Raspberry White Chocolate S’mores
    • S’mores Ice Cream Sandwiches

    Make sure you subscribe to my email list to get all my new recipes delivered right to your inbox!

    You can also follow me on Instagram, Facebook, or Pinterest for even more! 

    📖 Recipe

    Yield: 1 serving

    S'mores Campfire Cones

    S'mores Campfire Cones
    Prep Time 5 minutes
    Cook Time 10 minutes
    Total Time 15 minutes

    Ingredients

    • Waffle cones
    • Mini marshmallows
    • Chocolate chips (any kind)
    • Graham crackers, broken into small pieces

    Instructions

    1. Fill the bottom of each cone (about ¼ - ⅓) with mini marshmallows.
    2. Layer the chocolate chips, broken graham crackers, and more mini marshmallows until filled top the top, gently packing the layers down as you go (the ingredients will shrink as they cook and melt).
    3. Wrap each cone individually in aluminum foil, making sure they are tightly sealed. The easiest way to do this is by first covering the top of the cone where the ingredients are to ensure they don’t spill out. Then fold up the bottom and wrap up the sides.
    4. To bake in the oven: Preheat your oven to 350°F. Place the wrapped cones on a baking sheet and bake for 10-15 minutes or until everything is melted and gooey.
    5. To cook over the fire or on the grill: Place the wrapped cones over the hot coals of your campfire or on the grill grates. Cook for 5-7 minutes, turning occasionally, until the fillings are melted and the cone is slightly toasted.
    6. Carefully remove the cones from the heat and let cool for a minute or two. 
    7. Unwrap the foil and enjoy the warm, delicious treat!

    Did you make this recipe?

    Tag me in your Instagram photo - @fakeginger

    © Amanda Livesay
    Cuisine: American / Category: snack

    Panda Express Sweet Fire Chicken (Copycat)

    Jun 15, 2023

    If you love the Panda Express Sweet Fire Chicken, you have to try this homemade version! It has crispy chicken, onion, bell pepper, and pineapple all tossed with a sweet and spicy sauce.

    I also have a homemade Panda Express Beijing Beef recipe!

    If you love the Panda Express Sweetfire Chicken, you have to try this homemade version! It has crispy chicken, onion, bell pepper, and pineapple all tossed with a sweet and spicy sauce.

    I know orange chicken is the go to for most people at Panda Express but I’m definitely more of a Sweet Fire Chicken kind of girl. I love that this chicken has crispy stir-fried veggies and I especially love that sauce.

    And then you have to get it with white rice so that it can soak up all that delicious sauce.

    A skillet full of crispy chicken stir fry with onion, red bell pepper, and pineapple

    Why You’re Going To Love This Recipe

    • It tastes just like Panda Express, without going to Panda Express! You don’t have to leave your house or pay for delivery. And also? Last time I took my kids to Panda Express it was crazy expensive for all of us. This is so much cheaper!
    • The sauce is sweet and spicy which is my favorite combination.
    • So many different flavors and textures! You have the chicken, onion, bell pepper, and pineapple cooked until crisp and tossed in the sauce. And then it all gets topped with sesame seeds and green onions.
    • It’s ready in about 30 minutes! The chicken cooks quickly since it’s cut into small pieces and you just want to stir fry the veggies for a couple minutes so they crisp up.
    ingredients for homemade sweetfire chicken

    Ingredients for Sweet Fire Chicken

    • Boneless skinless chicken breasts – you can use boneless thighs if you prefer. The chicken needs to be cut into 1-inch pieces.
    • Eggs – these are going to get beaten and used to adhere the coating to the chicken.
    • Cornstarch – this is part of the coating for the chicken. It makes for a really light and crispy coating.
    • Flour – just a little bit of flour in the coating for texture.
    • Canola oil – you can also use vegetable oil. This is going to be used to fry the chicken and to stir fry the vegetables.
    • Yellow onion – or white onion.
    • Red bell pepper – you can use whatever color bell pepper you want but I like the color contrast that the red brings to the rest of the dish.
    • Pineapple chunks – you can use canned pineapple chunks (drain the juice) or dice up a fresh pineapple.
    • Sesame seeds – these are getting sprinkled over the finished dish.
    • Green onions – optional, for garnish but I really like the brightness that green onion brings to a spicy dish like this.
    • Sweet chili sauce – you can find this in the Asian section of most large grocery stores these days. My favorite is the one from Trader Joe’s.
    • Asian chili paste – I used sambal oelek but use your favorite chili paste. This can also be found in the Asian section of most grocery stores.
    how to make copycat panda express sweetfire chicken

    How To Make Sweet Fire Chicken

    • Make coating. Stir together the cornstarch and flour.
    • Coat chicken. Dredge the chicken pieces into the egg mixture, followed by the cornstarch mixture.
    • Fry chicken. Cook the coated chicken in hot oil, working in batches. Place cooked chicken aside on a plate lined with paper towels to drain excess oil.
    • Stir fry vegetables. Cook onion, pineapple chunks and bell pepper slices in oil in a hot skillet.
    • Make sauce. Pour the sweet chili sauce and asian chili paste into the hot skillet and let simmer for one minute.
    • Combine everything. Add cooked chicken to the pan, tossing evenly to coat.
    • Serve. Garnish with sesame seeds and green onions.
    Crispy chicken, onion, bell pepper, and pineapple and a sweet and spicy chili sauce

    How Long Is It Good For?

    Sweetfire chicken is good in the fridge for up to 3 days. Make sure to store it in an airtight container.

    I like to reheat this on the stove to get a little crispiness back but it reheats in the microwave just fine.

    Can You Freeze It?

    You can freeze Sweetfire Chicken for up to 3 months. I like to use freezer ziploc bags but you can use any freezer-safe airtight container.

    Let it defrost overnight before you plan to serve it. You can heat it up on the stovetop or the microwave.

    What To Serve With It

    You could serve it with fried rice or even plain white rice. The rice can absorb all the extra sauce.

    If you are looking for a vegetable to serve it it, try roasted broccoli or spicy honey brussels sprouts.

    Overhead shot of homemade Panda Express Sweetfire Chicken over rice with sesame seeds and green onions on top

    More Chicken Recipes

    • Chicken Fajitas
    • Air Fryer Honey Garlic Chicken Wings
    • Slow Cooker White Chicken Chili
    • Rosemary Ranch Chicken Kabobs
    • Honey Mustard Chicken Wings
    • Baked Caesar Chicken
    • Slow Cooker Orange Chicken

    Make sure you subscribe to my email list to get all my new recipes delivered right to your inbox!

    You can also follow me on Instagram, Facebook, or Pinterest for even more! 

    📖 Recipe

    Yield: 6 servings

    Panda Express Sweetfire Chicken

    Panda Express Sweetfire Chicken

    If you love the Panda Express Sweetfire Chicken, you have to try this homemade version! It has crispy chicken, onion, bell pepper, and pineapple all tossed with a sweet and spicy sauce.

    Prep Time 10 minutes
    Cook Time 15 minutes
    Total Time 25 minutes

    Ingredients

    For the chicken

    • 1 ½ lbs boneless skinless chicken breasts, cut into 1” pieces
    • 2 large eggs, beaten
    • 1 cup cornstarch
    • ¼ cup flour
    • Canola or vegetable oil for frying

    For the stir fry

    • 1 tablespoon canola oil
    • 1 medium yellow onion, thinly sliced
    • 1 red bell pepper, thinly sliced
    • 2 cups pineapple chunks
    • 2 teaspoons sesame seeds, for garnish
    • sliced green onions for serving

    For the sauce

    • ½ cup sweet chili sauce
    • 2 teaspoons Asian chili paste

    Instructions

    1. In a medium sized bowl, stir together the cornstarch and flour.
    2. Dredge the chicken pieces into the egg mixture, followed by the cornstarch mixture, evenly coating each piece.
    3. Heat a couple inches of oil in a large pot or skillet for frying. Add the coated chicken to the hot oil, working in batches. Cook for 3-4 minutes until the chicken is golden brown and cooked through with an internal temperature of 165F. 
    4. Place cooked chicken aside on a plate lined with paper towels to drain excess oil.
    5. Heat a tablespoon of oil in a large skillet. Add the onion, pineapple chunks and bell pepper slices. Saute for 3-4 minutes until the vegetables are softened. 
    6. Pour the sweet chili sauce and asian chili paste into the hot skillet and let simmer for one minute.
    7. Remove pan from heat and add the cooked chicken to the pan, tossing evenly to coat.
    8. Garnish with sesame seeds and green onions. Serve immediately, enjoy!

    Recommended Products

    As an Amazon Associate and member of other affiliate programs, I earn from qualifying purchases.

    • Chili Garlic Sauce
      Chili Garlic Sauce
    • Sweet Chili Sauce
      Sweet Chili Sauce

    Nutrition Information:

    Yield:

    6

    Serving Size:

    1

    Amount Per Serving: Calories: 472Total Fat: 11gSaturated Fat: 2gTrans Fat: 0gUnsaturated Fat: 8gCholesterol: 158mgSodium: 217mgCarbohydrates: 53gFiber: 2gSugar: 26gProtein: 39g

    Did you make this recipe?

    Tag me in your Instagram photo - @fakeginger

    © Amanda Livesay
    Cuisine: Asian / Category: chicken

    Cake Batter Milkshakes

    Jun 14, 2023

    Your new favorite summer treat! Cake Batter Milkshakes are quick, easy, and taste like a piece of funfetti cake.

    Some of our other favorite milkshake recipes are Reese’s Pieces Milkshake, Pumpkin Pie Milkshake, and Frozen Hot Chocolate!

    Overhead shot of a milkshake with whipped cream, rainbow sprinkles, and a cherry on top

    I’ve said it a million times but if cake batter is a flavor option, I’m going for it. Froyo, cheesecake, fudge, anything. Cake batter is my favorite flavor of all time.

    It is just so delicious and it’s also so fun because it almost always has rainbow sprinkles. And rainbow sprinkles obviously makes everything better.

    These cake batter milkshakes are a must make for all cake batter lovers. Or milkshakes lovers. Or anyone who just needs a cool and creamy sweet treat.

    Cake Batter Milkshakes topped with whipped cream, rainbow sprinkles, and a cherry

    Why You’re Going To Love This Recipe

    • Summertime calls for milkshakes! It’s the perfect sweet treat for those hot summer days.
    • Homemade milkshakes take just minutes to make! It’s as easy as throwing ingredients in a blender and blending it all up.
    • These are so delicious, especially if you are a cake batter person like me!
    Ingredients for cake batter milkshakes

    Ingredients

    • Vanilla ice cream – use your favorite vanilla ice cream. If you want to make it non-dairy, use a non-dairy vanilla ice cream.
    • Milk – you can use any milk you like, including non-dairy like oat milk or almond milk.
    • Yellow cake mix – yellow is traditional for cake batter flavor but you can also use white cake mix.
    • Vanilla – more vanilla is always better!
    • Sprinkles – I like to use rainbow sprinkles but you can use any sprinkle mix that you want. Some will be mixed into the shake and even more will go on top!
    • Whipped cream – optional but whipped cream makes all milkshakes better!
    • Maraschino cherries – optional but they look so good on top of milkshakes!
    How to make cake batter milkshakes in a blender

    How To Make Cake Batter Milkshakes

    • Make shake. Blend ice cream, milk, cake mix and vanilla extract in a blender on medium speed until smooth.
    • Add sprinkles. Add the sprinkles to your blender and pulse for a few seconds to mix.
    • Pour and garnish. Pour the blended milkshake into your glasses and top with whipped cream, extra sprinkles and a maraschino cherry for serving. Enjoy!
    How Long Are They Good For?

    Milkshakes are best served as soon as they are made but this will stay fine to eat for up to 3 days. Make sure you store it in an airtight container in the refrigerator.

    Keep in mind it will be basically a liquid after refrigeration. You can try blending it with ice if you want to achieve a shake-like consistency again.

    Can It Be Non-Dairy?

    If you want a non-dairy milkshake, use non-dairy vanilla ice cream (which is widely available in pretty much any store now) and a non-dairy milk like oat milk or almond milk.

    You can also find coconut whipped cream in the refrigerated whipped cream section and the Cool Whip area in the frozen section. Or you can skip the whipped cream completely.

    Your new favorite summer treat! Cake Batter Milkshakes are quick, easy, and taste like a piece of funfetti cake.

    More Frozen Treats

    • Homemade Dole Whip
    • Mint Chocolate Ice Cream Sandwich Cake
    • Circus Animal Cookie Ice Cream
    • Frozen Lemonade Pie
    • S’mores Ice Box Cake

    Make sure you subscribe to my email list to get all my new recipes delivered right to your inbox!

    You can also follow me on Instagram, Facebook, or Pinterest for even more! 

    📖 Recipe

    Yield: 2 servings

    Cake Batter Milkshakes

    Cake Batter Milkshakes

    Your new favorite summer treat! Cake Batter Milkshakes are quick, easy, and taste like a piece of funfetti cake.

    Prep Time 10 minutes
    Total Time 10 minutes

    Ingredients

    • 3 cups vanilla ice cream
    • ½ cup milk
    • ⅓ cup dry yellow cake mix
    • 1 teaspoon vanilla extract
    • 2 tablespoons sprinkles
    • Whipped cream, extra sprinkles and maraschino cherries, for garnish

    Instructions

    1. Blend ice cream, milk, cake mix and vanilla extract in a blender on medium speed until smooth.
    2. Add the sprinkles to your blender and pulse for a few seconds to mix.
    3. Pour the blended milkshake into your glasses and top with whipped cream, extra sprinkles and a maraschino cherry for serving. Enjoy!

    Recommended Products

    As an Amazon Associate and member of other affiliate programs, I earn from qualifying purchases.

    • Rainbow Sprinkles
      Rainbow Sprinkles
    • My Favorite Blender
      My Favorite Blender

    Did you make this recipe?

    Tag me in your Instagram photo - @fakeginger

    © Amanda Livesay
    Cuisine: American / Category: frozen goodies

    Red, White, and Blue Cake Balls

    Jun 13, 2023

    The cutest dessert for 4th of July or Memorial Day! Red, White, and Blue Cake Balls are so easy and so delicious.

    If you need more patriotic dessert recipes, try Red, White, and Blue Poke Cake, 4th of July Rice Krispies Treats, and Red, White, and Blue Jello Stars!

    Hi guys! With 4th of July weeks away, it’s time to start planning your menu!

    I don’t know what we’re doing yet but I know I’ll be making Root Beer Baked Beans, Broccoli Salad, and these Red, White, and Blue Cake Balls.

    I’m a sucker for a cute themed dessert and these are perfect to take to a party or prep ahead if you are hosting the party!

    Why You’re Going To Love This Recipe

    • Everyone loves cake balls! You can’t go into a Starbucks without at least being attempted by the cute little cake balls.
    • These patriotic cake balls are so easy! It starts with baking a cake mix and from there, you just mix them with cream cheese and decorate.
    • Cake balls are the perfect make ahead treat for all your 4th of July or Memorial Day parties. You can prep them the night before or morning of and they can sit in the fridge until you are ready to serve them.

    Ingredients

    • White cake mix – and all the ingredients the box calls for. It will probably be eggs, vegetable oil, and water.
    • Red and blue food coloring – I suggest gel food coloring so it doesn’t water down the batter.
    • Cream cheese – this gets mixed into the cooked cakes to create that cake ball texture.
    • White melting chocolate – I always use white almond bark for recipes like this but you can get the Wilton candy melts or any other white chocolate that melts well.
    • Sprinkles – you can find red, white, and blue sprinkles in any store when we’re closet to the patriotic holidays or you can order them online.

    How To Make Red, White, and Blue Cake Balls

    • Prepare. Preheat oven according to package instructions. Lightly grease 3 small baking pans and set aside.
    • Make cake batter. Combine the cake mix along with the ingredients needed on the box until well mixed.
    • Add color. Separate the batter into three smaller bowls. Leave one bowl plain and set it aside. Mix red food coloring in the second bowl and blue food coloring in the third bowl.
    • Bake. Pour each batter into the prepared baking pans and bake for 14-16 minutes, or until a toothpick inserted in the center.
    • Cool. Remove the pans from the oven cool completely on a wire rack.
    • Crumble. Crumble the cake into smaller pieces and transfer to separate bowls; set aside.
    • Add cream cheese. Beat the cream cheese until smooth and creamy. Divide the cream cheese evenly into 3 crumbled cake bowls and mix well.
    • Make balls. Break off small one inch chunks from each of the 3 cakes and then roll the colors together with your hands to make a ball. Place each ball onto a baking sheet lined with parchment paper.
    • Chill. Chill balls for 1-2 hours.
    • Melt chocolate. Place chocolate in a microwave-safe bowl and microwave in 30 second increments until melted and smooth.
    • Cover cake balls. Place one cake ball at a time on a fork and dip it into the melted chocolate. Tap the fork to remove the excess. Place the ball back onto the baking tray. Repeat with the rest of the cake balls.
    • Decorate. Pour the leftover melts into a piping bag (or a ziploc bag with a corner snipped off). Drizzle it over the balls one at a time and then immediately top each ball with sprinkles.
    • Chill. Return the cake balls to the refrigerator to chill until ready to serve.

    How Long Are They Good For?

    Cake balls will stay good for up to 5 days. Make sure to store them in the refrigerator in an airtight container.

    I like to let mine sit out for 5 – 10 minutes before serving just to take the chill off a bit.

    More Easy Desserts

    • No Bake Banana Split Pie
    • Dirt and Worms Pudding Cups
    • Homemade Dole Whip
    • Coconut Macaroons
    • Funfetti Gooey Butter Cake

    Make sure you subscribe to my email list to get all my new recipes delivered right to your inbox!

    You can also follow me on Instagram, Facebook, or Pinterest for even more! 

    📖 Recipe

    Yield: 24 - 30 cake balls

    Red, White, and Blue Cake Balls

    Red, White, and Blue Cake Balls

    The cutest dessert for 4th of July or Memorial Day! Red, White, and Blue Cake Balls are so easy and so delicious.

    Prep Time 1 hour
    Total Time 1 hour

    Ingredients

    • 1 (15.25 ounce) white cake mix, plus ingredients on box needed to make it
    • Red and blue food coloring
    • 1 (8 ounce) block cream cheese, softened to room temperature
    • 1 (10 ounce) package white melting chocolate
    • Red, white, and blue sprinkles

    Instructions

    1. Preheat oven to 350F or at the temperature according to package instructions. Lightly grease 3 small baking pans (I used 8x8) and set aside.
    2. In a large mixing bowl, combine the cake mix along with the ingredients needed on the box until well mixed.
    3. Separate the batter into three smaller bowls. Leave one bowl plain and set it aside. Mix red food coloring in the second bowl and blue food coloring in the third bowl, adding 5 drops at a time and mixing until the desired shade is reached.
    4. Pour each batter into the prepared baking pans and bake for 14-16 minutes, or until a toothpick inserted in the center.
    5. Remove the pans from the oven and cool completely on a wire rack.
    6. Once cooled, crumble the cake into smaller pieces and transfer to separate bowls; set aside.
    7. In a separate mixing bowl using a hand mixer on medium high speed, beat the cream cheese until smooth and creamy.
    8. Divide the cream cheese evenly into 3 crumbled cake bowls. Mix each bowl together until fully incorporated. The easiest way is with an electric mixer but you can do it by hand. If you use an electric mixer, make sure to wash it between each color.
    9. Line two baking trays with parchment paper.
    10. Break off small one inch chunks from each of the 3 cakes and then roll the colors together with your hands to make a ball. Place each ball onto the prepared baking trays.
    11. Once all of the cake balls have been made, place the trays in the refrigerator and allow to chill for 1-2 hours. This will ensure they hold their shape and stay firm while dipping.
    12. Place chocolate in a microwave-safe bowl and microwave in 30 second increments, stirring after each one, until melted and smooth.
    13. Place one cake ball at a time on a fork and dip it into the melted chocolate. Tap the fork to remove the excess. Place the ball back onto the baking tray. Repeat with the rest of the cake balls.
    14. Pour the leftover melts into a piping bag (or a ziploc bag with a corner snipped off). Drizzle it over the balls one at a time and then immediately top each ball with sprinkles.
    15. Return the cake balls to the refrigerator to chill for another 15 minutes to allow the coating to finish setting.
    16. Keep refrigerated until ready to serve.

    Recommended Products

    As an Amazon Associate and member of other affiliate programs, I earn from qualifying purchases.

    • Patriotic Sprinkles
      Patriotic Sprinkles
    • White Almond Bark
      White Almond Bark
    • Rimmed Baking Sheet
      Rimmed Baking Sheet
    • Parchment Paper
      Parchment Paper
    • Wilton Piping Bags with Tips Attached
      Wilton Piping Bags with Tips Attached
    • Electric Mixer
      Electric Mixer

    Did you make this recipe?

    Tag me in your Instagram photo - @fakeginger

    © Amanda Livesay
    Cuisine: American / Category: holiday
    « Previous Page
    Next Page »

    Primary Sidebar

    Amanda Livesay
    Hi, I'm Amanda! DFW food blogger, mom of boys, and crazy dog lady.
    Read more
    Privacy Policy
    Privacy Policy

    Footer

    ↑ back to top

    About

    • Privacy Policy
    • About Fake Ginger

    Newsletter

    • Sign Up for weekly emails featuring new recipes!

    As an Amazon Associate I earn from qualifying purchases.

    Copyright © 2024 FakeGinger.com