• Skip to primary navigation
  • Skip to main content
  • Skip to primary sidebar
  • Home
  • About
  • Recipes

Fake Ginger

menu icon
go to homepage
  • Recipe Index
  • About
  • Subscribe
    • Facebook
    • Instagram
    • Pinterest
  • subscribe
    search icon
    Homepage link
    • Recipe Index
    • About
    • Subscribe
    • Facebook
    • Instagram
    • Pinterest
  • ×
    Home » Page 12

    Pumpkin Chocolate Chip Muffins

    Pumpkin Chocolate Chip Muffins

    Aug 12, 2021

    Fluffy and delicious Pumpkin Chocolate Chip Muffins are going to become your fall favorite! Full of pumpkin puree, pumpkin pie spice, and mini chocolate chips – they’re simple and delicious.

    Pumpkin muffins with miniature chocolate chips on a white plate with more muffins in the background

    Is everyone excited that pumpkin products is starting to pop up in all the grocery stores?! I haven’t picked anything up yet but just seeing the pumpkin coffee creamer and the pumpkin ice cream and, omg, the little sugar cookies with the pumpkins printed on them! They all make me excited for fall.

    (Full disclosure: I’ve already bought 3 bags of candy corn.)

    Pumpkin muffins are an all year long thing for me, though. Mostly because I make Pumpkin Peanut Butter Dog Ice Cream for the pups over and over so there’s always an open can of pumpkin in the fridge.

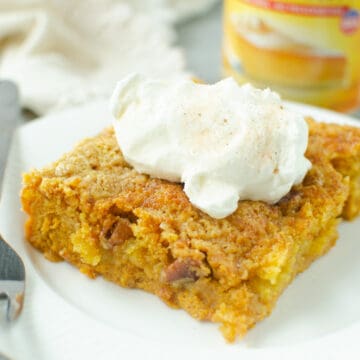
    These Pumpkin Chocolate Chip Muffins are a favorite. They’re a little earthy from the pumpkin, full of cinnamon and spice, and then a little sweet from the chocolate chips!

    I also have Pumpkin Walnut Muffins and Pumpkin Banana Muffins if you aren’t in the mood for chocolate!

    Four pumpkin chocolate chip muffins on a white plate with more muffins and a can of pumpkin the background

    Ingredients

    • Unsalted butter – make sure to bring it to room temperature before beginning.
    • Brown sugar
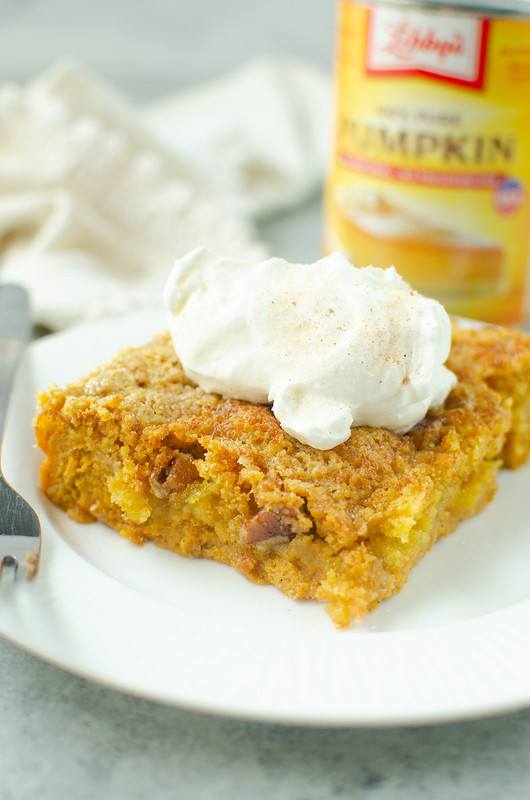
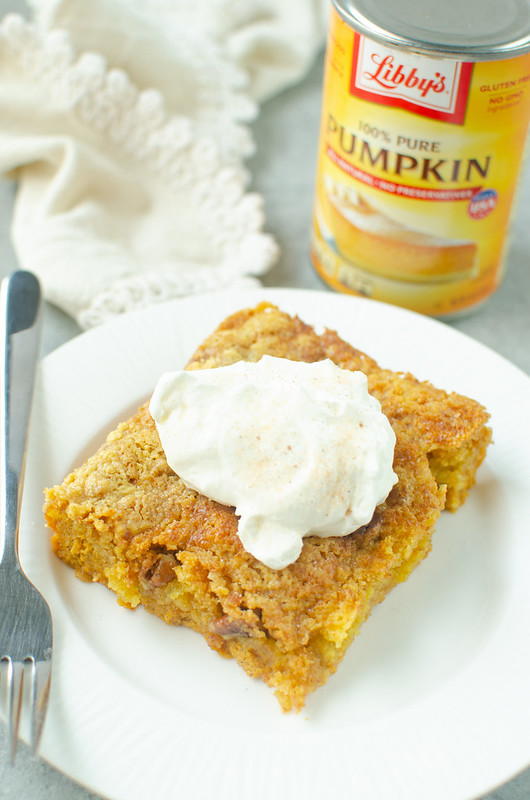
    • Pumpkin puree – the only ingredient should be pumpkin.
    • Egg
    • Vanilla
    • All-purpose flour
    • Baking powder
    • Baking soda
    • Pumpkin pie spice
    • Milk
    • Mini chocolate chips – you could use the regular size chocolate chips if you prefer.

    Instructions

    • Combine wet ingredients. Beat together butter and brown sugar. Add pumpkin, egg, and vanilla and beat until combined.
    • Combine dry ingredients. Whisk together flour, baking powder, baking soda, pumpkin pie spice, and salt.
    • Combine. Add the flour mixture alternately with the milk.
    • Add chocolate. Beat in ½ cup mini chocolate chips.
    • Transfer. Divide batter among prepared muffin cups. Sprinkle mini chocolate chips on top.
    • Bake. Bake at 350F for 19 – 22 minutes.
    • Cool. Cool before serving.
    Pumpkin Chocolate Chip Muffins - fluffy and delicious pumpkin muffins with chocolate chips! These are going to be your fall favorite.

    How Long Are Pumpkin Muffins Good For?

    These Pumpkin Chocolate Chip Muffins will be fine at room temperature for about 3 days. Make sure to cover them tightly to keep as much air out as possible.

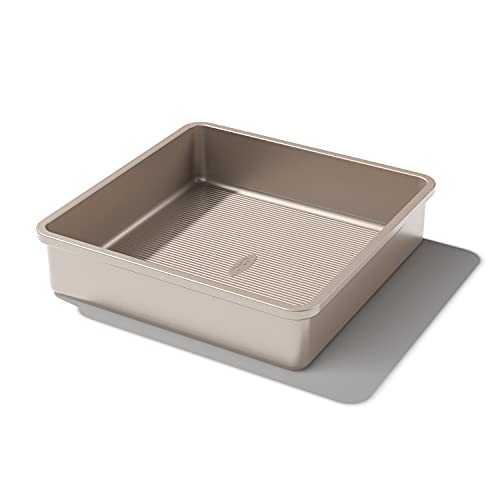
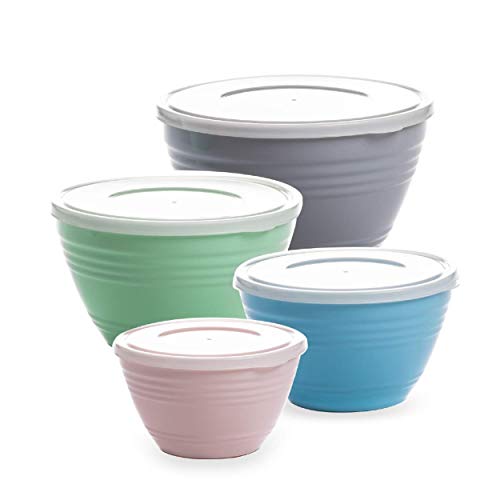
    I use this muffin pan with a cover so that I can bake the muffins and then just pop the top on when they cool!

    If you need them to last a little longer, put them in an airtight container in the fridge for up to 5 days! I recommend heating them up in the microwave or even a toasted oven.

    Can You Freeze Them?

    Yes, these muffins are perfect for the freezer! Make sure to cool the completely and then put them in an airtight freezer-safe container like a freezer ziploc bag. They will be good in the freezer for up to 6 months.

    To defrost, just let them sit at room temperature overnight before you plan to serve them.

    Pumpkin chocolate chip muffin split in half

    More Muffin Recipes

    • Blueberry Bran Muffins
    • Pineapple Upside Down Muffins
    • Zucchini Cinnamon Chip Muffins
    • Banana Chocolate Chip Muffins
    • Sour Cream Banana Nut Muffins
    • Blueberry Muffins

    📖 Recipe

    Yield: 12 muffins

    Pumpkin Chocolate Chip Muffins

    Pumpkin Chocolate Chip Muffins

    Fluffy and delicious Pumpkin Chocolate Chip Muffins are going to become your fall favorite! Full of pumpkin puree, pumpkin pie spice, and mini chocolate chips - they're simple and delicious.

    Prep Time 15 minutes
    Cook Time 20 minutes
    Total Time 35 minutes

    Ingredients

    • 3 tablespoon unsalted butter, softened
    • ¾ cup brown sugar
    • ¾ cup pumpkin puree
    • 1 egg
    • 1 teaspoon vanilla
    • 2 cups all-purpose flour
    • 2 ½ teaspoon baking powder
    • ¼ teaspoon baking soda
    • 1 ½ teaspoon pumpkin pie spice
    • ½ teaspoon Kosher salt
    • ⅔ cup milk
    • ½ cup mini chocolate chips, plus more for sprinkling on top

    Instructions

    1. Preheat oven to 350F. Line a 12-cup muffin tin with paper liners.
    2. Using an electric mixer to beat together butter and brown sugar until light and fluffy. Add pumpkin, egg, and vanilla and beat until combined.
    3. In a separate bowl, whisk together flour, baking powder, baking soda, pumpkin pie spice, and salt.
    4. Add the flour mixture alternately with the milk; beating after each addition.
    5. Beat in ½ cup mini chocolate chips.
    6. Divide batter among prepared muffin cups. Sprinkle extra mini chocolate chips on top of each muffin.
    7. Bake 19 - 22 minutes or until a toothpick inserted into the center of a muffin comes out clean.
    8. Cool for about 10 minutes before transferring to a wire rack to cool completely.

    Recommended Products

    As an Amazon Associate and member of other affiliate programs, I earn from qualifying purchases.

    • Pumpkin Puree
      Pumpkin Puree
    • Parchment Muffin Liners
      Parchment Muffin Liners
    • My Favorite Muffin Tin
      My Favorite Muffin Tin

    Nutrition Information:

    Yield:

    12

    Serving Size:

    1

    Amount Per Serving: Calories: 200Total Fat: 6gSaturated Fat: 3gTrans Fat: 0gUnsaturated Fat: 2gCholesterol: 24mgSodium: 198mgCarbohydrates: 34gFiber: 1gSugar: 16gProtein: 4g

    Did you make this recipe?

    Tag me in your Instagram photo - @fakeginger

    © Amanda Livesay
    Cuisine: American / Category: breakfast

    Ground Beef Stroganoff

    Aug 11, 2021

    Easy weeknight dinner recipe! Ground Beef Stroganoff cooks in just 30 minutes and who doesn’t love a comforting, creamy pasta dish?!

    If you love easy pasta dishes, try Taco Pasta!

    Beef stroganoff made with egg noodles, ground beef, and fresh mushrooms

    It’s back to school week for our house! Summer felt so short this year so I’m a little conflicted about sending them off.

    Along with school, we also have 12 sports practices this week (🥴) and I won’t lie, there was a night when I was in the Taco Bell and Wendy’s drive thru.

    So I need more quick, easy dinners that I can throw together after soccer and football, while I’m helping with homework and also listening to the gossip of the day.

    This Ground Beef Stroganoff is ready in just 30 minutes! And even my “Eww mushrooms!” kid liked it.

    If you’re into this sort of dinner, you’ll probably really like my Slow Cooker Salisbury Steak Meatballs – another great one for weeknights!

    How to make beef stroganoff with ground beef

    Ingredients

    • Egg noodles – I used dried egg noodles for this recipe. If you want to use fresh egg noodles, you will need to adjust the cooking time.
    • Butter
    • White onion
    • White mushrooms
    • Garlic
    • Olive oil
    • Ground beef – you can use ground turkey, chicken, or bison if you prefer!
    • Low sodium beef broth – if you don’t have low sodium beef broth, you can use regular but before adding any salt, taste it to see if it needs it.
    • Worcestershire
    • Dijon mustard
    • Salt and black pepper
    • Flour – flour is used to thicken the stroganoff
    • Sour cream – the sour cream makes the stroganoff creamy and add that’s slight tang that you want in a stroganoff
    • Fresh parsley – optional, for serving
    Ground beef stroganoff before and after adding cream

    Instructions

    • Cook egg noodles according to package instructions. Strain and set aside.
    • Heat butter over medium heat in a large skillet. Add diced onion and sliced mushrooms. Cook, stirring frequently, until onions are translucent and mushrooms have softened, about 7 minutes.
    • Add garlic and cook, stirring, until just fragrant, about 30 seconds. Remove to a bowl and set aside.
    • Raise the heat to medium-high and heat the olive oil in the same skillet.
    • Add ground beef and cook, breaking up the meat, until it’s cooked through, about 7 minutes. Drain and return to skillet.
    • Add 1 cup beef broth, worcestershire sauce, dijon mustard, and salt and pepper to skillet. Add mushroom mixture to skillet and stir to combine.
    • In a small bowl, whisk together flour and remaining ½ cup beef broth until no limps remain. Stir into the skillet and cook for about 1 minute, until the sauce has thickened considerably.
    • Place sour cream in another small bowl. Stir in about ¼ cup of the hot sauce mixture to temper your sour cream so it won’t curdle. Stir sour cream into the skillet until incorporated.
    • Combine cooked egg noodles and sauce in a large dish. Sprinkle with fresh parsley before serving.

    How Long Is It Good For?

    Ground beef stroganoff will be good in the fridge for up to 3 days. Make sure to store it in an airtight container to keep it fresh for as long as possible. I love these glass airtight containers for all leftovers.

    You can reheat the leftovers in either the microwave or on the stovetop.

    The sauce will continue to thicken as it sits in the fridge so you may need to add a couple splashes of beef broth or water to get it back to it’s original consistency.

    Ground beef stroganoff on a white plate

    Can You Freeze It?

    Yes, you can freeze this! I think the best way to freeze it is to just freeze the sauce and make the noodles fresh when you are ready to serve it.

    Make sure to cool it completely and then transfer to a freezer-safe airtight container (like a freezer ziploc bag) and then place it in the freezer. It will be good for up to 3 months in the freezer.

    When you are ready to serve it, defrost overnight in the refrigerator. You can reheat in the microwave or on the stovetop. Add your freshly cooked egg noodles and you are good to go!

    What To Serve with Stroganoff?

    If you don’t love egg noodles, you can serve this stroganoff over mashed potatoes and cooked rice. Both will soak up the sauce really nicely!

    I think bread is really nice with stroganoff, like Oatmeal Rolls or Homemade Crescent Rolls!

    And, of course, a nice fresh green salad is always nice on the side!

    Ground beef stroganoff on a white plate

    More Pasta Recipes

    • Baked Spaghetti Casserole
    • Spicy Bacon Ranch Pasta
    • Parmesan Pasta with Bacon and Peas
    • One Pot Cheeseburger Mac
    • One Pot Creamy Shells and Sausage
    • Chili Mac Casserole

    Make sure you subscribe to my email list to get all my new recipes delivered right to your inbox!

    You can also follow me on Instagram, Facebook, or Pinterest for even more! 

    📖 Recipe

    Yield: about 6 servings

    Ground Beef Stroganoff

    Ground Beef Stroganoff

    Easy weeknight dinner recipe! Ground Beef Stroganoff cooks in just 30 minutes and who doesn't love a comforting, creamy pasta dish?!

    Prep Time 10 minutes
    Cook Time 20 minutes
    Total Time 30 minutes

    Ingredients

    • 1 (12 ounce) package egg noodles
    • 1 tablespoon butter
    • 1 small white onion, diced
    • 8 oz white mushrooms, sliced
    • 4 cloves garlic, minced
    • 2 teaspoon olive oil
    • 1 pound lean ground beef
    • 1 ½ cups low sodium beef broth, divided
    • 1 tablespoon worcestershire
    • ½ teaspoon dijon mustard
    • ½ teaspoon salt
    • ¼ teaspoon black pepper
    • ¼ cup flour
    • 1 cup sour cream
    • fresh parsley, for serving

    Instructions

    1. Cook egg noodles according to package instructions. Strain and set aside.
    2. Heat butter over medium heat in a large skillet.
    3. Add diced onion and sliced mushrooms. Cook, stirring frequently, until onions are translucent and mushrooms have softened, about 7 minutes.
    4. Add garlic and cook, stirring, until just fragrant, about 30 seconds. Remove to a bowl and set aside.
    5. Raise the heat to medium-high and heat the olive oil in the same skillet.
    6. Add ground beef and cook, breaking up the meat, until it's cooked through, about 7 minutes. Drain and return to skillet.
    7. Add 1 cup beef broth, worcestershire sauce, dijon mustard, and salt and pepper to skillet.
    8. Add mushroom mixture to skillet and stir to combine.
    9. In a small bowl, whisk together flour and remaining ½ cup beef broth until no limps remain. Stir into the skillet and cook for about 1 minute, until the sauce has thickened considerably.
    10. Place sour cream in another small bowl. Stir in about ¼ cup of the hot sauce mixture to temper your sour cream so it won't curdle.
    11. Stir sour cream into the skillet until incorporated.
    12. Combine cooked egg noodles and sauce in a large dish. Sprinkle with fresh parsley before serving.

    Recommended Products

    As an Amazon Associate and member of other affiliate programs, I earn from qualifying purchases.

    • Silicone Whisk
      Silicone Whisk
    • Dutch Oven
      Dutch Oven

    Nutrition Information:

    Yield:

    6

    Serving Size:

    1

    Amount Per Serving: Calories: 360Total Fat: 21gSaturated Fat: 9gTrans Fat: 1gUnsaturated Fat: 8gCholesterol: 103mgSodium: 452mgCarbohydrates: 17gFiber: 2gSugar: 3gProtein: 26g

    Did you make this recipe?

    Tag me in your Instagram photo - @fakeginger

    © Amanda Livesay
    Cuisine: American / Category: pasta

    Pumpkin Crunch Cake

    Aug 08, 2021

    The easiest pumpkin cake! Pumpkin Crunch Cake has a layer of creamy pumpkin pie filling and it’s topped with cake mix, pecans, and butter. The topping bakes up so crunchy and delicious!

    pumpkin dump cake on a white plate with whipped cream and cinnamon sugar on top; can of pumpkin in the background

    This post original published September 17, 2011. Updated August 8, 2021.

    This Pumpkin Crunch Cake is one of my favorite cakes for fall. I make this and Pumpkin Roll Bars over and over during fall.

    This cake is the easiest pumpkin cake you will ever make and it’s so delicious!

    What Is Pumpkin Crunch Cake?

    Pumpkin Crunch Cake is sometimes called Pumpkin Dump Cake because you really just layer all the ingredients in a baking pan and pop it in the oven.

    The bottom layer bakes up almost like pumpkin pie filling. And then the topping, which is made of cake mix, pecans, and butter, gets all crunchy and delicious.

    Pumpkin Crunch Cake on a white plate with whipped cream and cinnamon sugar on top

    Ingredients

    • Pumpkin puree – make sure it’s pure 100% pureed pumpkin and not pumpkin pie filling
    • Evaporated milk
    • Eggs
    • Granulated sugar
    • Pumpkin pie spice – this is a mixture of cinnamon, ginger, nutmeg, cloves, and allspice. If you don’t already have it on hand, you can just do cinnamon with tiny dashes of the other spices.
    • Yellow cake mix
    • Pecans – you could use walnuts if you prefer.
    • Butter
    • Whipped cream – this is for serving. You could also do vanilla ice cream.

    Instructions

    • Combine. Combine the pumpkin, evaporated milk, eggs, sugar, pumpkin pie spice and salt.
    • Transfer. Mix well and spread into a prepared 9×13-inch pan.
    • Add cake mix. Sprinkle the yellow cake mix over the top of the pumpkin mixture and pat down.
    • Top. Sprinkle the chopped pecans over the top of the cake mix then drizzle the melted butter all over top.
    • Bake. Bake at 350F for 60 – 70 minutes, until a toothpick inserted into the center comes out clean.
    • Serve. Top cooled cake with whipped cream before serving.
    Making pumpkin crunch cake in a 9x13-inch pan; pumpkin pie filling and yellow cake mix

    How Long Is It Good For?

    This Pumpkin Crunch Cake will be good for 2 – 3 days.

    This is a super moist cake so it needs to be stored in the refrigerator – and make sure to use an airtight cake container to keep it fresh for as long as possible.

    Can You Freeze Pumpkin Crunch Cake?

    To freeze Pumpkin Crunch Cake, wrap the baked and cooled cake tightly and freeze for up to 3 months. Don’t add the whipped cream until you are ready to serve it!

    When you are ready to serve it, let it defrost overnight in the refrigerator and serve chilled.

    Making pumpkin crunch cake in a 9x13-inch pan; yellow cake mix, pecans, and butter

    More Pumpkin Recipes

    • Pumpkin Pie Milkshake
    • Pumpkin Spice Cupcakes
    • Pumpkin Pie Fudge
    • Pumpkin Banana Muffins
    • Pumpkin Banana Bread

    Make sure you subscribe to my email list to get all my new recipes delivered right to your inbox!

    You can also follow me on Instagram, Facebook, or Pinterest for even more! 

    Horizontal image of pumpkin cake on a white plate with whipped cream and cinnamon sugar on top; can of pumpkin puree and a cream colored napkin in the background

    📖 Recipe

    Yield: about 16 servings

    Pumpkin Crunch Cake

    Pumpkin Crunch Cake

    The easiest pumpkin cake! Pumpkin Crunch Cake has a layer of creamy pumpkin pie filling and it's topped with cake mix, pecans, and butter. The topping bakes up so crunchy and delicious!

    Prep Time 15 minutes
    Cook Time 1 hour
    Total Time 1 hour 15 minutes

    Ingredients

    • 2 cups pumpkin puree
    • 1 (12 ounce) can evaporated milk
    • 4 eggs
    • 1 ½ cups white sugar
    • 2 teaspoon pumpkin pie spice
    • 1 teaspoon salt
    • 1 (18.25 ounce) package yellow cake mix
    • 1 cup chopped pecans
    • 1 cup unsalted butter, melted
    • whipped cream, for serving

    Instructions

    1. Preheat oven to 350 degrees F. Lightly grease one 9x13 inch baking pan.
    2. Combine the pumpkin, evaporated milk, eggs, sugar, pumpkin pie spice and salt. Mix well and spread into the prepared pan.
    3. Sprinkle the yellow cake mix over the top of the pumpkin mixture and pat down.
    4. Sprinkle the chopped pecans over the top of the cake mix then drizzle the melted butter all over top.
    5. Bake at 350 degrees F (175 degrees C) for about 60 - 70 minutes, until a toothpick inserted into the center comes out clean.
    6. Top cooled cake with whipped cream before serving.

    Recommended Products

    As an Amazon Associate and member of other affiliate programs, I earn from qualifying purchases.

    • Cake Container
      Cake Container
    • 9x13-inch pan
      9x13-inch pan

    Nutrition Information:

    Yield:

    16

    Serving Size:

    1

    Amount Per Serving: Calories: 376Total Fat: 19gSaturated Fat: 9gTrans Fat: 0gUnsaturated Fat: 9gCholesterol: 78mgSodium: 407mgCarbohydrates: 50gFiber: 2gSugar: 34gProtein: 4g

    Did you make this recipe?

    Tag me in your Instagram photo - @fakeginger

    © Amanda Livesay
    Cuisine: American / Category: cake

    Chicken and Noodles

    Aug 06, 2021

    Old fashioned Chicken and Noodles is the best comfort food! Full of egg noodles, chicken, and vegetables all in a creamy sauce. The whole family will love this one!

    This post originally published September 10, 2014. Updated August 6, 2021.

    Simple chicken dishes are my go to when I don’t know what to cook or feel like cooking. Chicken and Biscuits are a forever favorite and so are these Chicken and Noodles!

    They are so easy, you probably already have everything on hand, and it takes about 30 minutes! Plus, everyone loves it! It’s total comfort food without a ton of work.

    What Is Chicken and Noodles?

    Chicken and Noodles is exactly how it sounds! Kind of. I always think of it as chicken noodle soup without the broth.

    It starts with frozen egg noodles which are a little thicker than dry egg noodles and fluff up when cooked, so it almost feels like chicken and dumplings.

    It also has chicken and lots of veggies! And then it’s thickened up with a milk and flour mixture which makes it so creamy and delicious.

    Ingredients

    • Low-sodium chicken broth – use your favorite brand or homemade broth.
    • Bay leaves
    • Dried thyme – you can use fresh if you happen to have it on hand.
    • Onion
    • Carrots
    • Celery stalk – I don’t like celery so I’ve been known to leave it out and double the carrots.
    • Frozen egg noodles – if you can’t find frozen egg noodles, look for wide Amish style egg noodles in the dry pasta section of the grocery store
    • Frozen peas
    • Shredded cooked chicken – cook your own chicken or buy a rotisserie chicken to make your life really simple!
    • Milk – this is going to create a really creamy sauce.
    • Flour – this is used to thicken the sauce.

    Instructions

    • Cook. In a large stockpot, combine chicken broth, bay leaves, dried thyme, salt, pepper, onion, carrots, and celery. Bring to a boil, cover and simmer until the carrots are tender, 5 – 10 minutes depending on carrot size.
    • Add noodles and peas. Bring back to a boil and add the noodles and peas. Cook according to noodle package instructions.
    • Add chicken. Add cooked chicken.
    • Thicken. In a small bowl, whisk together milk and flour. Stir into the noodles and cook, stirring the entire time, until the mixture has thickened considerably.

    How Long Is It Good For?

    Chicken and Noodles will be good for up to 3 days in the refrigerator. Make sure to store it in an airtight container – these glass containers are my favorite for all leftovers!

    Can You Freeze Chicken and Noodles?

    You can freeze chicken and noodles for up to 3 months. Make sure to let it cool down completely before transferring to a freezer-safe container, like a freezer ziploc bag.

    When you are ready to serve it, defrost overnight in the refrigerator and then warm up in either the microwave or the stovetop. It may be thicker than it was before but a splash of chicken broth or water will help get it back to the original consistency.

    Tips and Tricks

    • I find the frozen egg noodles at Kroger but most grocery stores will have them. My Walmart doesn’t have them so I’ll buy the wide Amish homestyle dry egg noodles that are with the rest of the dry pasta. They work just as well.

    More Chicken Recipes

    • Air Fryer Creamy Garlic Parmesan Chicken
    • Chicken Tortellini Soup
    • Lemon Chicken and Rice Soup
    • Buffalo Chicken Meatballs
    • Chicken and Wild Rice Soup (Panera Copycat)
    • Chicken Fajitas

    Make sure you subscribe to my email list to get all my new recipes delivered right to your inbox!

    You can also follow me on Instagram, Facebook, or Pinterest for even more! 

    📖 Recipe

    Yield: 6 - 8 servings

    Chicken and Noodles

    Chicken and Noodles

    Old fashioned Chicken and Noodles is the best comfort food! Full of egg noodles, chicken, and vegetables all in a creamy sauce. The whole family will love this one!

    Prep Time 10 minutes
    Cook Time 30 minutes
    Total Time 40 minutes

    Ingredients

    • 3 cups low-sodium chicken broth
    • 2 bay leaves
    • 1 teaspoon dried thyme
    • ½ teaspoon salt
    • ¼ teaspoon pepper
    • 1 large onion, diced
    • 2 large carrots, sliced
    • 1 celery stalk, sliced
    • 1 11 ounce package frozen egg noodles
    • 1 cup frozen peas
    • 3 cups shredded cooked chicken
    • ½ cup milk
    • 2 tablespoons flour

    Instructions

    1. In a large stockpot, combine chicken broth, bay leaves, dried thyme, salt, pepper, onion, carrots, and celery. Bring to a boil, cover and simmer until the carrots are tender, 5 - 10 minutes depending on carrot size.
    2. Bring back to a boil and add the noodles and peas. Cook according to noodle package instructions.
    3. Add cooked chicken.
    4. In a small bowl, whisk together milk and flour. Stir into the noodles and cook, stirring the entire time, until the mixture has thickened considerably.

    Recommended Products

    As an Amazon Associate and member of other affiliate programs, I earn from qualifying purchases.

    • Airtight glass containers
      Airtight glass containers
    • Old Fashioned Noodles
      Old Fashioned Noodles
    • Dutch Oven
      Dutch Oven

    Nutrition Information:

    Yield:

    6

    Serving Size:

    1

    Amount Per Serving: Calories: 283Total Fat: 11gSaturated Fat: 3gTrans Fat: 0gUnsaturated Fat: 6gCholesterol: 82mgSodium: 581mgCarbohydrates: 24gFiber: 3gSugar: 3gProtein: 22g

    Did you make this recipe?

    Tag me in your Instagram photo - @fakeginger

    © Amanda Livesay
    Cuisine: American / Category: chicken

    Salami Pinwheels

    Aug 03, 2021

    Salami Pinwheels are perfect for a quick lunch or snack! Cream cheese, salami, and pickles wrapped in flour tortillas and sliced into bite-size pieces.

    I’m obsessed with salami lately. I love those little adult lunchable type things that come with fancy crackers, gouda, and, most importantly, spicy salami. That and a glass of wine is all I need for the perfect night in front of the TV.

    These Salami Pinwheels are perfect for my obsession! They make a great little snack or easy lunch. My kids love them in their lunchbox – it’s a nice change from their usual sandwiches.

    Plus, they take only a few minutes to make and need only 4 ingredients!

    I also have Chicken Bacon Ranch Pinwheels and Taco Pinwheels if you love the pinwheel idea as much as I do!

    What Are Salami Pinwheels?

    Salami Pinwheels are flour tortillas filled with a mixture of plain whipped cream cheese, diced salami, and dill pickle relish. The salami mixture gets spread thinly on the tortillas and then the tortillas are rolled up tightly.

    Chill them for a little while and then you can slice them for the perfect little portable snacks or lunch!

    Ingredients

    • Whipped cream cheese – just the plain, unflavored kind.
    • Salami – I think the thinly sliced deli salami works best in this recipe
    • Dill relish – make sure it’s dill, not the sweet stuff!
    • Burrito-size flour tortillas

    Instructions

    • Make filling. In a bowl, use a rubber spatula to fold together cream cheese, salami, and relish.
    • Assemble. Working with one flour tortilla at a time, spread ¼ of the cream cheese mixture on one side. Roll up tighly and transfer to a plate. Repeat with all tortillas and the rest of the filling.
    • Chill. Refrigerate for 1 hour.
    • Slice and serve. Slice each roll up into about 10 slices.

    Can You Make Salami Pinwheels Ahead?

    Yes, these pinwheels need to be made at least an hour before you plan to serve them.

    How Long Are They Good For?

    These Salami Pinwheels will be good for up to 4 days when stored in an airtight container in the fridge – these airtight glass containers are my absolute favorite for everything!

    What To Serve with Pinwheels?

    I think these are great in lunchboxes so you could pack whatever you normally back in lunchboxes! Fresh carrots and celery, chopped fruit, a side salad, chips! They’re delicious with anything.

    If you’re making it into more of a dinner situation, how about Broccoli Salad or Glazed Ranch Carrots?

    More Salami Recipes

    • Muffuletta Dip
    • Italian Chopped Salad

    Make sure you subscribe to my email list to get all my new recipes delivered right to your inbox!

    You can also follow me on Instagram, Facebook, or Pinterest for even more! 

    📖 Recipe

    Yield: about 12 servings

    Salami Pinwheels

    Salami Pinwheels

    Salami Pinwheels are perfect for a quick lunch or snack! Cream cheese, salami, and pickles wrapped in flour tortillas and sliced into bite-size pieces.

    Prep Time 15 minutes
    Additional Time 1 hour
    Total Time 1 hour 15 minutes

    Ingredients

    • 1 (8 ounce) container plain whipped cream cheese
    • ¼ pound salami, finely diced
    • 3 tablespoon dill pickle relish
    • 4 burrito-size flour tortillas

    Instructions

    1. In a mixing bowl, use a rubber spatula to fold whipped cream cheese, diced salami, and dill pickle relish together. Be careful to not deflate the cream cheese too much.
    2. Working with 1 tortilla, spread ¼ of the salami mixture over the surface. Roll tightly and transfer to a plate. Repeat with remaining tortillas and filling.
    3. Refrigerate for 1 hour.
    4. Once chilled, slice each roll up into about 10 slices.
    5. Serve immediately or store in the fridge until ready to serve.

    Notes

    These are good for up to 4 days when stored in an airtight container in the refrigerator.

    Recommended Products

    As an Amazon Associate and member of other affiliate programs, I earn from qualifying purchases.

    • The Best Airtight Containers
      The Best Airtight Containers
    • OXO Mixing Bowls
      OXO Mixing Bowls

    Nutrition Information:

    Yield:

    12

    Serving Size:

    1

    Amount Per Serving: Calories: 200Total Fat: 9gSaturated Fat: 4gTrans Fat: 0gUnsaturated Fat: 5gCholesterol: 22mgSodium: 583mgCarbohydrates: 21gFiber: 3gSugar: 2gProtein: 8g

    Did you make this recipe?

    Tag me in your Instagram photo - @fakeginger

    © Amanda Livesay
    Cuisine: American / Category: sandwich

    Strawberry Cheesecake Poke Cake

    Jul 29, 2021

    Strawberry Cheesecake Poke Cake is a delicious cake filled with strawberry cheesecake filling and topped with Cool Whip, graham cracker crumbs, and fresh strawberries! It starts with a boxed cake mix so it’s easy and quick!

    My last recipe for #SummerDessertWeek, the annual blog event hosted by the most organized person I know, Angie of Big Bear’s Wife.

    I love a good poke cake. My Snickers Cake is one of my absolute favorite cakes ever. And the rest of my family loves the Banana Pudding Poke Cake.

    Poke cakes usually start with a cake mix which means they’re super easy! And then you poke holes all over them and pour some sort of creamy filling all over the cake so it settles into all the holes.

    This Strawberry Cheesecake Poke Cake starts with a white cake mix and gets filled with a cream cheese and strawberry mixture. And then it’s frosted with Cool Whip (like I said, easy) and topped with graham cracker crumbs and more strawberries!

    Ingredients

    • 1 (15.25 oz) white cake mix – plus all the ingredients listed on the box to bake the cake!
    • 2 cups strawberries
    • ½ cup Granulated Sugar
    • 1 (8 ounce) package cream cheese
    • ½ cup milk
    • ¼ cup graham cracker crumbs
    • 1 tablespoon unsalted butter
    • 1 (8 ounce) container Cool Whip
    • fresh strawberries

    Instructions

    • Bake cake according to box instructions. Let cool completely.
    • Combine chopped strawberries and sugar in a bowl and stir to coat all the strawberries with sugar. Let sit while the cake bakes and cooks so all the strawberries release their juices.
    • Once cake is cooled, use the end of a spatula or other round tool to poke holes all over the cake.
    • Using a stand mixer, beat cream cheese until smooth. Add chopped strawberries and all their juices; beat until almost all strawberry chunks are tiny. Beat in milk.
    • Pour the strawberry mixture over the cooled cake and use a spatula to make sure it gets to all sides and starts seeping into the holes.
    • Refrigerate overnight.
    • The next day, stir together graham cracker crumbs and melted butter. Bake at 350F for about 5 minutes or until the graham cracker crumbs start to brown. Let cool completely.
    • Spread the Cool Whip over the cake.
    • Sprinkle the cooled graham cracker crumbs on top of the cool whip.
    • Garnish with strawberries.

    How Long Are Poke Cakes Good For?

    This Strawberry Cheesecake Poke Cake will be good is the fridge for about 5 days. Make sure to cover it tightly to keep it as fresh as possible.

    Can You Make It Ahead?

    This is the perfect cake to make ahead because it needs to sit overnight! You bake the cake and add the filling the night before you serve it. And the frost and garnish the next day!

    Can You Freeze It?

    You can freeze the baked cake itself if you need to. Once you poke holes and add the strawberry cheesecake filling, I don’t recommend trying to freeze it.

    More Strawberry Recipes

    • Strawberry Lemonade Cupcakes
    • Homemade Strawberry Sherbet
    • Strawberry Upside Down Ricotta Cake
    • Homemade Strawberry Milk
    • Strawberry Cream Cheese Coffee Cake
    • Strawberry Sour Cream Ice Cream

    Make sure you subscribe to my email list to get all my new recipes delivered right to your inbox!

    You can also follow me on Instagram, Facebook, or Pinterest for even more! 

    📖 Recipe

    Yield: about 12 servings

    Strawberry Cheesecake Poke Cake

    Strawberry Cheesecake Poke Cake
    Prep Time 15 minutes
    Cook Time 35 minutes
    Total Time 50 minutes

    Ingredients

    • 1 (15.25 oz) white cake mix (plus all ingredients listed on box)
    • 2 cups strawberries, roughly chopped
    • ½ cup sugar
    • 1 (8 ounce) package cream cheese, at room temperature
    • ½ cup milk
    • ¼ cup graham cracker crumbs
    • 1 tablespoon unsalted butter, melted
    • 1 (8 ounce) container Cool Whip
    • fresh strawberries, for garnish

    Instructions

    1. Bake cake in a 9x13-inch pan according to the instructions on the box. Let cool completely before proceeding.
    2. Place chopped strawberries and granulated sugar in a bowl and stir to make sure the strawberries are coated. Let sit at room temperature while cake bakes and cools, giving it a stir every once in awhile. The strawberries will release their juices.
    3. Once cake is cool, use the handle of a spatula (or other round object) to poke holes all over the cake.
    4. Using an electric mixer, beat cream cheese until smooth. Add strawberries and all their juice; beat until most of the strawberry chunks are smooth Beat in milk.
    5. Pour the strawberry mixture over the cake. Use a spatula to make sure the mixture spread to all sides and starts seeping into the holes.
    6. Refrigerate overnight.
    7. When ready to serve, preheat oven to 350F. Spray a small baking sheet with oil.
    8. Stir together graham cracker crumbs and melted butter. Spread out onto the prepared pan.
    9. Bake for about 5 minutes, until it starts to brown. Cool completely.
    10. When graham cracker crumbs are cool, spread the Cool Whip over the cooled cake. Sprinkle the graham cracker crumbs on top. Top with fresh strawberries.

    Recommended Products

    As an Amazon Associate and member of other affiliate programs, I earn from qualifying purchases.

    • Graham Cracker Crumbs
      Graham Cracker Crumbs
    • 9x13-inch pan
      9x13-inch pan

    Nutrition Information:

    Yield:

    12

    Serving Size:

    1

    Amount Per Serving: Calories: 240Total Fat: 4gSaturated Fat: 2gTrans Fat: 0gUnsaturated Fat: 1gCholesterol: 6mgSodium: 340mgCarbohydrates: 49gFiber: 1gSugar: 30gProtein: 3g

    Did you make this recipe?

    Tag me in your Instagram photo - @fakeginger

    © Amanda Livesay
    Cuisine: American / Category: cake

    Birthday Cake Fudge

    Jul 27, 2021

    White chocolate fudge with Funfetti cake mix mixed in and topped with rainbow sprinkles. Birthday Cake Fudge is perfect for any special occasion or holiday!

    Another post for #SummerDessertWeek, the yearly blog event hosted by Angie of Big Bear’s Wife.

    Yesterday was my youngest kiddo’s birthday! He’s 10 now! 😲 That’s what inspired this Birthday Cake Fudge.

    I love all things birthday cake, cake batter, funfetti, whatever you want to call it! I love Birthday Cake Ice Cream, Funfetti Gooey Butter Cake, Cake Batter Blondie Bars!

    If it involves rainbow sprinkles, I love it.

    This fudge has a white chocolate base but has funfetti cake mix added and then it’s topped with lots of rainbow sprinkles! It’s great for a birthday, holiday cookie tins, or just a day when you want fudge covered in sprinkles!

    Ingredients

    • ¼ cup unsalted butter
    • 2 cups granulated sugar
    • ½ cup sour cream
    • 12 ounces white chocolate
    • 1 (7 ounce) jar marshmallow cream
    • 1 cup Funfetti cake mix
    • ⅓ cup rainbow sprinkles

    Instructions

    • Line a 9×9 inch pan with aluminum foil and spray with nonstick spray
    • Heat butter, sugar, and sour cream over medium heat, stirring until sugar is dissolved. Bring to a boil and cook, stirring frequently, until a candy thermometer reads 234F (soft ball stage), about 5 minutes
    • Remove from heat. Stir in chopped white chocolate and marshmallow cream. Stir until everything melted and combined
    • Stir in Funfetti cake mix until no lumps remain
    • Pour into the prepared pan. Sprinkle rainbow sprinkles on top
    • Chill at least 4 hours before cutting and serving

    Tips & Tricks

    • You are going to need a candy thermometer (I know, I’m sorry) but I promise it goes quickly. You just want to get the candy to soft ball stage so it has a really nice fluffy texture.
    • When you pour the fudge into your pan, it’s going to start setting up really fast. So have your rainbow sprinkles ready to be sprinkled on top.
    • Not into funfetti? Try strawberry cake mix instead!

    How Long Is Fudge Good For?

    This Birthday Cake Fudge will be good for up to 2 weeks when stored at room temperature. Make sure to use an airtight container. I love storing colorful treats in this large airtight glass jar on the counter.

    This fudge will be good for up to a month if stored in the fridge. These airtight glass containers are my favorite for storing pretty much anything in the fridge.

    Can You Freeze Fudge?

    Yes! You can freeze this fudge for up to 3 months. I suggest wrapping it in plastic wrap and them plastic in a freezer ziploc bag.

    To defrost, just let it sit overnight in the refrigerator or on the counter.

    More Fudge Recipes

    • Buckeye Fudge
    • Bourbon Praline Fudge
    • Candy Corn Fudge
    • Eggnog Fudge
    • White Chocolate Peppermint Fudge
    • Butterscotch Peanut Fudge
    • Maple Bacon Fudge
    • Pumpkin Pie Fudge

    Make sure you subscribe to my email list to get all my new recipes delivered right to your inbox!

    You can also follow me on Instagram, Facebook, or Pinterest for even more! 

    📖 Recipe

    Yield: 36 pieces

    Birthday Cake Fudge

    Birthday Cake Fudge
    Prep Time 10 minutes
    Cook Time 10 minutes
    Additional Time 4 hours
    Total Time 4 hours 20 minutes

    Ingredients

    • ¼ cup unsalted butter
    • 2 cups granulated sugar
    • ½ cup sour cream
    • 12 ounces white chocolate roughly chopped
    • 1 (7 ounce) jar marshmallow cream
    • 1 cup Funfetti cake mix
    • ⅓ cup rainbow sprinkles

    Instructions

    1. Line a 9x9 inch pan with aluminum foil and spray with nonstick spray.

    2. In a large pot, heat butter, sugar, and sour cream over medium heat, stirring until sugar is dissolved. Bring to a boil and cook, stirring frequently, until a candy thermometer reads 234F (soft ball stage), about 5 minutes.

    3. Remove from heat. Stir in chopped white chocolate and marshmallow cream. Stir until everything is melted and combined. It will be thick and take awhile. Once well combined. stir in Funfetti cake mix until no lumps remain.

    4. Pour into the prepared pan and rotate pan so the fudge reaches the corners. Quick sprinkle sprinkles on top so they stick. Chill at least 4 hours before cutting into 36 pieces. 

    Recommended Products

    As an Amazon Associate and member of other affiliate programs, I earn from qualifying purchases.

    • Candy Thermometer
      Candy Thermometer
    • Marshmallow Cream
      Marshmallow Cream
    • Rainbow Sprinkles
      Rainbow Sprinkles
    • 9x9-inch Square Pan
      9x9-inch Square Pan

    Did you make this recipe?

    Tag me in your Instagram photo - @fakeginger

    © Amanda Livesay
    Category: candy

    Margarita Bundt Cake

    Jul 26, 2021

    Delicious Margarita Bundt Cake tastes just like your favorite cocktail, without the booze! And it starts with a cake mix so you know it’s quick and easy!

    Slice of margarita bundt cake with glaze and lime zest on top; on a white plate with a fork. Limes and the rest of the cake in the background

    This Margarita Bundt Cake is my first recipe of the week and it’s such a good one! It starts with a cake mix so it’s really easy and it really tastes like a margarita. Minus the booze, of course!

    If you love cakes that start with cake mix, my Funfetti Gooey Butter Cake is another delicious summery option!

    Margarita bundt cake with glaze and lime zest on top. Limes in the background.

    Ingredients

    • 1 stick butter
    • 1 (15.25 oz) box lemon cake mix
    • 1 (3.2 oz) box instant lemon pudding mix
    • 1 (10 oz) can frozen margarita mix – if you can’t find margarita mix, you can use frozen limeade concentrate
    • 4 eggs
    • 5 tablespoon lime juice
    • zest of 1 lime
    • 1 ½ cups powdered sugar

    Instructions

    • Use an electric mixer to cream butter until smooth
    • Add cake mix, pudding mix, thawed margarita mix, eggs, 3 tablespoon lime juice, and lime zest
    • Mix slowly at first and then beat on high for about 2 minutes
    • Pour the batter into a bundt pan sprayed with baking spray and smooth out the top
    • Bake at 350F for 45 – 50 minutes, until the bottom is golden brown and a toothpick inserted into the center comes out clean
    • Cool in pan for about 15 minutes before inverting onto a wire rack to cool completely
    • Once cool, whisk together the remaining 2 tablespoon lime juice and powdered sugar until smooth
    • Drizzle glaze over cooled cake
    Margarita bundt cake with a bite taken out

    How Long Is It Good For?

    This Margarita Bundt Cake will be good for 4 – 5 days. Make sure to store it at room temperature in an airtight container (like this airtight cake container) to keep it fresh as long as possible.

    I don’t recommend storing it in the refrigerator because that will dry the cake out.

    Can You Freeze Bundt Cake?

    Yes, you can freeze this cake! I recommend freezing individual slices so you can pull one out whenever you get a craving!

    Wrap each slice tightly in plastic wrap and then put all the slices in a freezer ziploc bag. They will be good for up to 6 months in the freezer.

    You can also freeze the entire cake by wrapping it tightly in plastic wrap and then placing it in a freezer ziploc bag.

    Slice of margarita bundt cake with glaze and lime zest on top; on a white plate with a fork. Limes and the rest of the cake in the background

    More Bundt Cake Recipes

    • Meyer Lemon Blueberry Bundt Cake
    • Lemon-Lime Pound Cake
    • Grapefruit Pound Cake
    • Chocolate Angel Food Cake

    Make sure you subscribe to my email list to get all my new recipes delivered right to your inbox!

    You can also follow me on Instagram, Facebook, or Pinterest for even more! 

    📖 Recipe

    Yield: about 16 servings

    Margarita Bundt Cake

    Margarita Bundt Cake
    Prep Time 15 minutes
    Cook Time 45 minutes
    Total Time 1 hour

    Ingredients

    • ½ cup (1 stick) butter, at room temperature
    • 1 (15.25 oz) lemon cake mix
    • 1 (3.2 oz) box instant lemon pudding mix
    • 4 large eggs
    • 1 (10 oz) can frozen margarita mix, thawed overnight in fridge
    • 2 tablespoon lime juice
    • zest of 1 lime

    For the glaze:

    • 1 ½ cups powdered sugar
    • 3 tablespoon lime juice

    Instructions

    1. Preheat oven to 350F. Spray a bundt pan generously with baking spray.
    2. Use an electric mixer to cream butter until smooth.
    3. Add lemon cake mix, lemon pudding mix, eggs, frozen margarita mix, lime juice, and lime zest; beat slowly at first and then on high for about 2 minutes.
    4. Pour the batter into the prepared bundt cake and smooth out the top.
    5. Bake in preheated oven to 45 - 50 minutes, until bottom is golden brown and a toothpick inserted into the center comes out clean.
    6. Let cool in pan for about 15 minutes before inverting onto a wire rack to cool completely.
    7. Once the cake is completely cool, make the glaze by whisking together powdered sugar and lime juice. Drizzle over the cooled cake.

    Recommended Products

    As an Amazon Associate and member of other affiliate programs, I earn from qualifying purchases.

    • Instant Lemon Pudding Mix
      Instant Lemon Pudding Mix
    • Lemon Cake Mix
      Lemon Cake Mix
    • Bundt Pan
      Bundt Pan
    • Wire Rack
      Wire Rack

    Nutrition Information:

    Yield:

    16

    Serving Size:

    1

    Amount Per Serving: Calories: 213Total Fat: 3gSaturated Fat: 1gTrans Fat: 0gUnsaturated Fat: 1gCholesterol: 48mgSodium: 281mgCarbohydrates: 42gFiber: 1gSugar: 26gProtein: 3g

    Did you make this recipe?

    Tag me in your Instagram photo - @fakeginger

    © Amanda Livesay
    Category: cake


    Spicy Bacon Ranch Pasta

    Jul 22, 2021

    Pasta tossed with crispy bacon, chicken, Parmesan cheese, and a spicy ranch sauce! My kids LOVE this Spicy Bacon Ranch Pasta. And it’s ready in about 30 minutes!

    Spicy Bacon Ranch Pasta on a white plate white plate with a fork, parmesan wedge, and green onions in the background

    Originally published September 15, 2011. Updated July, 22, 2021.

    This is an old favorite recipe that I’ve literally been making for 10 years. It’s got everything my family loves: bacon, cheese, ranch, and a little bit of spice!

    It’s also such an easy recipe that you can have on the table in about 30 minutes which is extra important now that we’re headed back to school in the next couple weeks.

    If you’ve got ranch obsessed kids like I do, try my Spicy Ranch Saltines, Chicken Bacon Ranch Pinwheels, and Rosemary Ranch Chicken Kabobs!

    Spicy sauce in a white pot with crispy bacon, cooked chicken, and grated Parmesan on top

    Ingredients

    • Boneless skinless chicken breasts
    • Bacon
    • Flour
    • Spicy Ranch Dry Salad Dressing mix
    • Milk
    • Parmesan cheese – I like to stir grated Parmesan into the sauce and put extra shredded Parmesan on top of the finished pasta
    • Pasta – I used penne but you can use shells, rotini, any kind of small pasta

    Instructions

    • Cook pasta according to package instructions; strain and set aside
    • In a large skillet, cook diced bacon until crisp; remove to a paper-towel lined plate and pour off all about 1 tablespoon bacon fat
    • Cut chicken into bite-sized pieces and cook in the bacon fat until all sides are browned and chicken is cooked through; transfer to the plate with the bacon
    • Add enough oil to the skillet to equal about 2 tbsp
    • Whisk in flour and spicy ranch dressing mix
    • Slowly whisk in milk until the mixture is smooth
    • Bring milk mixture to a simmer and let cook until slightly thickened
    • Remove from heat and stir in bacon, chicken, and Parmesan cheese
    • Add pasta and toss to combine
    • Serve with extra Parmesan on top
    Spicy, cheesy sauce poured over penne noodles in a white pot

    How Long Is It Good For?

    This Spicy Bacon Ranch Pasta will be fine in the fridge for up to 3 days. Make sure to store it in an airtight container (these glass containers are my favorite!) to keep it fresh for as long as possible.

    The bacon will soften the longer it sits in the fridge, though, so keep that in mind.

    Can You Freeze It?

    Yes, you can freeze this pasta! It will be fine in the freezer for up to 3 months. Make sure to use a super airtight freezer-safe container. I like the big freezer ziploc bags for pastas like this.

    When you’re ready to serve it, let the container of pasta defrost overnight in the fridge and then you can reheat on the stove. If it’s a little too thick, add water or chicken broth to loosen the sauce up a bit.

    Spicy Bacon Ranch Pasta in a white pot

    Tips and Tricks

    • I will often buy a rotisserie chicken and skip having to cook the chicken for this dish. It turns it from a 30 minute meal to about 15 minutes!
    • The spicy ranch packet isn’t super spicy but if your family isn’t a fan of spice at all, use the regular ranch packets!
    • If you can’t find the spicy ranch mix and want it spicy, try adding ¼ – ½ teaspoon of crushed red pepper flakes. Or order the spicy one online!

    What To Serve with Spicy Bacon Ranch Pasta

    I like to serve a simple side salad with this pasta. They are nice and cooling to go with the spice. You could also do celery sticks, carrots, or sliced cucumbers if you want the cooling effect.

    It’s also delicious with Roasted Broccolini and Honey Yeast Rolls!

    Overhead shot of Spicy Bacon Ranch Pasta on a white plate. Green onions sprinkled on top and a fork on the plate. Parmesan wedge and green onions in the background.

    More Easy Pasta Recipes

    • Bacon Tortellini Bake
    • Sour Cream Noodle Bake
    • Chili Mac Casserole
    • Baked Spaghetti Casserole
    • One Pot Cheeseburger Mac
    • Four Cheese Spaghetti

    Make sure you subscribe to my email list to get all my new recipes delivered right to your inbox!

    You can also follow me on Instagram, Facebook, or Pinterest for even more! 

    Spicy Bacon Ranch Pasta - pasta tossed with crispy bacon, chicken, Parmesan cheese, and a spicy ranch sauce! My kids LOVE this recipe. And it's ready in about 30 minutes!
    Spicy Bacon Ranch Pasta – pasta tossed with crispy bacon, chicken, Parmesan cheese, and a spicy ranch sauce! My kids LOVE this recipe. And it’s ready in about 30 minutes!

    📖 Recipe

    Yield: about 8 servings

    Spicy Bacon Ranch Pasta

    Spicy Bacon Ranch Pasta
    Prep Time 15 minutes
    Cook Time 15 minutes
    Total Time 30 minutes

    Ingredients

    • 1 pound boneless, skinless chicken breasts
    • 6 slices bacon, diced
    • 2 tablespoons flour
    • 1 package Spicy Ranch Dry Salad Dressing mix
    • 1 ½ cups milk
    • ½ cup Parmesan cheese (plus more for topping)
    • 1 pound pasta (ziti, rotini, shells, whatever you like)

    Instructions

    1. Cook pasta according to package instructions.
    2. In a large skillet, cook the bacon until nice and crisp. Transfer to a paper towel lined plate to drain. Pour off all but 1 tablespoon of bacon fat.
    3. Cut the chicken into bite sized pieces and add it to the hot skillet. Cook thoroughly, making sure all sides of the chicken brown. Transfer the chicken to the plate with the bacon.
    4. In the same skillet (add olive oil to get to about 2 tablespoon oil), sprinkle in the flour and Spicy Ranch Dry Salad Dressing mix and whisk constantly for about a minute. Pour in the milk, while whisking. Bring to a simmer and allow to cook for a couple minutes, until it thickens.
    5. Add the chicken, bacon, and Parmesan and stir until the Parmesan melts.
    6. Once the pasta is cooked, drain it and add it to the pan with the sauce; stir to combine
    7. Serve with extra Parmesan.

    Recommended Products

    As an Amazon Associate and member of other affiliate programs, I earn from qualifying purchases.

    • Clip On Pasta Strainer
      Clip On Pasta Strainer
    • Spicy Ranch Mix
      Spicy Ranch Mix

    Nutrition Information:

    Yield:

    8

    Serving Size:

    1

    Amount Per Serving: Calories: 199Total Fat: 7gSaturated Fat: 3gTrans Fat: 0gUnsaturated Fat: 4gCholesterol: 17mgSodium: 550mgCarbohydrates: 24gFiber: 1gSugar: 1gProtein: 11g

    Did you make this recipe?

    Tag me in your Instagram photo - @fakeginger

    © Amanda Livesay
    Category: pasta

    Baked Spaghetti Casserole

    Jul 21, 2021

    Baked Spaghetti Casserole is my family’s favorite comfort food. Layers of pasta, meat sauce, and a creamy cheesy mixture all baked together.

    Baked Spaghetti on a white plate

    I am all about quick, easy dinners these days. I love anything that I can put in a casserole dish and forget about in the oven for 30 minutes or so.

    This Baked Spaghetti Casserole is quick, easy, and so tasty! It has a thick and delicious sauce made with jarred pasta sauce, layers of cottage cheese (don’t question it – it adds a creaminess that you don’t get from cheese!), mozzarella cheese, and pasta tossed with butter and eggs to add even more richness.

    It gets baked for about 40 minutes and then you’ve got dinner done! My kids LOVE this recipe and ask for it over and over.

    ingredients for baked spaghetti

    Ingredients

    Scroll down for ingredient amounts.

    • Spaghetti – this is the ideal pasta shape for this baked pasta dish but if you have another shape on hand, go ahead and use it.
    • Olive oil – use whatever oil you usually cook with
    • Ground beef – you can also use ground turkey or chicken if you prefer or just want to make the dish lighter.
    • White onion
    • Garlic
    • Pasta sauce – you can use a jarred sauce like I did or your favorite homemade recipe.
    • Butter – this gets tossed with the hot pasta.
    • Parmesan cheese – you can’t have spaghetti without Parmesan.
    • Eggs – this makes for such a rich and creamy pasta dish.
    • Cottage cheese – cottage cheese adds such a creaminess, almost like ricotta in a lasagna.
    • Mozzarella cheese
    how to make baked spaghetti

    Instructions

    • Cook pasta. Cook pasta according to package instructions.
    • Make sauce. Cook ground beef and diced onion. Add garlic to the skillet and cook until fragrant. Stir jar of pasta sauce into the skillet; set aside.
    • Make pasta mixture. Once pasta is done, strain and return to the pot it was cooked in. Add the butter and Parmesan cheese to the hot pasta and toss until the butter is melted.
    • Add eggs. In a small bowl, whisk together eggs; pour eggs over the pasta and toss quickly until the eggs coat the pasta.
    • Layer. Place half of the coated pasta in a 9×13-inch baking sheet.
    • Continue layering. Top the pasta with half of the cottage cheese, half of the meat/sauce mixture, and half of the mozzarella cheese. Repeat with remaining ingredients.
    • Bake. Cover and bake at 350°F for 30 minutes; remove foil and bake for another 10 minutes.
    Overhead shot of baked spaghetti with mozzarella sheet on top

    Can You Make It Ahead?

    Yes, you can make this Baked Spaghetti Casserole ahead. Do everything up until you bake it, let it cool down, and then cover it tightly and pop it in the fridge until you’re ready to bake it.

    I would add an extra 5 – 10 minutes to the baking time though since it will be cold.

    How Long Is Baked Spaghetti Good For?

    This pasta casserole will be fine for 3 days in the refrigerator. Make sure to store it in an airtight container to keep it fresh for as long as possible.

    I find this pasta reheats best in the microwave but you can put it in the oven for a few minutes if you prefer.

    What To Serve With Spaghetti Casserole?

    I like to serve hearty pasta dishes like this one with a nice green salad. You could do roasted broccoli or green beans.

    I also like to do garlic bread with pasta, like Cheesy Garlic Crescent Rolls.

    More Pasta Recipes

    • Spicy Bacon Ranch Pasta
    • Taco Pasta
    • Turkey Bolognese
    • Cheesy Chicken Broccoli Stuffed Shells
    • Blackened Shrimp Alfredo

    Make sure you subscribe to my email list to get all my new recipes delivered right to your inbox!

    You can also follow me on Instagram, Facebook, or Pinterest for even more! 

    📖 Recipe

    Yield: about 12 servings

    Baked Spaghetti Casserole

    Baked Spaghetti Casserole
    Prep Time 30 minutes
    Cook Time 40 minutes
    Total Time 1 hour 10 minutes

    Ingredients

    • 16 ounces spaghetti
    • 1 teaspoon olive oil
    • 1 pound ground beef (or ground turkey)
    • 1 small white onion, diced
    • 3 cloves garlic
    • 1 (24-ounce) jar pasta sauce
    • 4 tablespoon butter
    • ⅓ cup shredded Parmesan cheese
    • 2 eggs
    • 2 cups cottage cheese
    • 2 cups mozzarella cheese

    Instructions

    Preheat oven to 350°F. Spray a 9x13-inch baking dish with oil.

    Cook pasta according to package instructions.

    While pasta cooks, heat olive oil in a large skillet over medium-high heat. Add ground beef and diced onion; cook, breaking up the meat until it's cooked through and onion has softened. Drain excess fat if necessary.

    Add garlic to the skillet and cook just 30 seconds or so, until fragrant. Stir full jar of pasta sauce into the skillet; set aside.

    When pasta is done cooking, strain and return to the pot it was cooked in. Add butter and Parmesan cheese and toss until the heat from the pasta melts the butter.

    In a small bowl, whisk together eggs; pour into the pasta mixture, tossing it so the eggs coat the pasta. Place half of the coated pasta mixture into the prepared baking dish (9x13-inch baking sheet).

    Top the pasta on the baking sheet with half of the cottage cheese, half of the meat/sauce mixture, and half of the mozzarella cheese.

    Create a second layer with the remaining half of the ingredients.

    Cover with aluminum foil and bake in the preheated oven at 350°F for 30 minutes; remove foil and bake another 10 minutes.

    Serve hot.

    Recommended Products

    As an Amazon Associate and member of other affiliate programs, I earn from qualifying purchases.

    • 9x13-inch pan
      9x13-inch pan

    Nutrition Information:

    Yield:

    12

    Serving Size:

    1

    Amount Per Serving: Calories: 318Total Fat: 18gSaturated Fat: 9gTrans Fat: 0gUnsaturated Fat: 7gCholesterol: 98mgSodium: 413mgCarbohydrates: 15gFiber: 1gSugar: 2gProtein: 23g

    Did you make this recipe?

    Tag me in your Instagram photo - @fakeginger

    © Amanda Livesay
    Cuisine: italian / Category: pasta

    Broccoli Grape Pasta Salad

    Jun 10, 2021

    Pasta, bacon, broccoli, grapes, red onion, and pecans tossed in a sweet and tangy dressing. Broccoli Grape Pasta Salad is the perfect side dish for all your summer BBQs!

    Some of my other favorite pasta salads are Hawaiian Macaroni Salad and Pepperoni Pizza Pasta Salad.

    Broccoli Grape Pasta Salad - the perfect summer side dish for all your BBQs! Pasta, bacon, broccoli, grapes, red onion, and pecans in a sweet and tangy dressing.

    I’ve been making so many pasta salads this summer. They’re just so easy, they go perfectly with all the grilled foods, everyone loves them, AND they make great leftovers for quick lunches.

    This Broccoli Grape Pasta Salad and my Cole Slaw Pasta Salad have become my go-tos since the kids got out of school.

    This one has so many different textures and flavors all tossed in a delicious sweet and tangy cole slaw-like dressing. It’s so delicious and will be perfect for this weekend’s barbecue!

    Broccoli Grape Pasta Salad - the perfect summer side dish for all your BBQs! Pasta, bacon, broccoli, grapes, red onion, and pecans in a sweet and tangy dressing.

    Ingredients

    • Small pasta – I used farfalle but you can use rotini, wagon wheels, whatever you like!
    • Bacon – you can use pork or turkey bacon, whichever you prefer.
    • Broccoli – cut them into bite-size pieces.
    • Seedless red grapes – you could use green if you have them on hand. I just prefer the color and flavor of the purple.
    • Red onion – red onion isn’t quite as sharp as a white or yellow onion so it works best in raw recipes.
    • Pecans – you could also use walnuts.
    • Mayo
    • Granulated sugar – this just slightly sweetens the dressing.
    • Apple cider vinegar – this adds the tanginess to the dressing.
    • Salt
    • Black pepper
    Broccoli Grape Pasta Salad - the perfect summer side dish for all your BBQs! Pasta, bacon, broccoli, grapes, red onion, and pecans in a sweet and tangy dressing.

    Instructions

    • Cook pasta according to package instructions; drain and let cool slightly
    • In a large bowl, combine cooled pasta, broccoli, bacon, and red onion
    • In a separate small bowl, whisk together mayo, sugar, apple cider vinegar, and salt and pepper
    • Pour the dressing over the pasta mixture and toss to combine, making sure the dressing coats everything
    • Cover and refrigerate for 1 hour
    • Right before serving, stir in the pecans
    • Serve cold
    Broccoli Grape Pasta Salad - the perfect summer side dish for all your BBQs! Pasta, bacon, broccoli, grapes, red onion, and pecans in a sweet and tangy dressing.

    How Long Is Pasta Salad Good For?

    This Broccoli Grape Pasta Salad will be good for up to 3 – 4 days in the refrigerator. Make sure you store it in an airtight container to keep it as fresh as possible. (These glass containers are my alltime favorite because they are super airtight.)

    Keep in mind that everything will start to soften as it sits in the fridge so it’s definitely best on day 1 when the broccoli and pecans still have a crunch.

    Broccoli Grape Pasta Salad - the perfect summer side dish for all your BBQs! Pasta, bacon, broccoli, grapes, red onion, and pecans in a sweet and tangy dressing.

    Can You Make Broccoli Grape Pasta Salad Ahead?

    This pasta salad needs to be made 1 hour ahead.

    If you need to prep it the night before you plan to serve it, I would put the dressing in a separate container and combine everything an hour before you plan to serve it.

    What To Serve with Broccoli Grape Pasta Salad?

    I think this is the perfect side dish for pretty much anything in the summer! Here are some of my favorites:

    • Hawaiian BBQ Ribs
    • Rosemary Ranch Chicken Kabobs
    • Al Pastor Kabobs
    • Grilled Lemon Thyme Pork Chops with Peaches
    Broccoli Grape Pasta Salad - the perfect summer side dish for all your BBQs! Pasta, bacon, broccoli, grapes, red onion, and pecans in a sweet and tangy dressing.

    More Summer Side Dishes

    • Fritos Corn Salad
    • Caesar Pasta Salad
    • Cranberry Almond Broccoli Salad
    • Greek Farro Salad
    • Broccoli Salad

    Make sure you subscribe to my email list to get all my new recipes delivered right to your inbox!

    You can also follow me on Instagram, Facebook, or Pinterest for even more! 

    📖 Recipe

    Yield: about 8 servings

    Broccoli Grape Pasta Salad

    Broccoli Grape Pasta Salad

    Pasta salad with bacon, broccoli, grapes, red onion, and pecans in a sweet and tangy dressing. Perfect for summer BBQs and parties!

    Prep Time 15 minutes
    Cook Time 15 minutes
    Total Time 30 minutes

    Ingredients

    • 8 ounces small pasta
    • 8 slices bacon, cooked and crumbled
    • 16 ounces raw broccoli, cut into small florets
    • 2 cups seedless red grapes, halved
    • ¼ cup red onion, finely diced
    • 1 cup pecans
    • 1 cup mayo
    • 2 tablespoon granulated sugar
    • 2 tablespoon apple cider vinegar
    • ½ teaspoon salt
    • dash black pepper

    Instructions

    1. Cook pasta according to package instructions. Drain and let cool slightly.
    2. In a large mixing bowl, toss together pasta, bacon, chopped broccoil, halved grapes, and red onion.
    3. In a separate small bowl, whisk together mayo, granulated sugar, apple cider vinegar, and salt and pepper.
    4. Pour the dressing over the pasta mixture and toss to combine, making sure the dressing coats everything.
    5. Cover and refrigerate for 1 hour.
    6. Right before serving, stir in pecans. Serve cold.

    Recommended Products

    As an Amazon Associate and member of other affiliate programs, I earn from qualifying purchases.

    • The Best Airtight Containers
      The Best Airtight Containers
    • Clip On Pasta Strainer
      Clip On Pasta Strainer

    Did you make this recipe?

    Tag me in your Instagram photo - @fakeginger

    © Amanda Livesay
    Category: Sides

    Taco Pinwheels

    May 21, 2021

    Easy, delicious, kid-friendly lunch! Taco Pinwheels made with seasoned meat, salsa, cheddar cheese, and all the taco fixins. Rolled up in big flour tortillas and sliced into bite-size pieces.

    My kids love these pinwheels! Try Chicken Bacon Ranch Pinwheels and Salami Pinwheels if you love them, too.

    Taco Pinwheels - taco meat, salsa, cheddar cheese, and all the taco fixins rolled into flour tortillas and sliced into bite-size pinwheels! Easy, delicious, kid-friendly lunch! These are great for summer break.

    My kids only have a couple days of school left this year. Which means I have to go back to thinking about breakfasts and lunches for them all week long.

    I love using these Taco Pinwheels for lunches during summer because I can make a ton and my kids can just grab them as needed.

    And also, throw the whole dang container in your pool bag on the days you’re spending outside. They’re the perfect little bite size snack when the kids just can’t stop playing long enough to eat a real lunch.

    And did I mention they’re SO easy?

    These have a taco inspired filling with seasoned meat, salsa, cheese, and all the other taco fixins. All rolled in a big flour tortilla and sliced into bite size pinwheels!

    Taco Pinwheels - taco meat, salsa, cheddar cheese, and all the taco fixins rolled into flour tortillas and sliced into bite-size pinwheels! Easy, delicious, kid-friendly lunch! These are great for summer break.

    Ingredients

    • Olive oil
    • Ground meat – I used turkey but you can use ground chicken, beef, whatever you prefer!
    • White onion
    • Taco seasoning – use your favorite brand of taco seasoning or homemade recipe.
    • Cream cheese
    • Salsa – use your favorite brand of salsa.
    • Cheddar cheese
    • Black olives – leave out if you don’t like olives.
    • Flour tortillas – you want the big burrito-size flour tortillas.
    • Shredded lettuce – I recommend iceberg lettuce because it stays nice and crisp.
    Flour tortilla spread with cream cheese, seasoned taco meat, salsa, cheddar cheese, black olives, and shredded lettuce

    Instructions

    • Cook taco meat. Heat olive oil in a large skillet over medium-high heat. Add ground meat and onion and cook until onion is softened and meat is cooked through. Drain if necessary.
    • Add taco seasoning. To the pan with the meat, add taco seasoning and water and stir to combine. Let cook over medium heat until all the water is gone, about 5 minutes. Let cool slightly.
    • Make filling. Using an electric mixer, beat cream cheese until smooth. Beat in salsa and shredded cheddar cheese. Use a rubber spatula to stir in black olives and cooled meat mixture.
    • Assemble rolls. Spread ⅛ of the mixture onto each of the flour tortillas. Roll tightly and place seam side down on a plate. Chill for 1 hour before slicing.
    • Slice into pinwheels. Use a serrated knife to slice each tortilla roll into bite-size pieces. I usually get 8 pinwheels from each roll.
    Taco pinwheel being rolled; flour tortillas with cream cheese, seasoned meat, salsa, cheddar cheese, and black olives.

    How Long Are Pinwheels Good For?

    These Taco Pinwheels are good about up to 3 days in the fridge. Make sure to store them in an airtight container to keep them as fresh as possible. These are my favorite glass containers for storing pretty much everything.

    They are good straight out of the fridge or let them sit out for about 20 minutes to take the chill off if you prefer.

    What To Serve with Taco Pinwheels?

    If you are taking these on the go, baby carrots, sliced celery, a small bag of chips, or a fruit cup are all great options!

    If you have more time to prepare something, Fritos Corn Salad or Cole Slaw Pasta Salad would be delicious with them!

    Make It Vegetarian

    If you want to make these Taco Pinwheels vegetarian, just the ground meat with black or pinto beans. Drain and rinse the beans well and then add them to the onion after it’s nice and soft.

    Taco pinwheels on a white plate

    More Summer Lunch Ideas

    • Zesty Turkey Roll-Ups
    • Apple and Brie Quesadillas
    • Walking Tacos
    • Sonic Ocean Water

    Make sure you subscribe to my email list to get all my new recipes delivered right to your inbox!

    You can also follow me on Instagram, Facebook, or Pinterest for even more! 

    Taco Pinwheels - taco meat, salsa, cheddar cheese, and all the taco fixins rolled into flour tortillas and sliced into bite-size pinwheels! Easy, delicious, kid-friendly lunch! These are great for summer break.

    📖 Recipe

    Yield: 64 pinwheels

    Taco Pinwheels

    Taco Pinwheels

    Easy, delicious, kid-friendly lunch! Taco Pinwheels made with seasoned meat, salsa, cheddar cheese, and all the taco fixins. Rolled up in big flour tortillas and sliced into bite-size pieces.

    Prep Time 15 minutes
    Cook Time 10 minutes
    Total Time 25 minutes

    Ingredients

    • 1 teaspoon olive oil
    • ½ pound ground meat (turkey, chicken, or beef)
    • ¼ cup white onion, diced
    • 1 (1 ounce) package taco seasoning
    • ¼ cup water
    • 1 (8 ounce) block cream cheese, at room temperature
    • ½ cup salsa
    • ½ cup shredded cheddar cheese
    • ¼ cup black olives, roughly chopped
    • 8 burrito size flour tortillas
    • 1 cup shredded iceberg lettuce

    Instructions

    1. Heat olive oil in a large skillet over medium-high heat.
    2. Add turkey and onion and cook, breaking up the turkey, until the onion has softened and the turkey is cooked through. Drain if necessary.
    3. Add taco seasoning and water to the turkey mixure and stir to combine. Let cook on medium heat until all the liquid is absorbed, about 5 minutes. Remove from heat and let cool slightly.
    4. While turkey is cooling, make the filling! Place the cream cheese in the bowl of a stand mixer fitted with a whisk. Beat until smooth. Add salsa and cheese and beat until combined. Use a rubber spatula to fold in black olives, and cooled turkey mixture.
    5. Assemble the rolls by laying out a tortilla and spreading ⅛ of the mixture onto the tortilla. Sprinkle with shredded lettuce. Roll up tightly and place seam side down on a plate. Repeat with remaining ingredients.
    6. Let rolls chill in the fridge for 1 hour before using a serrated knife to slice into bite-size rounds. I usually get 8 pinwheels from each tortilla roll.

    Recommended Products

    As an Amazon Associate and member of other affiliate programs, I earn from qualifying purchases.

    • Serrated Knife
      Serrated Knife
    • Taco Seasoning
      Taco Seasoning
    • Stand Mixer
      Stand Mixer

    Nutrition Information:

    Yield:

    64

    Serving Size:

    1

    Amount Per Serving: Calories: 74Total Fat: 3gSaturated Fat: 1gTrans Fat: 0gUnsaturated Fat: 2gCholesterol: 8mgSodium: 175mgCarbohydrates: 8gFiber: 1gSugar: 1gProtein: 3g

    Did you make this recipe?

    Tag me in your Instagram photo - @fakeginger

    © Amanda Livesay
    Cuisine: American / Category: sandwich

    15+ No Bake Desserts

    May 08, 2021

    The most delicious No Bake Desserts! Pies, cookies, pudding, all the no bake treats you could want for summer.

    No bake desserts are a must for summer. I am always on the hunt for desserts that aren’t going to heat up my kitchen.

    Plus, no bake treats are usually good for kiddos that enjoy helping in the kitchen!

    This list has all my favorite easy, no bake delicious treats! Pies, cookies, muddy buddies, and so much more!

    If you are looking for even colder desserts for summertime, check out all my frozen goodies!

    Make sure you subscribe to my email list to get all my new recipes delivered right to your inbox!

    You can also follow me on Instagram, Facebook, or Pinterest for even more! 

    15+ No Bake Desserts

    Funfetti Muddy Buddies

    Funfetti Muddy Buddies - Chex cereal coated in white chocolate, Funfetti cake mix, and sprinkles! A delicious, easy, no bake snack that the kiddos can help make!

    No Bake Peanut Butter Pie

    No Bake Peanut Butter Pie - creamy and delicious peanut butter filling in a graham cracker crust. Only 6 ingredients, so easy, and everyone will be begging for the recipe!

    Banana Pudding

    Banana Pudding – the BEST banana pudding recipe! Layers of cookies, banana, and creamy vanilla pudding!

    White Chocolate Peanut Butter Ritz Crackers

    Crockpot Candy

    Crockpot Candy - chocolate covered peanuts but better! Only 4 ingredients and made completely in the slow cooker.

    Sugar Cookie Dip

    The most delicious dessert dip! Sugar Cookie Dip tastes just like a sugar cookie and only needs 4 ingredients. Dip fresh fruit, cookies, or crackers.

    No Bake Million Dollar Pie Bars

    No Bake Million Dollar Pie Bars – sweet creamy bars that taste like a millon bucks! Filled with pineapple, maraschino cherries, coconut and pecans.

    Almond Bark Drop Cookies

    Santa's favorite cookie: almond bark drop cookies! Peanuts, Rice Krispies, and marshmallows coated in white chocolate and peanut butter! No baking required!

    No Bake Cheerios Bars

    No Bake Cheerios Bars - easy no bake bars with Honey Nut Cheerios, peanuts, and dried cranberries coated in peanut butter and marshmallow!

    Maple Bacon Rice Krispies Treats

    Maple Bacon Rice Krispies Treats - the most delicious sweet and salty treat! Rice krispies made with maple syrup and crispy bacon.

    Hot Cocoa Dip

    Rich and delicious Hot Cocoa Dip is made with only 4 ingredients! This easy, no bake dessert is going to be your new favorite sweet treat.

    Sugar Cookie Truffles

    No bake Sugar Cookie Truffles are such a cute holiday treat! Only 3 ingredients (plus sprinkles!) and they are so easy to make.

    Banana Cream Cheesecake

    Banana Cream Cheesecake - layers of no bake cheesecake, banana pudding, and sliced bananas in a graham cracker crust. Delicious cool treat on hot summer days!

    Sand Pudding

    Sand Pudding – the cutest no bake dessert! Layers of pudding and cookie crumble sand and topped with gummy worms. Perfect for a birthday party!

    Funfetti Dip

    Funfetti Dip – a healthy 3 ingredient no-bake treat that takes just like cake batter! Perfect for dipping fruit, animal crackers, or graham crackers!

    No Bake Trail Mix Energy Bites

    No-Bake Trail Mix Energy Bites – filled with raisins, peanuts, chocolate chips, and M&MS! Perfect for lunchboxes, roadtrips, or easy snacks!

    No Bake Cookie Butter Pie

    No Bake Cookie Butter Pie - creamy cookie butter fillings in a graham cracker crust! Only 5 ingredients and everyone loves it.

    Fluffy Cheesecake - No Bake Cheesecake

    Fluffy Cheesecake - the creamiest no bake cheesecake! Only 4 ingredients and turns out perfect every single time.

    White Chocolate Crockpot Candy

    White Chocolate Crockpot Candy – easy 4 ingredient white chocolate peanut clusters! Made completely in the slow cooker.

    Banana Cream Pie

    Banana Cream Pie – layers of vanilla custard, sliced bananas, and whipped cream in a graham cracker crust. The perfect no bake summer dessert!

    Avalanche Bars

    Avalanche Bars – Rice Krispies cereal coated with white chocolate and peanut butter with marshmallows and chocolate chips mixed in.

    Crockpot Crunchy Drop Cookies

    Crockpot Crunchy Drop Cookies – Cap’n Crunch, Rice Krispies, and marshmallows coated in a peanut butter white chocolate! No bake and so simple!

    Funfetti Muddy Buddies

    May 04, 2021

    Chex cereal coated in white chocolate, Funfetti cake mix, and sprinkles! Funfetti Muddy Buddies are a delicious, easy, no bake snack that the kiddos can help make!

    Funfetti is my favorite flavor. Ask me what kind of cake I want for my birthday and it’s funfetti. Ask me what kind of anything I want and it will be funfetti.

    So I’m obsessed with these Funfetti Muddy Buddies.

    Muddy Buddies are a summer staple. I remember being at camp and each of us having ziploc bags to make our own little personal bag of muddy buddies. But we’re making them fancy today. Because funfetti.

    These are so easy. They take minutes to make and yes, you can totally make them in a ziploc bag.

    Ingredients

    • Rice or Corn Chex Cereal – either one works!
    • Funfetti Cake Mix – use the rest of the box for Funfetti Dip!
    • Powdered sugar – you can’t make muddy buddies without powdered sugar!
    • Rainbow sprinkles – I like to use jimmy-style sprinkles but use whatever rainbow sprinkles you like
    • Vanilla almond bark candy coating – you can find this in the baking aisle at all large grocery stores.

    How To Make Funfetti Muddy Buddies

    • Prep. Place Chex in a large mixing bowl. In a separate bowl, stir together cake mix, powdered sugar, and sprinkles. Set both aside.
    • Melt candy coating. In a microwave-safe bowl, microwave the candy coating in 30 second increments, stirring after each one, until melted and smooth
    • Coat the Chex. Working quickly but carefully, drizzle the melted candy coating over the Chex and toss to coat.
    • Add the Funfetti! Sprinkle the cake mix mixture over the candy coating covered Chex and toss until all the Chex is covered.
    • Enjoy! It’s ready to serve immediately! Or store it at room temperature until ready to serve.

    Ziploc Bag Muddy Buddies Instructions

    The ziploc bag method works great if you have several children who want to make their own little batch of Funfetti Muddy Buddies to snack on.

    • Divide the Chex cereal among the ziploc bags you’ll be using. I recommend using the heavier freezer bags and not the thinner sandwich bags.
    • Melt the chocolate as instruted and divide them over the Chex cereal in the ziploc bags. Close the bags and shake to coat.
    • Quickly divide the cake mix mixture among the bags and continue to toss to coat.
    • Enjoy straight from the bag!

    How Long Are They Good For?

    These muddy buddies don’t last a day in my house but they are technically good at room temperature for 3 or 4 days.

    How To Store Muddy Buddies

    Make sure to store muddy buddies at room temperature in an airtight container, like a large ziploc bag.

    Can Muddy Buddies Be Frozen?

    I don’t recommend trying to freeze muddy buddies.

    More Chex Mix Recipes

    • Dill Pickle Chex Mix
    • Dirt and Worms Chex Mix
    • Cheesy Ranch Chex Mix
    • Cranberry Nut Chex Mix
    • Chex Party Mix
    • Cheesy Taco Chex Mix
    • Chocolate Chex Mix

    Make sure you subscribe to my email list to get all my new recipes delivered right to your inbox!

    You can also follow me on Instagram, Facebook, or Pinterest for even more! 

    📖 Recipe

    Yield: about 10 servings

    Funfetti Muddy Buddies

    Funfetti Muddy Buddies

    Chex cereal coated in white chocolate, Funfetti cake mix, and sprinkles! Funfetti Muddy Buddies are a delicious, easy, no bake snack that the kiddos can help make!

    Prep Time 15 minutes
    Total Time 15 minutes

    Ingredients

    • 5 cups Rice or Corn Chex Cereal
    • 1 ¼ cups Funfetti cake mix
    • ⅓ cup powdered sugar
    • ¼ cup rainbow sprinkles
    • 10 ounces (5 squares) vanilla almond bark candy coating

    Instructions

    1. Place cereal in a large mixing bowl. Set aside.
    2. In a separate bowl, stir together Funfetti cake mix, powdered sugar, and sprinkles. Set aside.
    3. Cut vanilla candy coating into chunks and place in microwave-safe bowl. Microwave in 30 second increments, stirring after each one, until melted and smooth.
    4. Drizzle the melted candy coating over the chex and use a rubber spatula to quickly and carefully toss to coat.
    5. Pour about ¼ of the cake mix mixture over the Chex and toss to coat. Repeat with remaining cake mix, working quickly because the candy coating sets fast but carefully enough to not break the Chex up.
    6. Once all the Chex is coated in the cake mix, it's ready to serve!

    Recommended Products

    As an Amazon Associate and member of other affiliate programs, I earn from qualifying purchases.

    • Mixing Bowls with Lids
      Mixing Bowls with Lids
    • Vanilla Almond Bark
      Vanilla Almond Bark
    • Rainbow Sprinkles
      Rainbow Sprinkles

    Nutrition Information:

    Yield:

    10

    Serving Size:

    1

    Amount Per Serving: Calories: 218Total Fat: 3gSaturated Fat: 0gTrans Fat: 0gUnsaturated Fat: 2gCholesterol: 0mgSodium: 141mgCarbohydrates: 45gFiber: 1gSugar: 13gProtein: 3g

    Did you make this recipe?

    Tag me in your Instagram photo - @fakeginger

    © Amanda Livesay
    Cuisine: American / Category: snack

    Mango Avocado Salsa

    Apr 27, 2021

    The most delicious sweet and spicy salsa! Mango Avocado Salsa is full of fresh mango, avocado, tomatoes, red onion, jalapeno, cilantro, and lime juice. Great for dipping or a topping for shrimp tacos or grilled fish!

    Overhead shot of chopped mango, avocado, tomatoes, red onion, jalapeno, and cilantro tossed in lime juice in a white bowl

    Originally published February 2, 2010. Updated April 27, 2021.

    Mangoes are my forever favorite fruit. Probably the only fruit I eat on a regular basis. And now I’ve got my littlest obsessed too so I’m buying probably 10 a week.

    We can’t stop.

    We love them just sliced, he loves them in Mango Coconut Popsicles, and I love them in Frozen Mango Margaritas!

    And we both love this Mango Avocado Salsa. It’s sweet and spicy and there are so many different textures going on. We dipped tortilla chips in it (I made it the same day I made the Avocado Salsa so we had a salsa bar thing for dinner) but it’s perfect on top of shrimp or fish tacos or just piled on top of grilled fish or chicken.

    Chopped mango, avocado, tomatoes, red onion, jalapeno, and cilantro tossed in lime juice in a white bowl

    🥭 Ingredients

    • Mango – make sure they are very ripe.
    • Avocado
    • Roma tomatoes – I like to use roma tomatoes because they don’t have as much juice and seeds as other varieties. If you have other tomatoes on hand, squeeze as much juice and seeds out as possible.
    • Jalapeno
    • Red onion – red onions have less of a bite than white or yellow so they work best in a raw salsa.
    • Garlic
    • Cilantro – if you don’t like cilantro, you can leave it out.
    • Salt
    • Lime Juice – fresh lime juice is best but the bottled juice will work as well.

    👩🏼‍🍳 Instructions

    • Combine all ingredients in a large mixing bowl and toss to coat.
    • Refrigerate for at least 30 minutes before serving.

    🥑 What To Serve with Mango Avocado Salsa?

    My favorite way to serve this salsa is just with tortilla chips for dipping!

    It is also delicious on Shrimp Tacos, Fish Tacos, on top of grilled fish or chicken!

    ⏲ How Long is Mango Salsa Good For?

    This salsa will be fine in the fridge for up to 3 days in the fridge. The avocado will start to brown after that and the whole thing will become more liquidy.

    Make sure to store it in an airtight container (these are my favorite!) to keep it fresh for as long as possible.

    🍴 More Salsa Recipes

    • Restaurant Style Salsa
    • Avocado Feta Salsa
    • Pineapple Salsa

    Make sure you subscribe to my email list to get all my new recipes delivered right to your inbox!

    You can also follow me on Instagram, Facebook, or Pinterest for even more! 

    📖 Recipe

    Yield: about 6 servings

    Mango Avocado Salsa

    Mango Avocado Salsa
    Prep Time 15 minutes
    Additional Time 30 minutes
    Total Time 45 minutes

    Ingredients

    • 1 mango (diced)
    • 1 avocado (diced)
    • 2 roma tomatoes (seeded and diced)
    • 1 jalapeno (seeded and minced)
    • ½ red onion (diced)
    • 2 cloves garlic (minced)
    • ¼ cup cilantro (chopped)
    • 1 teaspoon salt
    • 2 tablespoons lime juice

    Instructions

      Gently combine all ingredients. Refrigerate for at least 30 minutes prior to serving.

    Recommended Products

    As an Amazon Associate and member of other affiliate programs, I earn from qualifying purchases.

    • The Best Airtight Containers
      The Best Airtight Containers
    • Citrus Juicer
      Citrus Juicer

    Nutrition Information:

    Yield:

    6

    Serving Size:

    1

    Amount Per Serving: Calories: 98Total Fat: 5gSaturated Fat: 1gTrans Fat: 0gUnsaturated Fat: 4gCholesterol: 0mgSodium: 357mgCarbohydrates: 14gFiber: 4gSugar: 9gProtein: 2g

    Did you make this recipe?

    Tag me in your Instagram photo - @fakeginger

    © Amanda Livesay
    Cuisine: Mexican / Category: appetizer
    « Previous Page
    Next Page »

    Primary Sidebar

    Amanda Livesay
    Hi, I'm Amanda! DFW food blogger, mom of boys, and crazy dog lady.
    Read more
    Privacy Policy
    Privacy Policy

    Footer

    ↑ back to top

    About

    • Privacy Policy
    • About Fake Ginger

    Newsletter

    • Sign Up for weekly emails featuring new recipes!

    As an Amazon Associate I earn from qualifying purchases.

    Copyright © 2024 FakeGinger.com